How to Clean Gold, Silver and Plated Jewellery at Home
Even the most stunning jewelry loses its sparkle over time. Every time you slip on a ring, clasp a bracelet, or fasten a necklace, your pieces come into contact with skin oils, lotions, perfume, and the invisible particles floating through the air. The result? That breathtaking brilliance you fell in love with slowly fades into a dull, lifeless haze.
Here's the good news: you don't need to visit a jeweler every time your favorite pieces look tired. Most everyday buildup can be removed right at your kitchen table with tools you probably already own.
But here's the catch, and it's a big one. The method that saves your silver could destroy your gold plating. The trick that restores your gold ring might crack the opal in your grandmother's brooch. Jewelry cleaning isn't one-size-fits-all, and using the wrong approach can cause damage that no amount of polishing will fix.
In this comprehensive guide, you'll learn exactly how to clean gold jewelry at home, how to tackle stubborn silver tarnish, why gold-plated pieces demand a completely different strategy, and which gemstones need special treatment. We'll also bust the myths that have been scratching up people's jewelry for decades (yes, we're looking at you, toothpaste).
Let's bring back the shine.

Why Your Jewelry Loses Its Sparkle: Understanding the Enemy
Before you reach for any cleaning solution, it helps to understand what you're actually fighting. Knowing why your pieces tarnish, dull, or darken will help you choose the right weapon, and avoid friendly fire.
Your Skin Is Working Against Your Jewelry (Sorry)
Every time you wear a piece of jewelry, your body wages a quiet chemical war against it. Here's what's happening beneath the surface:
Sebum (skin oil)
Your skin constantly produces a natural oily substance called sebum. It's designed to protect your skin, but it coats your jewelry in a thin, greasy film that acts like a magnet for dust and microscopic debris. Over days and weeks, this invisible layer builds up into a visible dull haze that kills the sparkle.
Sweat
Your perspiration is a cocktail of salts, acids, urea, and trace minerals. And here's the twist: everyone's sweat chemistry is different. Some people can wear silver for months without a trace of tarnish. Others watch their silver turn black after a single afternoon at the office. If your jewelry seems to darken unusually fast, your unique body chemistry might be the culprit, and that's completely normal.
Dead skin cells
Microscopic flakes of skin constantly shed from your body. These tiny particles love to wedge themselves into the tight spaces of your jewelry, between chain links, under gemstone settings, inside engraved details. You can't see them, but they're there, quietly dimming the brilliance of your pieces.
Cosmetics: The Silent Saboteur
Most people put on their jewelry before their cosmetics are fully absorbed. That's a mistake, and here's why:
Hand creams and moisturizers leave an oily residue on rings and bracelets that builds up over time. Foundation and concealer, when applied to the neck and décolletage, transfer directly onto necklaces and pendants. Perfume and cologne contain alcohol and chemical compounds that accelerate tarnishing on both gold and silver. Hairspray creates a sticky film that traps dust particles. And sunscreen, that summer essential, is particularly harsh on white gold with rhodium plating.
The golden rule? Jewelry goes on last, comes off first. Apply all your products, wait five to ten minutes for everything to absorb and dry, then put on your pieces. When you get home, reverse the order: jewelry off before anything else.
The Environment Is in on It Too
Your jewelry doesn't just battle your body. It also fights the air, the water, and the city itself.
Dust settles on exposed surfaces and works its way into crevices. Humidity accelerates oxidation, especially on silver. Sulfur compounds in the air (more concentrated in urban and industrial areas) react directly with silver to create that characteristic dark tarnish. And chlorine, whether from swimming pools or tap water, is aggressively corrosive to nearly all jewelry metals.
The Chemistry Behind the Darkness
Understanding the science will help you make smarter choices about how to clean, and how to prevent tarnish in the first place.
Why silver turns black
Silver reacts with hydrogen sulfide (H₂S) and other sulfur compounds naturally present in the air. This reaction creates silver sulfide (Ag₂S), the dark, almost black film you see on tarnished silver pieces.
The important thing to understand: this isn't damage. Silver sulfide sits on the surface like a coat of paint. The silver underneath is perfectly fine. With the right cleaning method, you can strip away the tarnish and reveal bright, beautiful metal underneath, even if your piece looks like it's been sitting in a chimney. For pieces that have been ignored for years and look unrecoverable, the deep-dive guide on tarnished jewelry recovery walks through the harder cases.
Why gold loses its luster
Pure gold (24 karat) doesn't oxidize or tarnish. It's one of the most chemically stable elements on Earth. But here's the catch: almost no jewelry is made from pure gold. It's too soft for everyday wear.
Instead, jewelers create alloys. 14K gold is 58.5% gold mixed with 41.5% other metals like copper, silver, and nickel. 18K gold is 75% gold with 25% alloy metals. It's those other metals, the alloy components, that oxidize and tarnish over time. That's why 14K gold tends to dull faster than 18K gold. The less pure gold in the mix, the more vulnerable the piece becomes.
The rhodium mystery on white gold
White gold isn't naturally bright white. It's actually a yellowish-grey alloy that gets its brilliant, silvery-white appearance from a thin layer of rhodium plating. Rhodium is a hard, bright metal from the platinum family, and it looks stunning.
But here's the problem: the rhodium layer is incredibly thin, typically just 0.1 to 0.25 microns. For reference, a human hair is about 70 microns thick. Over time, friction from daily wear slowly erodes this microscopic coating, and the warmer-toned base metal starts to peek through.
If your white gold is showing yellowish patches, that's not dirt. It's the rhodium wearing away. No amount of cleaning will fix this. You'll need a jeweler to re-plate the piece, which is a routine and relatively affordable service.
Micro-Scratches: Death by a Thousand Cuts
Every time your ring bumps against a table, your bracelet catches on your bag, or two necklaces rub together in your jewelry box, tiny scratches form on the metal's surface. Each individual scratch is invisible to the naked eye. But collectively, hundreds or thousands of micro-scratches transform a mirror-like finish into a flat, matte surface.
Think of it like this: a perfectly smooth lake reflects the sky like a mirror. But stir up ripples across the entire surface, and the reflection disappears. That's exactly what micro-scratches do to your jewelry's shine.
Building Your Home Cleaning Kit: The Right Tools (and the Wrong Ones)
Having the right tools makes all the difference. Here's what you need, and what you should keep far away from your jewelry.
The Essentials (Safe for All Jewelry Types)
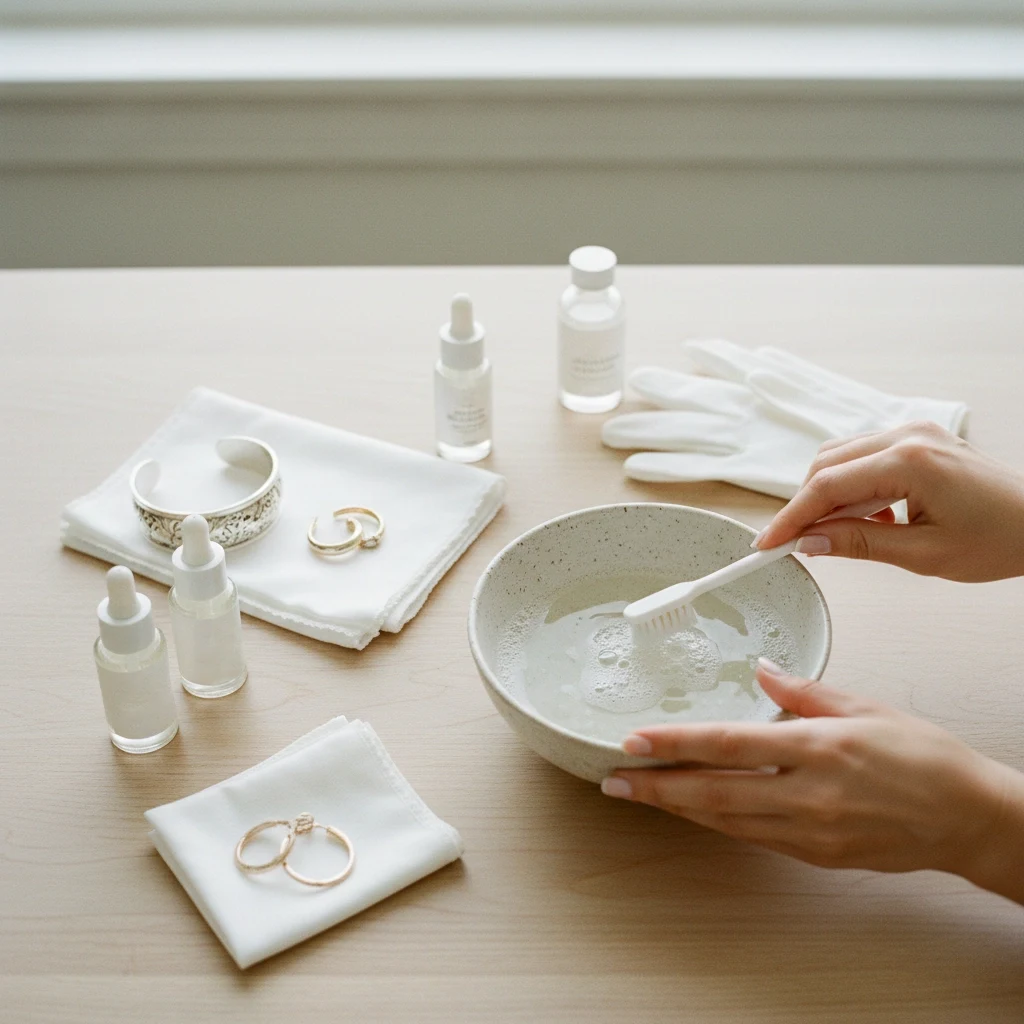
A soft-bristled toothbrush
A children's toothbrush is ideal, since the bristles are softer and gentler than adult versions. This is your primary cleaning tool for reaching into tight spots, under gemstone settings, between chain links, and along engraved details.
Critical rule: Never use a toothbrush you've actually brushed your teeth with. Old toothbrushes retain traces of toothpaste (which is abrasive, more on that later) and bacteria. Buy a fresh one and dedicate it exclusively to jewelry cleaning.
A small, deep bowl
Glass or ceramic is best. Plastic works in a pinch, but avoid metal bowls, since they can react with your cleaning solutions.
Mild liquid soap
Look for a gentle, fragrance-free hand soap or baby soap. Alternatively, a single tiny drop of dish soap works beautifully. Dish soap is very concentrated, so restraint is key.
Avoid anything with added moisturizers, exfoliants, or strong fragrances. You want the simplest, mildest soap you can find.
A microfiber cloth or soft flannel
This is your polishing and drying tool. It should be clean, soft, and lint-free. Microfiber cloths have a special weave that buffs metal to a shine without scratching.
Do not use regular towels. Bath towels and kitchen towels feel soft to your skin, but their texture is surprisingly rough at the microscopic level, rough enough to leave fine scratches on gold and silver.
Lukewarm water
Not hot, not cold, just comfortably warm, around 85-105°F (30-40°C). You should be able to hold your hand in it without any discomfort.
Hot water can damage certain gemstones (opals, pearls, emeralds). Cold water doesn't dissolve oils and grease effectively. Lukewarm is the sweet spot.
Additional Tools for Silver
Silver polishing cloths
These pre-treated cloths are specifically designed for silver. They're infused with a chemical compound (usually based on sodium thiosulfate) that dissolves silver sulfide, the dark tarnish layer, on contact.
You can find them at jewelry stores, department stores, and online. They're affordable (typically in the budget-friendly range), and a single cloth can be used dozens of times before it needs replacing.
Commercial silver cleaning solution (optional)
A liquid dip-style cleaner that removes even severe tarnish through a quick chemical bath. Extremely effective, but also more aggressive, which means it's not safe for all gemstones. More on this later.
Additional Tools for Gold
Ammonia solution (optional)
A 10% ammonia solution (available at most pharmacies and drugstores for a very low cost) is highly effective at cutting through stubborn grease and grime on gold. It has a strong smell, so always use it in a well-ventilated area.
Jeweler's polishing paste (for advanced users)
A specialized paste that buffs gold to a mirror finish. Not necessary for routine cleaning, but wonderful for occasional deep polishing sessions.
The Blacklist: What Should NEVER Touch Your Jewelry
This is arguably the most important section of this entire guide. These common "cleaning tips" have damaged more jewelry than years of neglect ever could.
Toothpaste, the #1 jewelry destroyer
Let's settle this once and for all: toothpaste should never, ever be used to clean jewelry.
Toothpaste contains abrasive particles (silicon dioxide, calcium carbonate, aluminum oxide) that are specifically designed to scrub the hard enamel of your teeth (which rates a 5 on the Mohs hardness scale). Gold rates a 2.5-3. Silver rates a 2.5.
Your jewelry is softer than your teeth. Rubbing toothpaste on gold or silver is like using sandpaper on glass. The abrasive particles carve microscopic grooves into the metal's surface, permanently destroying its mirror polish and leaving it scratched and matte.
Despite what countless internet "hacks" suggest, toothpaste is one of the worst things you can put on your jewelry. If you've already made this mistake and your pieces look dull and scratched, a professional jeweler can re-polish them, but it's an expense that's completely avoidable.
Baking soda (in dry form)
Baking soda crystals are abrasive. Rubbing dry baking soda on metal is essentially sanding it. A dissolved baking soda solution (baking soda fully dissolved in water) can be used carefully in some cases, but never apply baking soda as a dry paste or powder directly to your jewelry.
Hard-bristled brushes, steel wool, or abrasive sponges
These leave deep, visible scratches that require professional polishing to remove.
Strong acids (vinegar, pure citric acid, lemon juice)
These can react with metals and damage gemstones. While diluted vinegar has its uses in some household cleaning scenarios, it has no place in jewelry care.
Chlorine-based cleaners (bleach, bathroom cleaners)
Chlorine attacks gold and silver at a molecular level. It can cause pitting, discoloration, and structural weakening of the metal. Keep your jewelry far from any cleaning product that contains chlorine.
The Gold Standard: How to Clean Gold Jewelry at Home
Gold is noble and beautiful, but the alloy metals mixed into 14K and 18K gold can tarnish and dull over time. The good news? Restoring gold's brilliance at home is simple, safe, and effective.
The Soapy Water Method: Your Go-To Solution
This technique solves about 90% of gold jewelry cleaning situations. It's gentle enough for daily-wear pieces, effective enough to cut through weeks of buildup, and requires nothing you don't already own.
What you'll need:
- Lukewarm water (about 1-2 cups)
- 2-3 drops of mild liquid soap
- A soft-bristled toothbrush
- A microfiber cloth for drying
Step-by-step process:
Step 1: Prepare your cleaning bath
Pour lukewarm water into a glass or ceramic bowl. Add 2-3 drops of mild soap, just enough to create a light foam when you stir. You don't need a bubble bath; a little goes a long way.
Step 2: Soak your pieces
Gently place your gold jewelry into the soapy water. Let it sit for 10-15 minutes. During this time, the solution is working for you, softening dried oils, loosening dust, and breaking down cosmetic residue.
Important: Don't leave jewelry soaking for hours. Extended soaking isn't more effective, and it can be harmful to certain gemstones.
Step 3: Gently brush
Remove each piece from the solution one at a time. Using your soft-bristled toothbrush, gently clean all surfaces of the metal.
Pay special attention to the spots where grime loves to hide:
- Under gemstone settings (between the prongs and the stone)
- Inside engraved or textured details
- Between the links of chains and bracelets
- Around clasps and hinges
- The underside of rings (the part that touches your skin)
Use light, circular motions. There's no need to scrub hard. You're cleaning a delicate piece of art, not scouring a pan.
Step 4: Rinse thoroughly
Hold your jewelry under a gentle stream of lukewarm water and rinse away all soap residue. Any soap left behind will dry as a filmy haze, which defeats the purpose of cleaning.
Pro tip that could save you hundreds of dollars: Always rinse over a bowl or a sink with the drain closed. If the piece slips from your wet fingers, it'll land safely instead of disappearing down the drain.
Step 5: Dry completely
Gently pat the piece dry with your microfiber cloth. Then place it on a clean, dry surface and let it air-dry for 10-15 minutes to make sure no moisture remains in hard-to-reach spots.
Never put jewelry away while it's still damp. Trapped moisture can accelerate tarnishing and leave water spots.
The result:
Your gold should look bright, clean, and alive again. This method removes the vast majority of everyday buildup (oils, cosmetics, dust, and skin residue) without any risk of damage.
Tackling Stubborn Grime: When Soap Isn't Enough
Sometimes a piece has been neglected for months (or years), and the standard soapy water bath doesn't cut it. Old, caked-on grease in the links of a bracelet, a thick haze on a ring that gets worn through cooking. These situations call for slightly stronger solutions.
Option A: Ammonia solution (for gold without stones or with hard stones only)
What you'll need:
- Lukewarm water, about 1 cup (200 ml)
- 10% ammonia solution, 1 teaspoon
- A soft-bristled toothbrush
Process:
- Mix the water and ammonia in a well-ventilated area (near an open window or under an exhaust fan)
- Submerge the gold piece for 10-15 minutes, no longer
- Gently brush with the toothbrush
- Rinse thoroughly under lukewarm water
- Dry completely
Important warnings:
- The smell is strong. Ammonia fumes are sharp and unpleasant. Always work in a ventilated space, and avoid breathing directly over the bowl.
- Not safe for all gemstones. Ammonia is fine with hard stones like diamonds, sapphires, and topaz. But it will damage opals, pearls, coral, amber, and turquoise. If your piece has soft or porous stones, skip this method.
- Never use on gold-plated jewelry. Ammonia will strip the gold layer right off.
Option B: Hydrogen peroxide (a gentler alternative)
What you'll need:
- Lukewarm water, about 1 cup (200 ml)
- 3% hydrogen peroxide, 2 tablespoons
- Mild liquid soap, 1 teaspoon
Process:
- Mix all ingredients in a bowl
- Submerge the gold piece for 15-20 minutes
- Gently brush
- Rinse thoroughly
- Dry completely
Why choose this over ammonia?
Hydrogen peroxide is odorless and somewhat gentler, making it a better choice if you're sensitive to strong smells or if you're nervous about using ammonia. It's effective against moderate grime, though it may not cut through the most extreme buildup as quickly as ammonia does.
The Final Touch: Polishing for Mirror Shine
Cleaning removes dirt. Polishing takes your gold from "clean" to "dazzling." These are two different steps, and skipping the second one means leaving shine on the table.
What you'll need:
- A flannel cloth or dedicated jewelry polishing cloth
- Clean, completely dry gold jewelry
Process:
- Make absolutely sure your piece is fully dry (polishing wet metal creates streaks)
- Using gentle, circular motions, buff the surface of the metal with your flannel cloth
- Work your way around the entire piece, covering every facet, every angle, every curve
- Continue for 2-5 minutes until you see a mirror-like shine emerge
Why does this work?
Flannel has a unique fiber structure that polishes metal without scratching it. The soft, tightly-woven fibers gently smooth the surface at a microscopic level, increasing light reflection and restoring that fresh-from-the-jeweler glow.
Regular cotton, terry cloth, or paper towels can't do this. Their fibers are too coarse and can actually leave new micro-scratches.
Handle with Care: How to Clean Gold-Plated Jewelry
Gold-plated jewelry occupies a special category that demands its own set of rules. If you treat gold-plated pieces the way you treat solid gold, you're going to ruin them. Here's why, and what to do instead.
Understanding Gold Plating: Why It's So Fragile
Gold-plated jewelry (sometimes called "gold-plated" or "gold-tone") consists of a base metal (usually brass, stainless steel, or sterling silver) coated with a microscopically thin layer of real gold through an electroplating process.
How thin? The gold layer is typically just 0.5 to 3 microns thick. To put that in perspective, a single human hair is about 70 microns thick. The gold on your gold-plated ring might be 30 to 140 times thinner than a strand of hair.
This is important to internalize because it changes everything about how you should treat these pieces.
What Happens When You Clean Gold Plating Too Aggressively
Abrasives (baking soda, toothpaste, stiff brushes):
They physically scrape away the gold layer. After just 2-3 cleanings with baking soda or toothpaste, the gold plating can be completely gone, exposing the dull base metal underneath.
Acids and strong chemicals:
They can react with the base metal beneath the gold layer, causing the plating to bubble, blister, and peel away in patches.
Excessive friction:
Even a soft cloth, if you press too hard, will gradually wear through the gold layer over time.
How to tell if your plating is wearing through:
- Patches of a different color appearing (silvery, copper-toned, or greenish)
- Uneven coloring across the surface
- Bare spots on high-friction areas (the back of rings, chain links near clasps, bracelet segments that rub against each other)
A reality check: Gold plating is not permanent. Even with perfect care, the coating will eventually wear away after 1-3 years of regular wear. This is normal and expected. A jeweler can re-plate the piece for a modest fee, and it's a standard service.
The Only Safe Way to Clean Gold-Plated Jewelry
For gold-plated pieces, gentleness isn't just recommended. It's mandatory. Here's the safest method:
What you'll need:
- Lukewarm water
- A single drop of mild soap
- A soft microfiber cloth
Process:
Step 1: Create the gentlest possible solution
A single drop of mild soap in a small bowl of lukewarm water. That's it. More soap is not better here.
Step 2: Dampen your cloth
Dip your microfiber cloth into the soapy water and wring it out so it's barely damp: not dripping, not soaking, just slightly moist.
Step 3: Wipe with extreme gentleness
Using the lightest possible touch, wipe the surface of the jewelry. Think of it like dusting a butterfly's wing. You're removing surface oils and dust, nothing more.
No rubbing. No scrubbing. No pressure.
Step 4: Remove soap residue
Wipe again with a clean cloth dampened with plain water.
Step 5: Dry immediately
Pat dry with a soft, dry cloth. Gold plating should not stay wet. Moisture can seep into microscopic cracks in the plating and cause problems underneath.
The absolute "never" list for gold-plated jewelry:
- Never soak it. Water can penetrate micro-cracks in the plating and reach the base metal, causing tarnishing from the inside out.
- Never use a toothbrush, even a soft one.
- Never use ammonia, hydrogen peroxide, baking soda, or polishing paste.
- Never put it in an ultrasonic cleaner.
- Never use cleaning solutions designed for solid gold. They're formulated for a completely different material.
Extending the Life of Your Gold Plating: Daily Habits That Matter
Since gold plating wears away through friction and chemical exposure, the goal is to minimize both. Here are habits that can double or triple the lifespan of your plated pieces:
The "last on, first off" rule
Put your gold-plated jewelry on after you've finished applying all cosmetics, lotions, perfumes, and hair products, and after everything has fully dried (wait at least 5-10 minutes). When you get home, remove your jewelry before you do anything else.
This simple habit drastically reduces your plating's exposure to the chemicals in your beauty products, which are some of the biggest enemies of gold plating.
Avoid contact with:
- Water. Remove pieces before washing your hands, showering, or doing dishes
- Household chemicals. Take off jewelry before cleaning
- Sweat. Remove during exercise (perspiration is surprisingly corrosive)
- Chlorinated water. Pools are devastating to gold plating
- Salt water. The ocean is equally destructive
Store thoughtfully:
Keep each gold-plated piece in its own soft pouch or separated compartment. Contact with other jewelry causes friction, which accelerates plating wear. Store in a dry location, since humidity speeds up deterioration.
Weekly maintenance polish:
Once a week, give each piece a gentle wipe with a clean, dry microfiber cloth, no water, no products. This removes surface dust and helps maintain the shine between deeper cleanings.
Fighting the Dark Side: How to Clean Silver Jewelry
Sterling silver (925 silver) is one of the most beautiful jewelry metals, and one of the most demanding to maintain. If you want to understand exactly what you are working with before you clean it, here is the dedicated breakdown of the 925 alloy and why it's the industry standard. Its signature challenge? Tarnish.
If you own silver jewelry, you've seen it happen: that gorgeous bright metal gradually darkens, first to a warm gold, then to a grey, then to a deep, almost theatrical black. Understanding what causes this, and how to reverse it, will keep your silver looking spectacular.
Why Silver Tarnishes (And Why Yours Might Tarnish Faster Than Your Friend's)
Silver tarnish is caused by a chemical reaction between silver and sulfur compounds in the air, primarily hydrogen sulfide (H₂S) and sulfur dioxide (SO₂). When silver encounters these compounds, it forms silver sulfide (Ag₂S), which appears as a progressively darkening film on the surface.
Common sources of sulfur:
- Air pollution (more concentrated in cities and industrial areas)
- Human perspiration
- Rubber products (rubber bands, rubber-backed gloves)
- Certain foods (eggs, onions)
- Cosmetics and perfumes
Why the rate of tarnishing varies wildly between people:
This is one of the most fascinating quirks of silver jewelry. Two people can wear identical silver rings, and one person's ring will stay bright for months while the other's turns black in a week. The primary factor is the chemical composition of each person's sweat: its pH level, salt concentration, and specific chemical makeup. This is genetically determined and entirely individual.
If your silver tarnishes quickly, it doesn't mean anything is wrong with you or your jewelry. It just means your body chemistry is particularly reactive with silver. You can either embrace a more frequent cleaning routine or opt for rhodium-plated silver, which resists tarnishing.
Method 1: Silver Polishing Cloths (The Quick Fix)
This is the easiest, fastest, and most convenient way to maintain silver jewelry.
What are they?
Pre-treated cloths infused with a chemical compound (typically sodium thiosulfate-based) that dissolves silver sulfide on contact. You simply wipe, and the tarnish disappears.
Where to find them:
Jewelry stores, department stores, and online retailers. They're budget-friendly, and a single package can last months with regular use.
How to use:
- Pull out a polishing cloth
- Rub the silver with moderate pressure, and you'll see the cloth turning black (that's the dissolved tarnish transferring onto the cloth, which means it's working)
- Finish with a clean, dry soft cloth for a final shine
The good:
- Incredibly fast (30 seconds per piece)
- Highly effective for light to moderate tarnish
- No water, no mess, no prep
- Safe for most gemstones
The not-so-good:
- They're a consumable (you'll need to replace them periodically)
- Not safe for pearls, opals, or turquoise
Method 2: Soapy Water Bath (For Light Tarnish)
If the tarnish is mild (a slight dulling rather than full-on blackening), the same soapy water method used for gold works beautifully on silver.
Process:
- Lukewarm water + 2-3 drops of mild soap
- Soak silver for 10 minutes
- Gently brush with a soft toothbrush
- Rinse thoroughly
- Dry completely
This removes surface oils and light tarnish. For anything more severe, you'll need to step up to the methods below.
Method 3: The Baking Soda + Aluminum Foil Method (For Heavy Tarnish)
This is the heavy artillery. It's a classic home remedy backed by real chemistry, and it can transform completely blackened silver back to bright white in minutes. It's almost magical to watch.
What you'll need:
- Aluminum foil
- Baking soda, 2 tablespoons
- Boiling water, 1-2 cups
- A deep, heat-safe bowl
Process:
Step 1: Line the bottom of your bowl with aluminum foil, shiny side up.
Step 2: Sprinkle the baking soda onto the foil.
Step 3: Place your silver jewelry on the foil. The pieces must be touching the aluminum. This is critical for the reaction to work.
Step 4: Pour boiling water over everything.
Step 5: Wait 5-10 minutes and watch the magic happen.
You'll see fizzing and bubbling. You might notice a sulfur smell (like rotten eggs). That's the chemical reaction in progress, and it's completely normal.
What's happening scientifically:
The aluminum acts as a reducing agent. The silver sulfide (Ag₂S) on your jewelry's surface is being electrochemically reduced back into pure silver (Ag), while the sulfur atoms transfer from the silver to the aluminum foil. You're literally reversing the tarnishing reaction.
Step 6: Remove the silver, rinse under lukewarm water, and dry thoroughly.
The result: Even severely tarnished silver comes out looking dramatically brighter. Pieces that appeared ruined can be completely restored.
CRITICAL WARNINGS, read before you try this:
This method is NOT safe for jewelry containing:
- Pearls. Boiling water will crack them
- Opals. Thermal shock will fracture them
- Amber. Heat causes cloudiness and damage
- Enamel work. Heat can cause separation and peeling
- Glued-in stones. Boiling water will dissolve the adhesive
Use this method ONLY for plain silver jewelry without stones, or for silver set with hard stones like diamonds, sapphires, and rubies.
Always ensure the room is well-ventilated, because the hydrogen sulfide gas released during the reaction is unpleasant and shouldn't be inhaled in concentration.
Method 4: Commercial Silver Dip Solutions (The Professional Shortcut)
These ready-made liquid solutions offer powerful, fast tarnish removal with minimal effort.
How to use:
- Pour the solution into a glass or plastic bowl (never metal, which can react)
- Submerge your silver pieces
- Follow the timing on the product's label (usually 30 seconds to 5 minutes)
- Remove, rinse thoroughly with water, and dry
The good:
- Extremely effective, since even blackened silver comes out bright
- Fast, because the solution does the work for you
- Reaches every nook, cranny, and crevice
The not-so-good:
- More aggressive than other methods, so it can damage certain gemstones
- Strong chemical smell
- Over-soaking can leave silver looking matte rather than shiny
- Mid-range pricing, but a bottle lasts for many uses
Do NOT use on: pearls, opals, amber, turquoise, coral, or any porous/organic stones.
Method 5: Toothpaste, The Myth That Won't Die
Every corner of the internet will tell you to clean your silver with toothpaste. Please don't.
Toothpaste is an abrasive. It's designed to scrub hard tooth enamel. Silver is a soft metal. When you rub toothpaste on silver, the abrasive particles scratch the surface, destroying the mirror polish and leaving the metal looking dull and permanently scuffed.
If you've already made this mistake and your silver has lost its shine, a jeweler can re-polish it for a modest fee, but it's an unnecessary expense that a gentle soapy water bath would have avoided entirely.
Gemstone Guide: Not All Stones Are Created Equal
The metal of your jewelry is only half the equation. The gemstones set into your pieces each have their own personality, vulnerabilities, and cleaning requirements. What's perfectly safe for a diamond could shatter an opal.
Here's your comprehensive guide, organized by durability.
The Hard Stones: Clean with Confidence
These gemstones are tough, stable, and resistant to most cleaning methods.
Diamonds (Mohs hardness: 10)
The hardest natural material on Earth. Diamonds can handle virtually any cleaning method short of aggressive acids.
Interestingly, diamonds are notorious "grease magnets" that attract oils and become dirty faster than most other stones. But they're also easy to restore. A soapy water bath with gentle brushing (paying special attention to the underside of the stone where grime accumulates) will bring back full brilliance every time.
Sapphires and Rubies (Mohs hardness: 9)
Extremely hard and chemically resistant. Safe for soapy water, ammonia solutions, specialized jewelry cleaners, and even ultrasonic cleaning.
Topaz and Aquamarine (Mohs hardness: 7-8)
Quite durable. Soapy water and a soft brush work perfectly.
One caution: some topaz specimens have internal stress fractures. Avoid extreme temperature changes, and don't use boiling water.
Amethyst and Citrine (Mohs hardness: 7)
Hard and durable, but with one quirk: they can fade with prolonged sun exposure. Clean with soapy water and a soft brush, but don't leave them drying in direct sunlight.
Garnets (Mohs hardness: 6.5-7.5)
Generally robust. Soapy water is your friend.
The Medium Stones: Proceed with Caution
These gemstones have hidden vulnerabilities that make aggressive cleaning dangerous.
Emeralds (Mohs hardness: 7.5-8, but fragile)
Here's the emerald paradox: they score high on the hardness scale, but nearly every natural emerald is riddled with internal fractures (called "inclusions" or "jardins"). To make these fractures less visible, emeralds are almost always treated with oil or resin that fills the cracks and improves clarity.
The problem? Aggressive cleaning methods (ultrasonic cleaners, hot water, ammonia, commercial dips) can extract that oil, making the internal fractures suddenly visible and dramatically reducing the stone's beauty and value.
The only safe method for emeralds: Lukewarm (not hot) soapy water, applied with extreme care using a very soft cloth. No brushes. No soaking for extended periods. No chemicals.
Moonstone (Mohs hardness: 6-6.5)
Moonstones have a layered internal structure that makes them prone to cleavage (splitting along internal planes). Handle them gently.
Safe method: A soft cloth dampened with mild soapy water. No brushing, just gentle wiping.
The Soft and Porous Stones: Maximum Delicacy Required
These gemstones are essentially fragile, and even minor mistakes can cause irreversible damage.
Opals (Mohs hardness: 5.5-6.5)
Opals contain up to 10% water within their structure. This water content is what creates their mesmerizing play of color, but it also makes them extremely sensitive to temperature changes, dry environments, and extended water exposure.
What can go wrong: Hot water can cause thermal shock and cracking. Dry air can slowly dehydrate the stone, causing it to crack and lose its color play. Even a rapid change from warm to cold conditions can be dangerous.
Safe method: Wipe gently with a barely damp soft cloth. That's it. No soaking, no chemicals, no temperature extremes.
Pearls (Mohs hardness: 2.5-4.5)
Pearls are organic, formed by living organisms from calcium carbonate and an organic protein called conchiolin. They're soft, porous, and chemically reactive.
What will damage them: Water (excessive soaking disrupts internal moisture balance), soap and detergents (alkaline substances damage nacre), acids (even weak ones, including human sweat, dissolve calcium carbonate), alcohol-based products (perfume, cologne, hairspray), ultrasonic cleaners (vibrations destroy the layered structure), and heat (can cause dehydration and cracking).
Safe method:
- Wipe with a barely damp soft cloth after every wearing
- Allow to air dry
- That's all
The pearl paradox: While pearls are damaged by excessive wear and chemical exposure, they also need to be worn. If a pearl sits unworn for years, it gradually dehydrates, dulls, and can eventually crack. The moisture from your skin actually helps keep pearls "alive." The sweet spot is wearing them a few times a week, enough to maintain their luster without letting sweat and cosmetics take their toll.
Turquoise (Mohs hardness: 5-6)
Turquoise is porous like a sponge. It absorbs liquids, oils, and chemicals that touch its surface. Once absorbed, these substances can permanently alter the stone's color.
Safe method: Dry soft cloth only. No water whatsoever.
Never let turquoise come into contact with creams, perfumes, sunscreen, or even plain water. Store it in a dark place, as sunlight can cause fading.
Amber (Mohs hardness: 2-2.5)
Amber is fossilized tree resin: organic, extremely soft, and vulnerable to solvents.
What will damage it: Alcohol (including perfume and cologne), acetone (nail polish remover), heat, and any abrasive material.
Safe method: A soft cloth slightly dampened with lukewarm water. A single drop of mild soap is acceptable if needed. Wipe dry immediately.
If amber has lost its luster, you can carefully polish it with a soft cloth and a tiny amount of olive oil, then wipe completely dry.
Coral (Mohs hardness: 3-4)
Like pearls, coral is organic calcium carbonate. Acids destroy it.
Safe method: Barely damp soft cloth only.
Quick Reference: Gemstone Cleaning Chart
| Gemstone | Hardness | Safe Cleaning Method | What to AVOID |
|---|---|---|---|
| Diamond | 10 | Soapy water, brush, ultrasonic | Nothing |
| Sapphire / Ruby | 9 | Soapy water, brush, ultrasonic | Nothing |
| Topaz / Aquamarine | 7-8 | Soapy water, soft brush | Extreme temperature changes |
| Amethyst / Citrine | 7 | Soapy water, soft brush | Direct sunlight (causes fading) |
| Emerald | 7.5-8 | Very mild soapy water only | Ultrasonic, hot water, chemicals |
| Opal | 5.5-6.5 | Barely damp cloth | Water, temperature shock, dryness |
| Pearl | 2.5-4.5 | Barely damp cloth | Water, soap, acids, ultrasonic |
| Turquoise | 5-6 | Dry cloth only | All liquids, cosmetics |
| Amber | 2-2.5 | Barely damp cloth | Alcohol, solvents, heat |
| Coral | 3-4 | Barely damp cloth | Acids, extended water contact |
When in doubt, default to the gentlest method: a barely damp, soft cloth. It's always safe.
Wear the symbol, don't just read about it. These are in stock:


Ultrasonic Cleaners: The Power Tool of Jewelry Cleaning
Ultrasonic cleaners use high-frequency sound waves to create microscopic bubbles in a liquid bath. When these bubbles collapse (a process called cavitation), they generate tiny shockwaves that blast dirt and grime out of places no brush could ever reach.
It's like pressure-washing your jewelry at a microscopic scale: incredibly effective, but not appropriate for every piece.
When Ultrasonic Cleaning Shines
Ideal for:
- Solid gold without stones, or with hard stones (diamonds, sapphires, rubies)
- Solid silver without stones, or with hard stones
- Chains and bracelets (phenomenal at cleaning between tiny links)
- Intricately detailed pieces with filigree, engravings, or complex textures
Advantages:
- Reaches places that are physically impossible to clean with a brush
- Fast, typically 5-10 minutes
- No physical contact means no risk of friction-based scratching
When Ultrasonic Cleaning Is Dangerous
NEVER use an ultrasonic cleaner on:
Stones with internal fractures or stress: Emeralds, opals, certain topaz specimens, tanzanite, and some amethysts. The vibrations can widen existing fractures, and the stone can literally crack apart during cleaning.
Organic gemstones: Pearls, coral, amber. Their organic structure cannot withstand ultrasonic vibrations and may disintegrate.
Porous gemstones: Turquoise, lapis lazuli. They'll absorb water and may permanently change color.
Glued-in stones: If a stone is secured with adhesive rather than mechanical prongs, ultrasonic vibrations can dissolve the glue and send the stone tumbling loose.
Gold-plated jewelry: Ultrasonic waves can accelerate the separation of the gold layer from the base metal.
Using a Home Ultrasonic Cleaner
Compact ultrasonic cleaners for home use are widely available online and at electronics retailers at affordable prices. They're a worthwhile investment if you have a significant collection of solid gold or silver jewelry.
How to use:
- Fill the cleaner's tank with lukewarm water
- Add 1-2 drops of mild soap
- Place only appropriate jewelry inside (double-check against the "never" list above)
- Run for 3-5 minutes
- Remove, rinse with clean water, and dry thoroughly
The golden rule: If you're not 100% sure a piece is safe for ultrasonic cleaning, don't risk it. The gentle manual methods described earlier are always a safe fallback.
Special Case: Cleaning White Gold with Rhodium Plating
White gold with rhodium plating is one of the most popular fine jewelry choices, and one of the most misunderstood in terms of care. If you are still weighing the metal itself, the comparison of white, yellow and rose gold lays out how each behaves over time. Understanding what makes white gold different will save you from expensive mistakes.
What Makes White Gold... White?
White gold is an alloy of yellow gold mixed with white metals like palladium, nickel, or silver. On its own, white gold has a subtle yellowish-grey tone. It's not the brilliant, silvery-white metal you see in jewelry stores.
That bright, cool-toned finish comes from a thin layer of rhodium plating applied over the white gold. Rhodium is a metal from the platinum family: extremely hard, brilliantly white, non-reactive, and hypoallergenic.
The Inevitable Wear
Despite rhodium's hardness, the plating is thin, just 0.1 to 0.25 microns. Daily friction from normal wear gradually erodes this microscopic layer.
Timeline: Depending on wear frequency and plating thickness, rhodium can last anywhere from 6 months to 5 years before it needs refreshing.
Signs that your rhodium is wearing through:
- Yellowish patches appearing (the base white gold showing through)
- Uneven coloring across the surface
- Loss of that bright, cool-toned shine
Critical understanding: When rhodium wears off, no amount of cleaning will fix it. The yellow tone you're seeing isn't dirt. It's the actual color of the underlying metal. The solution is re-plating, which a jeweler can do as a routine service at a reasonable cost.
How to Clean Rhodium-Plated White Gold
Since aggressive cleaning accelerates rhodium wear, the approach needs to be gentle:
- Mild soapy water solution (same as regular gold)
- Soft toothbrush with very light pressure, lighter than you'd use on regular gold
- Thorough rinsing
- Complete drying
- Optional: gentle polish with a soft cloth
Avoid:
- Any abrasive (paste, powder, baking soda)
- Aggressive chemicals
- Excessively frequent cleaning (clean only when needed, not on a rigid schedule)
When to Visit the Jeweler for Re-Plating
Once rhodium visibly wears through, the only fix is professional re-plating. The jeweler will:
- Remove any remaining old rhodium
- Polish the underlying white gold to a smooth finish
- Apply a fresh rhodium layer using an electroplating process
This restores the piece to its original brilliant white appearance. Plan on a turnaround of 1-3 days, and factor in a modest cost. It's an investment that's well worth making to keep your white gold looking its best.
The Top 5 Mistakes That Ruin Jewelry (Permanently)
Some jewelry damage is easily reversible. But some mistakes cause permanent harm that even a professional jeweler can't fully undo. Here are the five most common offenders, and how to avoid them.
Mistake #1: Using Toothpaste
We've covered this in detail, but it bears repeating because this myth is so persistent.
Why it's destructive: Toothpaste abrasives (silicon dioxide, calcium carbonate, aluminum oxide) are designed for tooth enamel, which rates a 5 on the Mohs hardness scale. Gold and silver rate 2.5-3. The abrasives are significantly harder than the metal, meaning they physically carve scratches into the surface.
The damage: A permanently dulled, visibly scratched surface where there was once a mirror-like polish. Only professional re-polishing can restore it, and even then, a tiny amount of metal is lost in the process.
The fix: Use mild soapy water instead. It's gentler, cheaper, and actually more effective for everyday cleaning.
Mistake #2: Boiling Jewelry That Contains Gemstones
Boiling water is sometimes recommended as a jewelry cleaning hack. For plain metal pieces, it's usually fine. But for jewelry with gemstones, it can be catastrophic.
What happens:
- Opals crack from thermal shock
- Emeralds lose their oil/resin treatment, making internal fractures suddenly visible
- Pearls become cloudy and may deteriorate
- Amber turns milky and opaque
- Topaz can fracture from internal stress
The fix: Always use lukewarm water. It's just as effective at dissolving soap and loosening grime, without any of the risks.
Mistake #3: Aggressively Cleaning Gold-Plated Jewelry
Why it's destructive: The gold layer on plated jewelry is just 0.5-3 microns thick. Scrubbing with baking soda, toothpaste, a brush, or any abrasive material literally grinds through this microscopic layer in just a few sessions.
The damage: Once the plating is gone, you're looking at the bare base metal, usually brass or copper. The piece will have a patchy, mottled appearance with the gold finish missing in patches. No amount of cleaning can bring it back.
The fix: Only ever clean gold-plated pieces with a barely damp soft cloth and the lightest possible touch.
Mistake #4: Wearing Jewelry in Swimming Pools
This is one of the most common and most damaging habits.
Why it's destructive: Swimming pool water is treated with chlorine, which is aggressively corrosive to jewelry metals.
What happens:
- Gold: Chlorine attacks the alloy metals (copper, nickel), causing discoloration, surface pitting, and in severe cases, structural weakening of the metal itself
- Silver: Rapid and severe blackening
- Gold plating: Accelerated peeling and separation
The damage: A single swim in a chlorinated pool can cause visible, permanent damage. Extended or repeated exposure multiplies the harm.
The fix: This one is non-negotiable. Always remove all jewelry before swimming, whether in a pool, hot tub, or the ocean (salt water is equally corrosive).
Mistake #5: Storing All Jewelry Together in One Container
Why it's destructive: When pieces share a space, they rub against each other. Harder metals scratch softer ones. Gemstones (which are harder than most metals) scratch metal surfaces. Chains tangle, sometimes so severely that untangling them causes additional damage.
The damage: Cumulative micro-scratches across all surfaces, gradually destroying the polish and shine. Tangled chains that sometimes can't be freed without cutting them.
The fix: Store each piece individually, in its own soft pouch, a separated compartment of a jewelry box, or even a simple ziplock bag. This one change can dramatically extend the beautiful appearance of your entire collection.
Customer reviews
Zevira is a real jewellery shop. Genuine payments, deliveries and customer thank-yous.
🥰🥰🥰 gracias
Ok, ¡gracias! 🙂
Smart Storage: How to Keep Jewelry Clean Between Wearings
The best cleaning routine in the world can't compensate for poor storage habits. Where and how you store your jewelry between wearings has an enormous impact on how often it needs cleaning, and how long it stays beautiful.
The Fundamental Rules
Keep it dry
Moisture accelerates oxidation, especially on silver. The bathroom, where humidity spikes after every shower, is one of the worst places to store jewelry. Choose a bedroom drawer, closet shelf, or vanity in a dry room instead.
Keep it dark
Some gemstones (amethyst, citrine, topaz, turquoise) gradually fade with prolonged exposure to direct sunlight. Even if your stones are resistant to fading, UV light contributes to the breakdown of organic materials like silk cords and certain adhesives used in jewelry construction.
Keep it separate
Every piece should have its own space. Individual soft pouches, separate compartments in a jewelry box, or dedicated spots on a hanging organizer. This prevents scratching, tangling, and the general wear that comes from pieces grinding against each other.
Fasten clasps
Before storing chains and bracelets, always close the clasp. Open clasps catch on other pieces, on fabric linings, and on themselves, leading to tangles, snags, and deformation.
Storage Options
Compartmented jewelry box
The classic choice. Look for boxes with soft lining (velvet or suede is ideal) and plenty of separated sections. Higher-end boxes include ring rolls, earring cushions, and necklace hooks.
Individual fabric pouches
Simple, effective, and often free. Many jewelers include a pouch with purchase. Each piece gets its own soft cocoon of protection.
Anti-tarnish bags (especially for silver)
Specially treated bags or cloths that contain anti-tarnish compounds. They absorb the sulfur compounds in the air that cause silver to darken, dramatically slowing the tarnishing process.
Ziplock bags (budget-friendly silver solution)
Small plastic ziplock bags are nearly airtight, which limits silver's exposure to sulfur in the air. Not glamorous, but surprisingly effective at slowing tarnish. Squeeze out excess air before sealing.
Hanging organizers
Fabric organizers with clear pockets that hang in a closet. Great for keeping pieces visible, separated, and easily accessible. Particularly useful for earrings and lighter necklaces.
Extra Care for Silver
Silver is particularly demanding about storage conditions.
Silica gel packets
Those little "Do Not Eat" packets that come in shoe boxes and electronics packaging are actually moisture absorbers, and they're fantastic for keeping your jewelry box dry. Toss a couple into your silver storage area. They're also available for purchase in bulk online.
Chalk
A stick of plain white chalk placed in your silver storage box absorbs moisture from the surrounding air. It's an old jeweler's trick that genuinely works.
Anti-tarnish strips
Small strips infused with tarnish-inhibiting chemicals. Available at jewelry supply stores and online. Drop one into each storage compartment to create a protective microenvironment for your silver.
The Household Chemical Hazard: Should You Remove Your Rings?
Many people wear their rings 24/7, through dishwashing, house cleaning, gardening, even automotive work. If this sounds like you, your jewelry is paying the price.
What Household Chemicals Do to Jewelry
The chemical cocktails in common cleaning products are surprisingly hostile to jewelry metals:
Chlorine (found in bleach, bathroom cleaners, disinfectants):
Attacks gold and silver at a molecular level, causing pitting, discoloration, and structural weakening. Chlorine damage is often irreversible.
Strong alkaline compounds (found in oven cleaners, drain openers, heavy-duty degreasers):
Can cause rapid tarnishing and surface damage.
Acids (found in toilet bowl cleaners, lime scale removers, some bathroom cleaners):
Destroy organic gemstones like pearls and coral, and can damage certain metal alloys.
The cumulative effect:
Even mild dish soap, used daily, leaves a residue that gradually builds up and dulls your jewelry. Multiply that by years of constant exposure, and the effect on your pieces is significant.
The Simple Rule
Always remove rings and bracelets before:
- Washing dishes
- Cleaning the house
- Working with any chemical products
- Gardening (soil is surprisingly abrasive)
- Cooking (oils, acids in food, salt)
- Frequent handwashing throughout the day
For earrings: Generally safe to leave in, since they rarely contact chemicals directly.
For necklaces and pendants: Less vulnerable than rings, but still worth removing during heavy-duty cleaning tasks.
The habit that protects your investment: Designate a specific, safe spot (a small dish by the kitchen sink, a hook near the front door) where you always place your jewelry before starting any household task. Consistency is key. If removing jewelry becomes automatic, you'll never have to think about it.
Home Remedies from the Pharmacy: Ammonia and Hydrogen Peroxide Recipes
If you prefer DIY solutions over commercial products, your local pharmacy has everything you need. Here are time-tested recipes that use inexpensive, widely available ingredients.
Recipe 1: Ammonia Solution for Gold
Ingredients:
- 10% ammonia solution, 1 teaspoon
- Lukewarm water, 1 cup (200 ml)
- Mild liquid soap, a few drops
Process:
- Mix all ingredients in a bowl (in a well-ventilated area)
- Submerge gold jewelry for 10-15 minutes, strictly no longer
- Gently brush with a soft toothbrush
- Rinse thoroughly under lukewarm running water
- Dry completely
Best for: Plain gold, or gold set with hard stones (diamonds, sapphires)
Not safe for: Pearls, opals, amber, coral, turquoise, gold-plated pieces
Advantages: Extremely effective at cutting through stubborn grease and grime. Very budget-friendly, since ammonia costs very little.
Drawbacks: The smell is strong and unpleasant. Requires ventilation and care.
Recipe 2: Hydrogen Peroxide Solution for Gold
Ingredients:
- 3% hydrogen peroxide, 2 tablespoons
- Lukewarm water, 1 cup (200 ml)
- Mild liquid soap, 1 teaspoon
Process:
- Mix all ingredients in a bowl
- Submerge gold jewelry for 15-20 minutes
- Gently brush
- Rinse thoroughly
- Dry completely
Best for: Gold with gemstones (gentler than ammonia), white gold
Advantages: Odorless, safer to handle, widely available at a very low cost
Drawbacks: Slightly less aggressive than ammonia, so it may not cut through the most extreme buildup
Recipe 3: Baking Soda + Aluminum Foil for Silver
(Detailed instructions in the silver section above)
When to use: Only for severely tarnished silver without soft, organic, or porous gemstones.
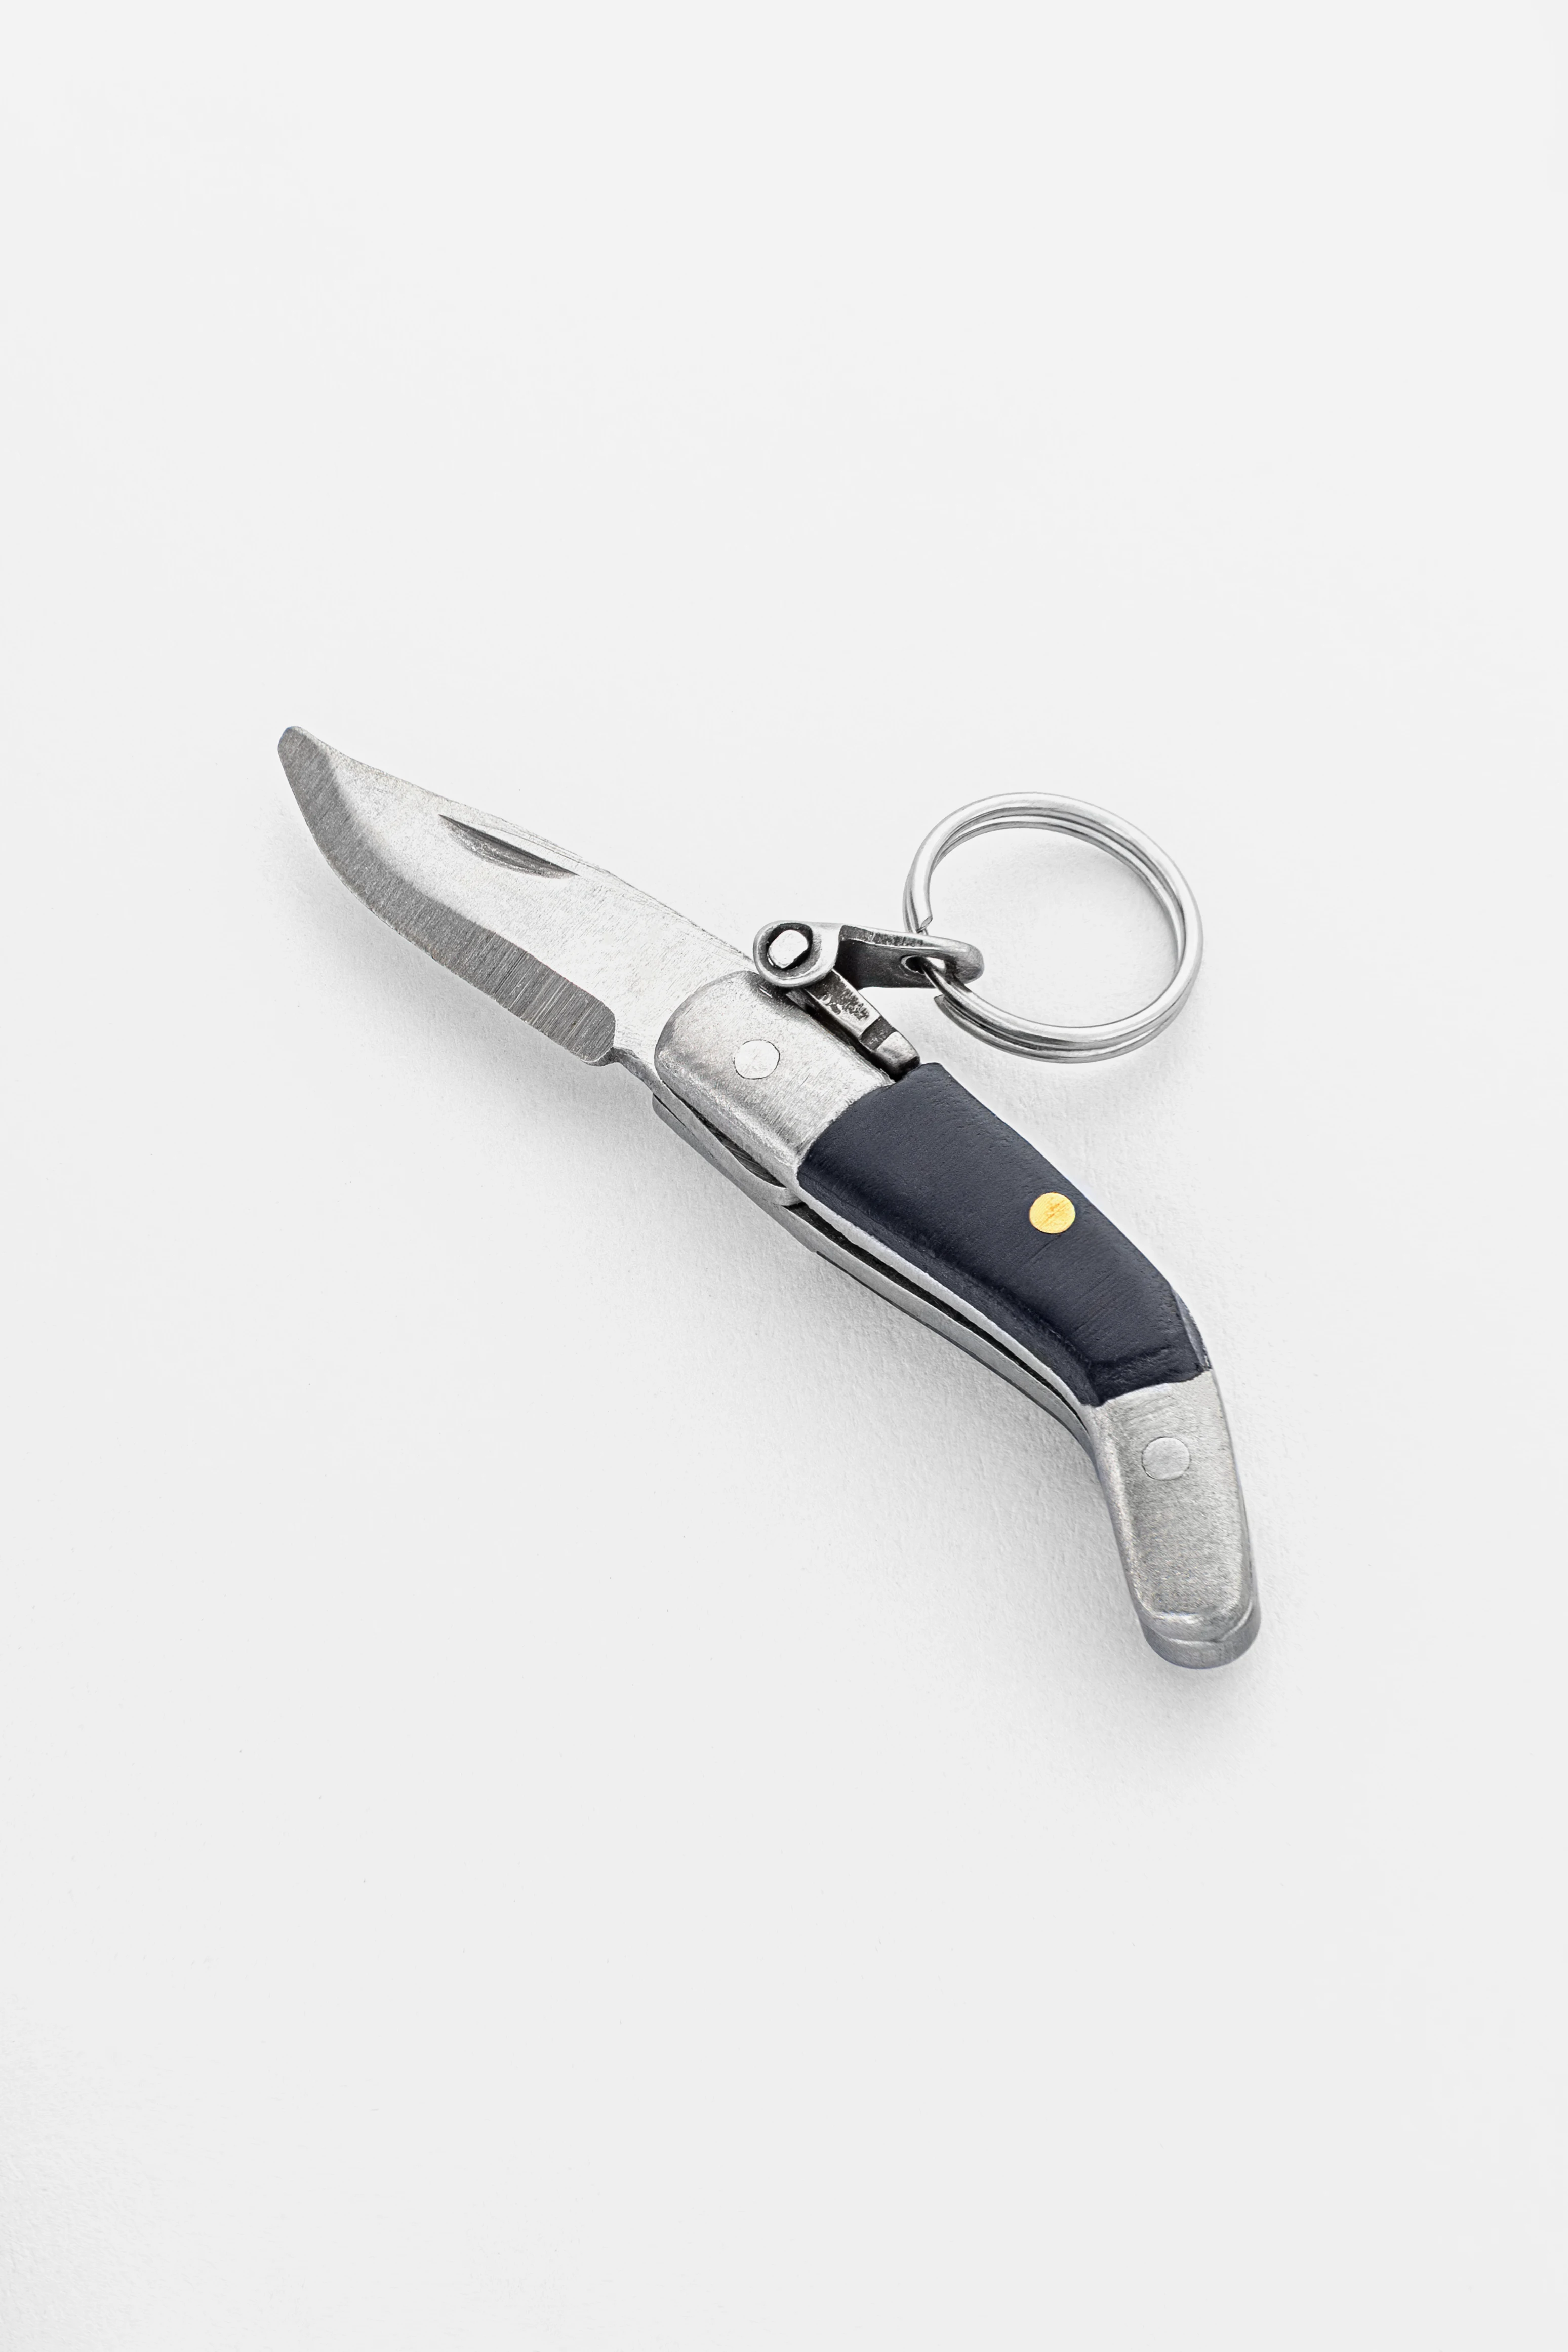
Artisan-crafted CAPAORA navaja pendant
A 40 mm stainless-steel navaja with a real folding mechanism and Palanquilla lock. An affordable gift to remember.
A code for blog readers:
10% off your first order
Authentic · Maker's guarantee · Ships from Spain
Pearls, Amber, and Turquoise: Why These Stones Fear Water
Organic and porous gemstones live by different rules than their mineral counterparts. Understanding their unique vulnerabilities is essential, because mistakes here are often permanent.
Pearls: Nature's Most Delicate Gem
Composition: Layers of calcium carbonate (CaCO₃) bonded with an organic protein called conchiolin, the same material that forms the inner lining of the mollusk's shell.
Why they're so vulnerable:
Pearls are simultaneously soft (2.5-4.5 on the Mohs scale, softer than a copper penny), organic (they contain biological compounds that break down when exposed to chemicals), and porous (they absorb liquids that can alter their internal chemistry).
What destroys pearls:
- Extended water contact: Pearls contain 2-4% internal moisture. Too much soaking disrupts this delicate balance, causing the pearl to swell, cloud, or develop a chalky texture.
- Soap and detergents: Alkaline compounds eat away at the nacre (the pearly outer layer).
- Acids: Even mild acids (human perspiration, vinegar, citrus juice) dissolve calcium carbonate. Wearing pearls during a sweaty workout is actively dissolving them.
- Perfume, cologne, and hairspray: The alcohol and chemical compounds in these products attack the organic protein layer.
- Ultrasonic cleaners: The vibrations destroy the layered structure of the nacre.
- Heat: Can dehydrate the pearl, leading to cracking and loss of luster.
The correct cleaning method:
- After every wearing, gently wipe each pearl with a barely damp soft cloth
- Allow to air dry completely
- That's the entire process
The beautiful paradox of pearls:
While pearls are damaged by many forms of contact, they also need to be worn. A pearl that sits in a drawer for years will slowly dehydrate, lose its luster, and can eventually develop surface cracks.
The natural oils and moisture from your skin actually nourish pearls and keep them "alive." The ideal frequency? Wearing them 2-3 times per week, enough to maintain their vitality without over-exposing them to harmful chemicals and friction.
Amber: Fossilized Time Capsule
Composition: Organic fossilized tree resin, millions of years old.
Why it's vulnerable:
Amber is extraordinarily soft (2-2.5 on the Mohs scale, softer than a fingernail) and organic. Its resinous origin means it's particularly susceptible to solvents.
What damages amber:
- Alcohol: Perfume, cologne, aftershave, and alcohol-based lotions can literally dissolve the surface of amber, causing it to become cloudy and pitted.
- Acetone: Nail polish remover is devastating to amber. Even brief contact can cause visible damage.
- Heat: Amber has a relatively low softening temperature. Hot water, hairdryers, and direct heat sources can warp or cloud it.
- Abrasives: Extremely easy to scratch due to its softness.
The correct cleaning method:
- Wipe with a soft cloth slightly dampened with lukewarm water
- A single drop of mild soap is acceptable if needed
- Wipe dry immediately
Restoring luster: If amber has lost its shine, place a tiny drop of olive oil on a soft cloth and gently buff the surface. Then wipe completely dry with a clean cloth. The oil temporarily fills micro-scratches and restores some of the stone's natural warmth and glow.
Turquoise: The Stone That Drinks
Composition: A hydrated phosphate of aluminum and copper, naturally porous.
Why it's vulnerable:
Turquoise is essentially a sponge disguised as a gemstone. It readily absorbs any liquid, oil, or chemical that touches its surface, and once absorbed, these substances can permanently change the stone's color. A turquoise ring that regularly contacts hand cream can slowly shift from brilliant blue to a muddy green.
What damages turquoise:
- Water: Absorbed into the stone, can cause discoloration and structural weakening
- Cosmetics and perfumes: Absorbed, leaving permanent stains
- Soap and cleaning products: Absorbed, causing cloudiness and color change
- Sunlight: Extended UV exposure can cause fading
The correct cleaning method:
- Dry soft cloth only
- Gentle wiping motions
- No water, no chemicals, no moisture of any kind
Storage: Always keep turquoise in a dark, dry location. Separate from other pieces (it scratches easily). And never store near sources of humidity.
The Universal Rule for Delicate Stones
When in doubt, keep it dry. A gentle wipe with a clean, soft, dry cloth is always safe for every gemstone on Earth. If you're ever uncertain whether your stone can handle water, soap, or any other substance, don't risk it. Dry cloth. Every time.
Platinum: The Low-Maintenance Champion
If you're tired of worrying about tarnish, plating, and chemical sensitivities, platinum might be your dream metal. It's the closest thing to "set it and forget it" in the jewelry world.
Why Platinum Plays by Different Rules
Chemically inert:
Platinum doesn't oxidize, doesn't tarnish, and doesn't react with acids, alkalis, or chlorine. You could theoretically wear a platinum ring in a swimming pool (though it's still risky due to the possibility of the ring slipping off in water) or while scrubbing the kitchen, and the metal itself would be unaffected.
Exceptionally hard:
Platinum is harder than gold and more resistant to scratching. It holds its shape better over years of daily wear.
Hypoallergenic:
Platinum jewelry is typically 95% pure (950 platinum), with minimal alloy content. It's one of the safest choices for people with metal sensitivities.
No coatings needed:
Unlike white gold, platinum doesn't need rhodium plating. Its natural color is a beautiful silvery-white with a subtle grey undertone.
Cleaning Platinum at Home
Despite its resilience, platinum still gets dirty. Oils, dust, and cosmetic residue accumulate just like on any other metal.
The method:
- Soapy water bath (lukewarm water + mild soap)
- Soft toothbrush for scrubbing
- Rinse thoroughly
- Dry completely
- Optional polish with a soft cloth
That's genuinely all you need. No special solutions, no careful chemical balancing, no worried glances at the gemstone chart.
For stubborn grime: You can safely use ammonia, hydrogen peroxide, commercial jewelry cleaners, or ultrasonic devices (assuming the gemstones in the piece are ultrasonic-safe).
It's genuinely difficult to damage platinum with standard home cleaning methods.
The Patina Question
Over years of wear, platinum develops a natural patina, a soft, satiny surface created by countless micro-scratches. Unlike gold, where scratches mean metal loss, platinum's scratches simply displace the metal across the surface. Nothing is actually lost.
This patina is a matter of personal preference:
- Some people love it: The soft, matte finish gives platinum a warm, lived-in character that many find more appealing than a mirror shine.
- Some people prefer the original shine: A jeweler can polish platinum back to its original brilliance at any time.
Either way, the metal itself remains undamaged and beautiful.
Your Maintenance Calendar: How Often to Clean Each Type of Jewelry
Not sure how often you should be cleaning? Here's a practical schedule based on how frequently you wear each piece.
Gold Jewelry
Daily wear pieces (wedding bands, everyday rings, favorite necklaces):
- Quick wipe with a soft cloth: After every wearing (takes 10 seconds, just to remove surface oils and dust)
- Full soapy water cleaning: Every 2-4 weeks
- Professional jeweler cleaning: Once every 6-12 months (they'll also check gemstone settings and overall condition)
Occasional wear pieces (worn a few times a month):
- Full soapy water cleaning: Every 3-6 months, or before wearing if it looks dull
- Professional cleaning: Once every 1-2 years
Silver Jewelry
Daily wear:
- Quick wipe with a soft cloth: After every wearing
- Tarnish removal: As needed (this could be weekly or monthly depending on your body chemistry, local air quality, and humidity levels)
- Professional cleaning: Once every 6-12 months
Occasional wear:
- Tarnish removal: Before wearing (if tarnish has developed during storage)
- Professional cleaning: As needed
Gold-Plated Jewelry
- Gentle dry cloth wipe: After every wearing
- Damp cloth cleaning: Every 1-2 months (with extreme gentleness)
- Professional service: When the plating wears through (for re-plating, if desired)
Platinum Jewelry
- Soapy water cleaning: Every 1-3 months (platinum accumulates grime slower than gold)
- Professional polish: Every 1-2 years (if you prefer a bright finish over natural patina)
Jewelry with Gemstones
Follow the guidelines for the most delicate component of the piece:
- Hard stones (diamonds, sapphires): Follow the metal's schedule
- Soft/organic stones (pearls, opals): Gentle wipe after every wearing, that's all
Drying Done Right: Why Wet Jewelry Is a Ticking Time Bomb
You've just finished a perfect cleaning session. Your jewelry looks fantastic. But if you rush the drying step, you could undo all your hard work.
Why Proper Drying Matters
Water loves to hide in the smallest spaces of your jewelry:
- Between chain links
- Under gemstone settings (in the tiny gaps between prongs and metal)
- Inside engravings and decorative textures
- Within clasp mechanisms
If moisture remains trapped in these areas:
- Silver tarnishes faster, because moisture accelerates the sulfide reaction
- Water spots form on metal surfaces as minerals in the water dry and leave deposits
- Some gemstones can cloud from extended moisture contact
- Adhesives weaken, since trapped water slowly dissolves the bond on any glue-set stones
The Proper Drying Method
Step 1: Pat dry with a microfiber cloth
After rinsing, gently (and we mean gently) pat rather than rub the piece dry with a clean microfiber cloth. Pay extra attention to spots where water can hide: between links, under settings, inside clasps.
Step 2: Air dry on a soft surface
Place the jewelry on a clean, dry, soft cloth or towel. Let it sit for 15-30 minutes in open air.
Choose your spot carefully:
- Not in direct sunlight (some gems fade)
- Not on a radiator or heating vent (temperature extremes damage some stones)
- Not in a closed drawer (trapped humidity)
- A clean, dry surface at room temperature is perfect
Step 3: Verify before storing
Before putting your jewelry away, inspect it. Look closely at chain links, under stones, and around clasps. If you see any remaining moisture, let it air dry longer.
What NOT to Do
Don't use a hairdryer. The concentrated hot air can damage gemstones, soften adhesives, and cause thermal stress to sensitive stones.
Don't place jewelry on a heating element. Radiators, heating vents, and stove surfaces are all too hot.
Don't put damp jewelry directly into storage. Moisture + enclosed space = accelerated tarnishing, potential water stains, and the perfect environment for tarnish to develop unseen.
Toothpaste on a gold ring is a crime, not a cleaning trick. Put the tube down.
How to Choose Jewellery That's Easy to Care For
Over years on shoots I have watched good pieces ruined by the wrong cleaning and careless storage. Here is what actually saves you time and nerves, sorted by situation.
Which pieces are easiest to keep bright? I recommend clean, simple shapes in gold, platinum or silver without deep crevices or fine openwork. Dirt has nowhere to gather in them, and a couple of minutes in soapy water brings the shine back. The fewer hard-to-reach spots, the less often you reach for a brush at all.
Gold or silver if you would rather not fuss? For a warm undertone I suggest gold and platinum: they barely tarnish and forgive rare upkeep. A cool undertone calls for silver, but build the habit of wiping it after wear or it darkens faster. The choice here is less about fashion and more about how much time you want to spend.
What should you pick for daily wear? For pieces you keep on for months I choose hard stones or none at all, with a secure setting. A diamond, sapphire or topaz will happily survive a shower and a soapy clean. Skip soft stones for that routine, they stand up to neither water nor friction.
Which stones give the least trouble? Hard stones and smooth metal are the least work. Pearl, opal, turquoise and amber ask for a dry cloth and separate storage, though they read richer for a night out. You can mix both kinds in one look, just remember they clean in different ways when you buy.
How do you build a set that never sulks? I suggest a capsule of two or three sturdy everyday pieces and a couple of delicate ones for special days. Store each item apart, in a pouch or a box compartment, so they do not scratch one another. That way the set holds its look for years and cleaning takes minutes, not a whole weekend.

Turn on your camera, pick earrings, a pendant or a ring, and see the piece on yourself in real time.
Switch items in one tap.
Everything runs in your browser: no photo or video is ever uploaded.
Frequently Asked Questions: Your Jewelry Cleaning Questions, Answered
Can I clean gold with toothpaste?
No. Toothpaste contains abrasives that scratch gold's soft surface, destroying the mirror finish. Use mild soapy water instead. It's gentler, safer, and more effective.
Why has my gold jewelry become dull?
Two factors are usually at play. First, the alloy metals in your gold (copper, silver, nickel) have oxidized slightly, creating a surface film. Second, accumulated oils, cosmetics, and dust have built up a haze over the gold's surface.
Solution: A soapy water bath with gentle brushing will likely restore the shine completely. If not, try the ammonia or hydrogen peroxide methods described earlier.
How do I restore the shine to gold-plated jewelry?
If the plating is still intact but just looks dull, a very gentle wipe with a barely damp cloth followed by buffing with a dry cloth should help.
However, if you can see patches of a different color (silvery, coppery, or greenish), the plating has worn through. No amount of cleaning can fix this. You'll need a jeweler to re-plate the piece.
Is it safe to shower with gold jewelry?
Technically, gold won't be damaged by water. But soap, shampoo, and conditioner leave residue that gradually builds up and dulls the surface. If you wear your gold in the shower daily, you'll need to clean it much more frequently.
Recommendation: It's better to remove it. The few seconds it takes to slip off a ring or unhook a necklace will save you significant cleaning effort over time.
Can I use baking soda on silver?
Only in dissolved form. Specifically, the baking soda + aluminum foil + hot water method described earlier, which uses a chemical reaction (not abrasion) to remove tarnish.
Never rub dry baking soda on silver. The crystals act as an abrasive and will scratch the surface.
How often should I clean my jewelry?
- Gold (daily wear): Every 2-4 weeks
- Silver: Whenever tarnish appears (could be weekly or monthly)
- Gold-plated: Light wipe after each wearing; damp cleaning every 1-2 months
- Pearls, opals, soft stones: Gentle wipe after every single wearing
Is it safe to use an ultrasonic cleaner at home?
Yes, but with important restrictions.
Safe: Gold, silver, and platinum pieces that are either stone-free or set with hard gemstones (diamonds, sapphires, rubies).
Not safe: Emeralds, opals, pearls, coral, amber, turquoise, gold-plated pieces, or any jewelry with glued-in stones.
Why does silver tarnish faster on me than on other people?
The rate of silver tarnishing depends primarily on the chemistry of your perspiration: its pH level, salt content, and specific chemical composition. These factors are genetically determined and vary significantly from person to person.
If you're a "fast tarnisher," you have two good options: choose rhodium-plated silver (which resists tarnishing), or simply clean more frequently. There's nothing wrong with you. It's just chemistry.
Can I put jewelry in the dishwasher?
Absolutely not.
Dishwashers combine aggressive detergents, extremely hot water, and intense mechanical agitation (the water jets and the vibration from other items). This trifecta can damage metals, destroy gemstones, strip plating, dissolve adhesives, and potentially deform delicate pieces. Keep your jewelry far from the dishwasher.
What should I do if a stone falls out after cleaning?
If a gemstone was loosely secured before cleaning, the gentle action of a toothbrush can sometimes dislodge it.
What to do:
- Find the stone immediately (check the bottom of your bowl, the drain catch, your cloth)
- Keep both the stone and the jewelry piece safe
- Take them to a jeweler for professional re-setting
Prevention: Before cleaning any piece with gemstones, gently wiggle each stone with your fingertip. If anything feels loose, take the piece to a jeweler for tightening before you clean it.
Your Complete Jewelry Care Cheat Sheet
Here's everything distilled into a single, quick-reference summary.
Gold (14K, 18K, Solid Gold)
Your go-to method: Lukewarm soapy water + soft toothbrush = solves 90% of problems
For stubborn grime: Ammonia solution or hydrogen peroxide bath
Never use: Toothpaste, dry baking soda, chlorine, harsh chemicals
Silver (Sterling 925)
For light maintenance: Silver polishing cloths (fast, easy, effective)
For moderate tarnish: Soapy water bath with gentle brushing
For severe tarnish: Baking soda + aluminum foil + boiling water (chemical restoration)
Never use: Toothpaste, dry abrasives, chlorine
Caution with gemstones: Always check the stone compatibility before using any method beyond a soft cloth wipe
Gold-Plated
The only safe method: Barely damp soft cloth, minimal pressure
Never use: Brushes (even soft ones), ammonia, peroxide, baking soda, polishing paste, ultrasonic cleaners, commercial gold cleaning solutions
Remember: Gold plating wears away over time: this is normal, not a cleaning failure
Gemstones
Hard stones (diamonds, sapphires, rubies): Can handle most cleaning methods
Medium stones (emeralds): Extremely gentle soapy water only: no ultrasonic, no chemicals
Soft/organic stones (pearls, amber, coral): Barely damp cloth only
Porous stones (turquoise): Dry cloth only
Platinum
Almost indestructible: Soapy water, brushing, commercial cleaners, and ultrasonic all work. Just be mindful of any gemstones in the piece.
Universal Rules
- Jewelry goes on last, comes off first (relative to cosmetics, perfume, and activities)
- Remove before swimming, cleaning, exercising, and showering
- Store pieces separately in a dry, dark location
- Dry completely before storing
- Clean gently and often. This is always better than cleaning rarely and aggressively
- When in doubt, use just a damp soft cloth. It's safe for everything
When to Call in the Professionals
Home cleaning handles everyday maintenance beautifully. But some situations call for professional expertise. Here's when to visit a jeweler:
Schedule a professional cleaning when:
- Home methods aren't fully restoring the shine
- You wear a piece daily and it's been 6-12 months since the last professional service
- A gemstone feels loose (they'll tighten the setting while they're at it)
- White gold is showing yellow patches (time for rhodium re-plating)
- Gold plating has worn through (time for re-plating)
- Your piece has been exposed to harsh chemicals and you're concerned about hidden damage
What a jeweler does that you can't:
- Professional ultrasonic cleaning with specialized equipment far more powerful than home units
- Steam cleaning that blasts away grime from the most inaccessible spots
- Machine polishing that removes micro-scratches and restores a true mirror finish
- Structural inspection of prong settings, clasps, and chain links for wear
- Rhodium or gold re-plating using professional electroplating equipment
Professional cleanings are typically in the affordable range for standard pieces, a small price to pay for maintaining jewelry that may be worth many times more in monetary and sentimental value.
Six fast checks, no tools. Leave your email, we'll send the PDF and a discount code.
No spam, unsubscribe anytime.
Conclusion: A Little Attention Goes a Long Way
Your jewelry is more than metal and stone. It's a gift, a memory, a piece of your identity that you carry with you every day. It deserves a few minutes of care.
The truth is that most jewelry maintenance is absurdly simple. A bowl of warm soapy water, a soft brush, a gentle cloth. That's all it takes to keep most pieces looking their best for decades. The real secret isn't some magical product or technique. It's consistency. A quick wipe after every wearing. A proper cleaning every few weeks. Smart storage habits. Removing pieces before swimming, cleaning, or exercising.
These small habits compound over time into dramatic results. Twenty years from now, a well-maintained piece will still sparkle like the day it was bought, while a neglected one may need expensive restoration or may be beyond saving entirely.
So take five minutes today. Clean something you love. You'll be amazed at the transformation.
And remember: if you're ever unsure whether a cleaning method is safe for your specific piece, err on the side of caution. A gentle approach that's slightly less effective is always better than an aggressive one that causes permanent damage. When all else fails, a soft, dry cloth is universally safe, and a professional jeweler is always just a visit away.
Your jewelry was made to be worn, loved, and admired. Give it the care it deserves, and it will reward you with a lifetime of brilliance.
Discover Jewelry Built for Real Life
Zevira creates pieces designed to be worn, not hidden away. Our sterling silver and quality gold jewelry is crafted for everyday beauty, easy maintenance, and lasting brilliance.
We believe the best jewelry is the kind you never want to take off. That's why we select only durable materials, secure stone settings, and thoughtful designs that balance elegance with practicality.
Every Zevira piece is built to shine through years of real life, and to come back to life with just a few minutes of simple care.
Explore the Zevira Collection →
Bonus: Seasonal Jewelry Care, Adapting Your Routine Throughout the Year
Your jewelry doesn't exist in a vacuum. The seasons change, and so should your care habits. Temperature, humidity, activity levels, and even wardrobe shifts all affect how your pieces age and what kind of attention they need.
Spring: The Wake-Up Call
Spring is the perfect time for a jewelry refresh. After months of winter, when your pieces may have been hidden under gloves, scarves, and heavy coats, many items are overdue for attention.
What to do:
Pull everything out of storage. Lay each piece on a clean, white cloth under good lighting. Examine them one by one. Check for:
- Tarnish accumulation (especially on silver that's been stored over winter)
- Loose stones (give each stone a gentle wiggle, since anything that moves needs professional attention before you wear it)
- Damaged clasps or chains (winter clothing can catch on delicate links and prongs)
- Dull or hazy surfaces (months of incidental contact with scarves, turtlenecks, and coats can leave a film)
Spring cleaning your jewelry collection once a year is a habit that prevents small problems from becoming expensive repairs.
Spring also means allergy season. If you find yourself washing your hands and applying lotions more frequently, remember to remove rings first. The increased chemical exposure adds up faster than you might expect.
Summer: The Danger Zone
Summer is the most hostile season for jewelry. Between sunscreen, swimming, sweat, and outdoor activities, your pieces face more threats per day than they do in any other season.
Key summer rules:
Sunscreen is your jewelry's nemesis. The chemicals in sunscreen, particularly avobenzone and octinoxate, are notoriously harsh on metals. They leave a stubborn, gummy residue that's harder to remove than typical skin oils. Apply sunscreen, wait for it to absorb completely (at least 15 minutes), then put on your jewelry. And clean your pieces more frequently during sunscreen season.
The beach is a jewelry minefield. Salt water corrodes metals. Sand is an abrasive that scratches surfaces. Sunlight fades certain gemstones. And cold ocean water causes your fingers to shrink slightly, increasing the risk of rings slipping off and being lost forever.
Rule of thumb for the beach: Leave everything in the hotel safe. If you absolutely must wear jewelry to the beach, choose inexpensive pieces you wouldn't be devastated to lose.
Outdoor festivals, BBQs, and summer parties typically involve a perfect storm of jewelry enemies: heat, sweat, sunscreen, food preparation, and drinks. Consider wearing your more resilient pieces (solid gold, platinum) and leaving delicate items (pearls, plated jewelry, porous stones) at home.
Increase your cleaning frequency. During active summer months, consider cleaning daily-wear gold and silver pieces every 1-2 weeks instead of the usual 3-4 weeks.
Fall: The Recovery Period
As summer winds down, your jewelry deserves some recovery time.
What to do:
Give every piece that survived summer a thorough cleaning. Pay special attention to pieces that were exposed to sunscreen, salt water, or heavy perspiration. These need more than a quick wipe. A proper soapy water soak and gentle brushing is warranted.
Fall is also a good time to:
- Replace worn anti-tarnish strips in your storage boxes
- Check silica gel packets. They absorb moisture over time and become saturated; replace them if they feel heavy or look discolored
- Re-evaluate your storage situation. Is your jewelry box in a location that will stay dry through the coming winter?
- Schedule professional cleanings for pieces you want looking their best for the holiday season
Winter: Protection Mode
Cold weather brings its own set of challenges.
Dry indoor air is the biggest winter concern. Central heating systems dramatically reduce indoor humidity, which can be devastating for opals (they need ambient moisture to maintain their color play) and pearls (which dehydrate in dry conditions).
If you own opals: Consider placing a small open dish of water near your jewelry storage to maintain some humidity in the immediate area, or use a small room humidifier.
If you own pearls: Wear them regularly during winter, because the brief contact with your skin's natural moisture helps counteract the dry air.
Cold temperatures cause metal to contract. Rings that fit perfectly in summer can become slightly loose in winter as your fingers shrink in the cold. Be especially cautious about wearing rings outdoors in freezing temperatures, since a loose ring can easily slip off a cold, numb finger.
Wool, cashmere, and heavy fabrics can catch on prong settings and delicate chain links. Be mindful when layering necklaces under scarves, and check your pieces after removing heavy winter clothing.
Understanding Jewelry Hallmarks: What Those Tiny Stamps Mean for Cleaning
The tiny stamps on your jewelry aren't just decorative. They tell you exactly what metal you're working with, which directly impacts how you should clean it.
Gold Hallmarks
999 or 24K: Pure gold (99.9%). Extremely rare in jewelry, since it's too soft for practical wear. Won't tarnish, but scratches incredibly easily. Clean with the gentlest methods only.
750 or 18K: 75% gold, 25% alloy metals. The gold standard (pun intended) for fine jewelry worldwide. Excellent balance of beauty, durability, and tarnish resistance. Responds beautifully to soapy water cleaning.
585 or 14K: 58.5% gold, 41.5% alloy metals. The most popular choice in the United States. More durable than 18K, but the higher proportion of alloy metals means it tarnishes slightly faster. Clean every 2-3 weeks with regular wear.
375 or 9K: 37.5% gold, 62.5% alloy metals. Common in the UK and Australia. The high alloy content means this gold tarnishes noticeably faster than higher karats. May need weekly attention if worn daily.
How to find the hallmark: Look on the inside of rings, on the clasp area of necklaces and bracelets, or on the post of earrings. You may need a magnifying glass, because these stamps are tiny.
Silver Hallmarks
999: Fine silver (99.9%). Too soft for most jewelry. Very bright and white.
925 or Sterling: Sterling silver (92.5% silver, 7.5% copper). The standard for silver jewelry worldwide. The copper content is what causes tarnishing.
800 or 835: Continental silver. Lower silver content, more copper. Tarnishes faster than sterling. Common in vintage European pieces.
What "Gold-Plated" vs. "Gold-Filled" vs. "Gold Vermeil" Means
These terms are often confused, but they represent dramatically different products with different care requirements:
Gold-plated: A very thin layer of gold (0.5-3 microns) electroplated onto a base metal. The most affordable option, but the plating wears away relatively quickly. Requires the gentlest cleaning approach.
Gold-filled (sometimes marked GF): A much thicker layer of gold (at least 5% of the item's total weight) mechanically bonded to a base metal. Significantly more durable than plating, and can last decades with proper care. Can generally tolerate soapy water cleaning, but still avoid abrasives and harsh chemicals.
Gold vermeil: Sterling silver coated with a layer of gold at least 2.5 microns thick. A middle ground between plated and solid gold. More durable than basic gold plating because the base is silver rather than brass. Clean gently. It's slightly more forgiving than standard plating, but still requires care.
Knowing exactly what you're working with helps you choose the right cleaning method and avoid damaging mistakes.
Travel Tips: Keeping Jewelry Safe and Clean on the Go
Traveling with jewelry introduces a whole new set of challenges. Unfamiliar water, different climates, increased activity levels, and the chaos of living out of a suitcase can all take a toll on your pieces.
Packing Smart
Never toss jewelry loosely into a suitcase. Pieces will tangle, scratch each other, and potentially break from the impact of baggage handling.
Use a dedicated travel jewelry organizer, a small, padded case with individual compartments. These are widely available and worth every penny. If you don't have one, you can improvise:
- Individual ziplock bags for each piece (squeeze out the air)
- Small fabric pouches, one per piece
- Wrap each item in a small piece of tissue paper and place inside a hard-sided container like a glasses case
Thread necklaces through a drinking straw to prevent tangling. Seriously, it works. Open the clasp, thread the chain through the straw, then close the clasp. The rigid straw keeps the chain straight.
Cleaning While Traveling
You probably won't have your full cleaning kit on the road, but you can still maintain your pieces:
Pack a microfiber cloth. It's small, lightweight, and handles 90% of on-the-go maintenance. A quick wipe after each day's wearing removes the day's oils and dust.
Bring a single silver polishing cloth if you're traveling with silver pieces. It takes up almost no space.
In a hotel room: If a piece needs more than a wipe, use the hotel soap (which is usually mild) and lukewarm water from the bathroom tap. Follow the standard soapy water method, and dry thoroughly.
Climate Considerations
Humid tropical destinations accelerate tarnishing, especially on silver. Clean more frequently, and consider leaving fine silver pieces at home in favor of gold or platinum.
Hot, dry desert climates can dehydrate opals and pearls. If you're bringing these stones to an arid destination, wear them against your skin (the natural moisture helps) and store them in sealed bags overnight to retain some humidity.
Chlorinated resort pools and hot tubs are just as dangerous abroad as they are at home. Remove all jewelry before swimming. No exceptions, no matter how inconvenient it feels on vacation.
Ocean activities (snorkeling, surfing, swimming in the sea) are a hard no for jewelry. Beyond the chemical corrosion from salt water, the risk of losing a piece in the ocean is very real and very permanent.
The Psychology of Jewelry Care: Building Habits That Stick
Knowing how to clean your jewelry is one thing. Actually doing it consistently is another. Here are some practical strategies for turning good intentions into automatic habits.
The "Jewelry Landing Pad"
Designate one specific spot in your home as the place where jewelry goes when you take it off. This could be a small dish by your front door, a ring holder on your bathroom counter, or a tray on your nightstand.
The key is consistency, always the same spot, every single time. When removing your jewelry becomes associated with a specific location and routine (come home → put keys on hook → put jewelry on dish), it becomes automatic.
This also prevents the most common way people lose jewelry: taking it off in random locations and forgetting where they put it.
The "Sunday Sparkle" Routine
Pick one day per week (Sunday works well for many people) and dedicate five minutes to jewelry maintenance. Check what needs cleaning, give daily-wear pieces a quick soapy water bath, polish anything that looks dull, and return everything to proper storage.
Five minutes once a week prevents the need for intensive cleaning sessions later. It's like brushing your teeth, where a small daily effort prevents big problems.
The "Three Second Check"
Before you put on any piece of jewelry, take three seconds to look at it. Is it dull? Does anything feel loose? Is the clasp working properly?
This tiny habit catches problems early: before a loose stone falls out during your commute, before tarnish builds up into a black crust, before a weakened chain link gives way.
The "Box Rule"
If a piece goes back into its storage spot still dirty, you've broken the rule. Make it a non-negotiable: every piece gets at least a quick wipe with a soft cloth before it goes back in the box.
This single habit will dramatically reduce how often you need deep cleaning sessions.
Send a friend a discount code, they save on their first order.
Common Myths Debunked: What the Internet Gets Wrong About Jewelry Care
The internet is full of jewelry cleaning advice, and a shocking amount of it is wrong, misleading, or actively harmful. Let's set the record straight on the most persistent myths.
Myth: "Ketchup cleans silver"
The claim: Dip your silver in ketchup for a few minutes, and the tarnish will disappear.
The reality: Ketchup contains acetic acid (from vinegar) and citric acid (from tomatoes), which can remove some tarnish. But these acids are unpredictable in concentration, and the sugar in ketchup leaves a sticky residue that's surprisingly difficult to remove. Plus, the acids can damage gemstones and react with certain alloy metals.
The verdict: Please don't put your jewelry in condiments. Use a proper cleaning method.
Myth: "Coca-Cola cleans jewelry"
The claim: Soak your jewelry in Coca-Cola overnight for sparkling results.
The reality: Cola contains phosphoric acid, which can dissolve some tarnish and mineral deposits. But it also contains sugar, caramel coloring, and other compounds that leave residue, can stain porous stones, and may react unpredictably with certain metals.
The verdict: Another condiment-based "hack" that creates more problems than it solves. Soapy water is simpler, safer, and more effective.
Myth: "Rubbing alcohol is safe for all jewelry"
The claim: A quick wipe with rubbing alcohol disinfects and cleans your jewelry.
The reality: Isopropyl alcohol is safe for solid gold, silver, and platinum. But it can devastate organic gemstones: amber dissolves in alcohol, pearls are damaged by it, and opals can be affected. It also accelerates the wear of gold plating and can strip certain surface treatments from gemstones.
The verdict: If your piece is solid metal with no stones (or only hard mineral stones), alcohol is fine. For anything else, stick to soapy water.
Myth: "Ultrasonic cleaners are safe for everything"
The claim: If jewelers use them, they must be safe for all jewelry.
The reality: Professional jewelers carefully assess each piece before deciding whether to use ultrasonic cleaning. They know which stones can handle it and which can't. Home users who toss everything into their ultrasonic machine without checking are gambling with their gemstones.
The verdict: Ultrasonic cleaners are powerful tools, but they're not universal. Check the gemstone guide in this article before using one, and when in doubt, skip it.
Myth: "Expensive cleaning products work better than soap and water"
The claim: You need specialized products for good results.
The reality: For basic, routine maintenance, mild soapy water is genuinely as effective as most commercial cleaning solutions. Specialized products have their place: silver dip solutions handle extreme tarnish faster than home methods, and polishing pastes can achieve a higher shine. But for day-to-day care, soap and water handle 90% of situations perfectly.
The verdict: Save your money for the occasional specialty product when you actually need it. Your daily cleaning routine can be virtually free.
Myth: "If my white gold is turning yellow, it needs cleaning"
The claim: The yellow tone on white gold is dirt or tarnish that can be cleaned away.
The reality: As explained earlier, the yellow color is the base white gold metal showing through worn rhodium plating. This is a physical change, not a surface contamination. No amount of cleaning will turn it white again.
The verdict: This requires re-plating by a jeweler, a routine, affordable service.
Jewelry Care for Different Lifestyles
Not everyone lives the same way, and your lifestyle should shape your jewelry care strategy.
For the Fitness Enthusiast
If you work out regularly, your jewelry faces extra challenges: heavy perspiration, impact during weight training, chlorine from pool swimming, and the friction of wearing pieces during high-movement activities.
Best practices:
- Remove all jewelry before working out. Even "tough" metals like platinum accumulate sweat residue that accelerates tarnishing and dulling.
- Designate a safe spot in your gym bag, such as a small zippered pouch, for your pieces.
- Clean your daily-wear pieces more frequently (weekly rather than bi-weekly) to counteract the extra sweat exposure.
- Consider a separate set of workout-appropriate pieces if you really can't go bare-wristed to the gym. Silicone rings and stainless steel bands can handle what precious metals can't.
For the Frequent Cook
Kitchens are full of jewelry hazards: onion and garlic juices (sulfur compounds that tarnish silver instantly), cooking oils, acidic ingredients (tomatoes, citrus, vinegar), and the constant handwashing that comes with food preparation.
Best practices:
- Remove rings before cooking. This is non-negotiable for hygiene as well as jewelry care.
- If you cook daily, clean your rings weekly. Kitchen exposure accelerates buildup significantly.
- Be especially careful with silver in the kitchen. Egg yolk contains sulfur compounds that can turn silver black on contact.
For the Healthcare Professional
Frequent handwashing (sometimes dozens of times per day), contact with sanitizing agents, and latex or nitrile glove use all affect jewelry.
Best practices:
- Many facilities prohibit hand jewelry for infection control reasons. Follow your workplace policy.
- If rings are permitted, choose smooth, simple bands without prong settings or engraving where bacteria can hide.
- The constant soap-and-sanitizer cycle rapidly dulls jewelry. Plan for weekly cleaning if you wear pieces at work.
- Nitrile and latex gloves can trap moisture against rings, accelerating tarnish on silver.
For the Gardener
Soil is a surprisingly aggressive abrasive, and the chemicals in fertilizers, pesticides, and even certain plants can damage metals and stones.
Best practices:
- Remove all jewelry before gardening. Rings get packed with soil that's extremely difficult to remove from prong settings. Bracelets and watches catch on branches and tools.
- After accidental exposure to soil, give the piece a thorough soapy water bath with careful brushing to remove all particles before they can scratch the metal.
Emergency Fixes: What to Do When Things Go Wrong
Sometimes, despite your best efforts, something goes sideways. A ring slips into a drain. A pearl strand breaks. Silver turns jet-black overnight. Here's your emergency playbook.
"I Dropped My Ring Down the Drain!"
Don't panic. Don't run the water.
In most modern plumbing, the ring is sitting in the P-trap, the curved section of pipe directly below the drain. It's designed to hold water (which prevents sewer gases from coming up), and heavy objects like rings get caught here.
What to do:
- Immediately stop all water flow to that sink
- Place a bucket under the P-trap (the curved pipe under the sink)
- Unscrew the P-trap fittings by hand or with pliers (most are hand-tightenable)
- Let the water drain into the bucket, and your ring should be in there
- If you're not comfortable doing this yourself, call a plumber (tell them it's urgent before you accidentally run more water)
Prevention: Always close the drain or work over a bowl when handling wet jewelry near a sink.
"My Silver Turned Completely Black!"
This looks alarming but is almost always reversible. Severe black tarnish is just a thick layer of silver sulfide, the same stuff that causes mild tarnish, just more of it.
What to do:
Use the baking soda + aluminum foil method described earlier. For extreme cases, you may need to repeat the process 2-3 times. Between treatments, gently brush with a soft toothbrush to help loosen stubborn spots.
If the foil method isn't enough, a commercial silver dip solution will handle even the most severe tarnish. Dip, wait, rinse, dry, and it's remarkably effective.
"I Lost One Earring of a Pair"
It happens to almost everyone eventually: you reach up, the back is gone, and so is the stud. Before resigning yourself to a single orphan, retrace the day and check obvious places (collar, hood, car seat, bedding). If it does not turn up, the practical guide on what to do when you've lost an earring covers replacement, restyling the surviving stud as a single asymmetric piece, and salvage strategies.
"My Pearl Necklace Broke!"
Immediate steps:
- Gather every pearl you can find, checking the floor, crevices, under furniture, and pockets
- Count them if you know how many beads should be on the strand
- Store them safely in a soft pouch or small container
- Take them to a jeweler for re-stringing
Important note: Quality pearl necklaces should be re-strung every 1-2 years with regular wear, even if they haven't broken. The silk thread weakens over time from exposure to body oils and moisture. If your pearls broke, they were likely overdue for re-stringing.
Future prevention: Have your pearl strands professionally re-strung on knotted silk (with a knot between each pearl) every 12-24 months. The knots serve two purposes: they prevent pearls from rubbing against each other (which causes wear), and if the strand breaks, only one pearl falls off instead of the entire strand scattering across the floor.
"I Think I Scratched My Gemstone"
Whether a scratch is permanent depends entirely on what scratched what:
- If a hard stone (diamond, sapphire, ruby) was scratched by something softer: It's probably not actually scratched. It may just have surface residue that looks like a scratch. Clean it and re-examine.
- If a soft stone (opal, pearl, turquoise, amber) has a visible scratch: Unfortunately, this is likely permanent. A jeweler may be able to re-polish some stones, but this isn't always possible, especially for porous and organic stones.
- If the metal is scratched (not the stone): Minor scratches can be polished out by a jeweler. Deep scratches may require more extensive work.
Prevention: Store each piece separately, and handle gemstone-set jewelry with care.
"I Used the Wrong Cleaning Method and Now My Jewelry Looks Worse"
If you accidentally used an abrasive (toothpaste, dry baking soda, a rough cloth) and your piece is now scratched and matte:
For gold and silver: A professional jeweler can re-polish the piece, restoring the original mirror finish. This is a standard, routine service.
For gold plating: If the plating was scratched through, the only fix is professional re-plating.
For gemstones: Depends on the stone. Hard stones can often be re-polished. Soft stones may be permanently altered.
If you used a chemical method that went wrong (discoloration, spots, cloudiness), take the piece to a jeweler immediately and tell them exactly what you used. The sooner they can assess and treat it, the better the outcome.
Jewelry Insurance: Protecting Your Investment Beyond Cleaning
This might seem like a tangent in a cleaning guide, but it's worth mentioning: if you own valuable jewelry, insurance is part of comprehensive care.
Why it matters for a cleaning guide:
Even with perfect maintenance habits, accidents happen. A stone can loosen during normal wear and fall out unnoticed. A chain can snap. A ring can be lost. And no amount of cleaning or careful storage protects against theft.
Types of jewelry insurance:
- Homeowner's or renter's insurance may cover jewelry, but often with low limits and restrictions. Check your policy: many cap individual jewelry items at a modest amount unless you've purchased additional coverage.
- Standalone jewelry insurance (offered by specialist insurers) provides broader coverage including loss, theft, damage, and mysterious disappearance. Premiums are typically 1-2% of the item's value per year.
- Jewelry-specific riders on your existing home insurance policy can increase coverage limits for specific pieces.
What you need:
- A professional appraisal (updated every 2-3 years, as metals and gemstone values fluctuate)
- Clear photographs of each insured piece
- Original receipts if available
The connection to care: Many insurance policies require that you maintain your jewelry in reasonable condition and have it professionally inspected on a regular basis. Good care habits don't just protect the jewelry itself. They protect your ability to make a claim if something goes wrong.
The Environmental Angle: Sustainable Jewelry Care
Caring for your existing jewelry is one of the most environmentally friendly things you can do. Maintaining what you already own means less demand for new mining, less manufacturing, and less waste.
Why Repair Beats Replace
Every piece of jewelry that gets maintained and repaired instead of discarded and replaced represents:
- Reduced mining impact, since gold and silver mining have significant environmental footprints
- Lower carbon emissions, since manufacturing new jewelry requires energy-intensive processes
- Less waste, since broken or neglected jewelry that ends up in landfills is a loss of valuable materials
When a piece needs professional attention (polishing, re-plating, stone re-setting, chain repair), it's almost always more environmentally responsible (and usually more affordable) to repair it than to buy a replacement.
Choosing Eco-Friendly Cleaning Products
If you opt for commercial jewelry cleaning products, look for:
- Biodegradable formulations
- Non-toxic ingredients
- Minimal packaging
- Refillable containers
Better yet, the soapy water method, which uses only mild soap and tap water, has essentially zero environmental impact. It's the greenest cleaning method available.
Extending Lifespan Is the Greenest Choice
A gold ring that lasts a lifetime (or multiple lifetimes, as an heirloom) has a fraction of the environmental impact per year of ownership compared to a series of cheaply made pieces that are worn briefly and discarded.
Investing in quality pieces and caring for them properly is sustainable jewelry ownership at its best.
DIY vs. Professional: Making the Right Call
One of the most common questions jewelry owners face is: "Can I handle this at home, or do I need a professional?" Here's a clear framework for making that decision.
Definitely DIY (Home Cleaning Is Perfect For):
Routine maintenance cleaning. The soapy water method, silver polishing cloths, and gentle wiping are all perfectly suited for home care. If your piece just needs its regular refresh, you don't need a jeweler any more than you need a mechanic to fill your gas tank.
Light to moderate tarnish removal on silver. Unless the tarnish is in an unusual pattern or accompanied by other signs of damage, home tarnish removal is safe and effective.
Dust and oil removal from gold pieces. The standard soapy water bath is the exact same first step a jeweler would take. You're just doing it yourself.
Wiping down pearl, amber, and turquoise jewelry. The gentle cloth method described in this guide is actually better done at home, where you can take your time and be as gentle as needed, rather than in a busy workshop.
Gray Area (Home Cleaning Might Work, But Be Careful):
Heavily tarnished silver with gemstones. If you know your stones are hard (diamonds, sapphires, rubies), home methods are fine. If you're unsure about the stone type, a jeweler can identify it before you accidentally damage a soft stone.
Gold with unknown stones. Inherited or second-hand jewelry may contain stones you can't identify. When in doubt, consult a professional before applying any chemical cleaning method.
Pieces with intricate filigree or very fine details. If you can't reach all the crevices with a soft brush and the piece still looks dirty after home cleaning, a professional ultrasonic bath can reach what you can't.
Antique or vintage jewelry. Old pieces may have construction methods, stones, or finishes that differ from modern jewelry. If you have something that's genuinely old and valuable, get professional advice before attempting any cleaning.
Definitely Professional (Don't Try This at Home):
Loose or missing stones. This requires mechanical repair: resetting prongs, applying new adhesive, or replacing stones. Not a cleaning issue.
Structural damage. Bent prongs, stretched or weakened chain links, broken clasps, and cracked settings all need a jeweler's tools and expertise.
Rhodium re-plating. Requires professional electroplating equipment. No home method can replace a worn rhodium layer.
Gold re-plating. Same as above, because electroplating requires specialized equipment and expertise.
Re-stringing pearl necklaces. Requires specific materials (silk or nylon thread), knotting technique, and the right tools. A jeweler or bead-stringer will do this properly.
Polishing out deep scratches. Professional polishing wheels and compounds can remove scratches that are too deep for hand polishing. Be aware that polishing always removes a microscopic layer of metal, so it should be done sparingly.
Repairing or replacing watch components. If your watch is also a piece of jewelry (and many are), internal components require a watchmaker's expertise.
Reading Your Jewelry: What Discoloration Patterns Mean
Experienced jewelry owners learn to "read" their pieces, understanding what different types of discoloration mean and what they indicate about the health of the jewelry.
Yellow Patches on White Gold
What it means: The rhodium plating has worn through in those areas, revealing the natural yellowish tone of the underlying white gold alloy.
What to do: Schedule rhodium re-plating with your jeweler.
Green Stains on Your Skin (From Rings or Bracelets)
What it means: The copper in the alloy is reacting with your sweat, creating copper chloride, a harmless green compound that transfers to your skin. This is more common with lower-karat gold (9K, 10K) and with copper-based alloys in fashion jewelry.
What to do: The green on your skin washes off easily. For the jewelry itself, more frequent cleaning helps. If it bothers you, applying a thin layer of clear nail polish to the inside surface of rings can create a barrier between the copper and your skin.
Black Tarnish Concentrated in Crevices
What it means (on silver): Normal tarnish accumulating in areas where air contact is greatest and cleaning hasn't reached. Some people actually prefer this look. It's called "oxidized" or "antiqued" silver, and it highlights surface details beautifully.
What it means (on gold): Buildup of dirt, oils, and cosmetics in hard-to-reach areas. Rarely actual chemical tarnish.
What to do: A thorough cleaning with a soft brush should remove it. If you like the antiqued look on silver, clean only the raised surfaces and leave the dark crevices alone.
Cloudy or Milky Appearance on a Gemstone
What it means: Depends on the stone. For diamonds, it's usually a buildup of oils and lotions on the surface, easily cleaned. For opals, it could indicate dehydration, a more serious concern. For pearls, it might mean the nacre is deteriorating from chemical exposure.
What to do: Start with a gentle cleaning. If the cloudiness doesn't clear up, consult a jeweler for assessment.
Rainbow or Iridescent Film on Metal
What it means: A thin oxide layer has formed on the metal surface. This sometimes happens with lower-karat gold and can be caused by chemical exposure.
What to do: Usually removable with a standard soapy water cleaning. If persistent, a jeweler can assess and treat it.
Pitting (Small Divots or Craters on the Metal Surface)
What it means: Chemical damage, often from chlorine exposure. The chemicals have literally eaten tiny holes into the metal surface.
What to do: This is permanent damage that cannot be reversed with cleaning. A jeweler may be able to improve the appearance through polishing, but severe pitting may require more extensive restoration. Prevention (avoiding chlorine) is the only real answer here.
Building Your Jewelry Wardrobe with Maintenance in Mind
If you're building or expanding a jewelry collection, considering maintenance requirements before you buy can save you significant time, effort, and expense over the years.
Low-Maintenance Metals
Platinum: The undisputed champion of low-maintenance metals. No tarnish, no plating to wear through, resistant to most chemicals. Clean it when it gets dirty and that's essentially it.
High-karat gold (18K+): More gold in the alloy means less tarnishing, less reactivity, and less maintenance overall. 18K gold is the sweet spot for most people, durable enough for daily wear, with minimal tarnishing.
Stainless steel: While not a precious metal, stainless steel jewelry is virtually indestructible and requires almost no maintenance. A good choice for everyday pieces that see heavy use.
Moderate-Maintenance Metals
14K gold: The most popular choice in many markets. Durable and beautiful, but the higher alloy content means it tarnishes faster than 18K. Expect to clean bi-weekly to monthly.
Sterling silver (with rhodium plating): Rhodium prevents tarnishing, giving you the beauty of silver with significantly less maintenance. The plating does wear off over time, but lasts much longer than gold plating.
High-Maintenance Materials
Sterling silver (unplated): Beautiful, but demands regular tarnish maintenance. If you love silver, embrace the cleaning routine or invest in anti-tarnish storage.
Gold-plated jewelry: Requires careful handling and limited lifespan. Best for pieces you wear occasionally rather than daily.
Pearls: Require consistent gentle care and careful wearing habits. Worth every moment of attention for the beauty they bring.
Stone Maintenance Considerations
Lowest maintenance: Diamonds, sapphires, and rubies are hard, stable, and easy to clean.
Moderate maintenance: Topaz, amethyst, and garnet are durable but come with specific sensitivities (heat, light).
Highest maintenance: Emeralds, opals, pearls, turquoise, and amber each have unique vulnerabilities that demand careful, individualized attention.
Choosing pieces whose maintenance requirements match your lifestyle ensures that you'll actually enjoy wearing them, rather than leaving them in a drawer because they're "too much trouble" to keep clean.
The Smart Buyer's Checklist
Before purchasing a new piece, ask yourself these questions:
"How often will I wear this?"
Daily-wear pieces should be made from durable materials that can handle frequent cleaning. Occasional pieces can be more delicate, since they'll spend most of their time safely stored.
"Am I willing to maintain this?"
If the answer is no, if you know you won't consistently wipe pearls after wearing them or regularly polish silver, choose materials that forgive neglect. Platinum and high-karat gold are far more forgiving than silver or plated pieces.
"What activities will I do while wearing this?"
A chef should think twice about an emerald ring. A swimmer should avoid silver bracelets. A gym enthusiast might prefer platinum or stainless steel over plated pieces. Match your jewelry to your life.
"Do I have safe storage for this?"
Before adding to your collection, make sure you have appropriate storage: individual pouches, separated compartments, or anti-tarnish environments for silver. Cramming new pieces into an overcrowded box guarantees scratching and accelerated wear.
"Can I identify and care for the gemstones?"
If a piece contains stones you can't identify, ask the seller. Knowing what you own is the first step to caring for it properly. Reputable sellers will always be able to tell you exactly what stones and metals are in a piece.
Building a jewelry collection is one of life's great pleasures. Doing it with maintenance awareness ensures that every piece brings you joy for years, not frustration.
When you combine smart purchasing decisions with consistent care habits, the result is a collection that grows more beautiful and more meaningful with every passing year. Each piece tells a story, and proper care ensures that story continues for generations.
Remember: the best jewelry isn't the most expensive. It's the most loved, the most worn, and the best cared for.
That's what separates a jewelry collection from a jewelry pile.
Now go make something sparkle.
Silver and gold jewellery, wedding bands, symbolic pendants, paired sets.
A Final Word on Value: Your Jewelry Deserves This
Here's a truth that many people don't consider: proper care protects your investment.
A well-maintained engagement ring looks as beautiful at its 50th anniversary as it did on proposal day. A cared-for silver necklace can become a cherished heirloom passed down through generations. A properly stored gold bracelet holds its resale value far better than one that's been scratched, tarnished, and neglected.
On the other hand, a diamond ring with a permanently scratched band, a silver brooch with deep pitting from chlorine exposure, or a pearl necklace that's been dehydrated to the point of cracking. These are losses that can't be fully recovered, no matter how much you spend on restoration.
The time investment is minimal. A few minutes after each wearing. A proper cleaning session once or twice a month. Smart storage habits that take seconds to implement. That's all it takes to protect pieces that may hold thousands of dollars in value, and immeasurable sentimental worth.
Your jewelry was chosen with care, given with love, and worn with pride. Return the favor with a little attention. The sparkle you get back will be worth every second.
Explore the Zevira Collection →
About Zevira
Zevira makes jewellery by hand in Albacete, Spain. We work with 925 silver and quality gold for one simple reason: these materials are built for everyday wear and bounce back to a clean shine with the easy at-home methods covered in this guide.
Here is what you will find with us if you value pieces that stay easy to look after:
- Earrings and rings in 925 silver that come clean with a soapy bath or a quick pass of a polishing cloth
- Pieces in 14-18K gold with secure stone settings that hold up to regular gentle cleaning
- Chains and bracelets with sturdy links, so grime has nowhere to collect between the details
- Paired and symbolic designs set with hard stones that handle a thorough clean without worry
- Smooth, pared-back shapes with no tight crevices for cosmetics and dust to hide in
Every piece is made by hand by a single craftsperson, with the option of personal engraving. 925 silver and 14-18K gold.
#JewelryCare #HowToCleanGold #HowToCleanSilver #GoldPlatedJewelry #Zevira #JewelryTips #HomeCleaning #JewelryMaintenance #SilverCare #GoldCare