Jewellery Layering: How to Combine Multiple Pieces and Actually Look Good
The single pendant problem
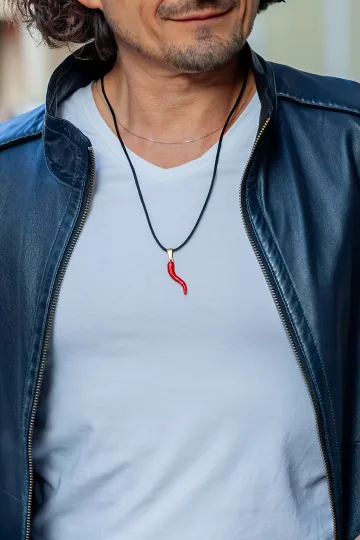
She was wearing one necklace. A delicate chain with a small pendant, sitting right at the collarbone. Nothing wrong with it. Clean, simple, perfectly fine. The kind of thing you put on without thinking and forget about by lunch.
Then her friend walked in. Three chains. Different lengths, different textures, different pendants. A thin gold chain sitting high on the throat. A medium-length piece with a crescent moon. A longer chain with a blue stone pendant resting just above the neckline of her shirt. The whole thing looked effortless, like she'd thrown it all on in thirty seconds. But it completely changed the energy of her outfit. A plain black t-shirt and jeans suddenly looked intentional, curated, interesting.
The first woman touched her single pendant and asked the question that millions of people have asked: "How do you do that? How do you put multiple pieces together without it looking like a mess?"
That's what this guide is about. Not theory. Not vague "express yourself" advice. Actual, practical rules for combining jewellery (necklaces, bracelets, rings) in ways that look deliberate rather than chaotic. Because there's a real difference between layered and cluttered, and it comes down to a handful of principles that anyone can learn.
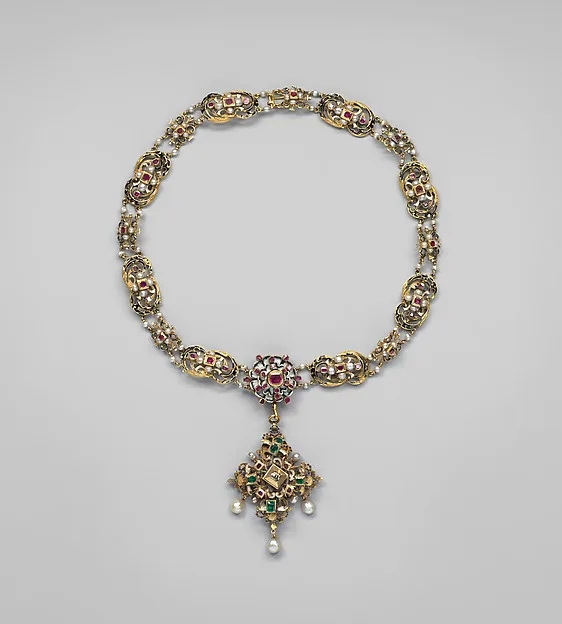
The funny thing is, layering isn't new. People have been stacking and combining jewellery for thousands of years. Egyptian pharaohs wore multiple collars. Indian brides layer dozens of bangles. West African women stack gold rings up their fingers. What's changed is that layering has moved from cultural tradition into everyday personal style, and people want to know the actual mechanics of how to do it well.
Let's get into it.
What is jewellery layering
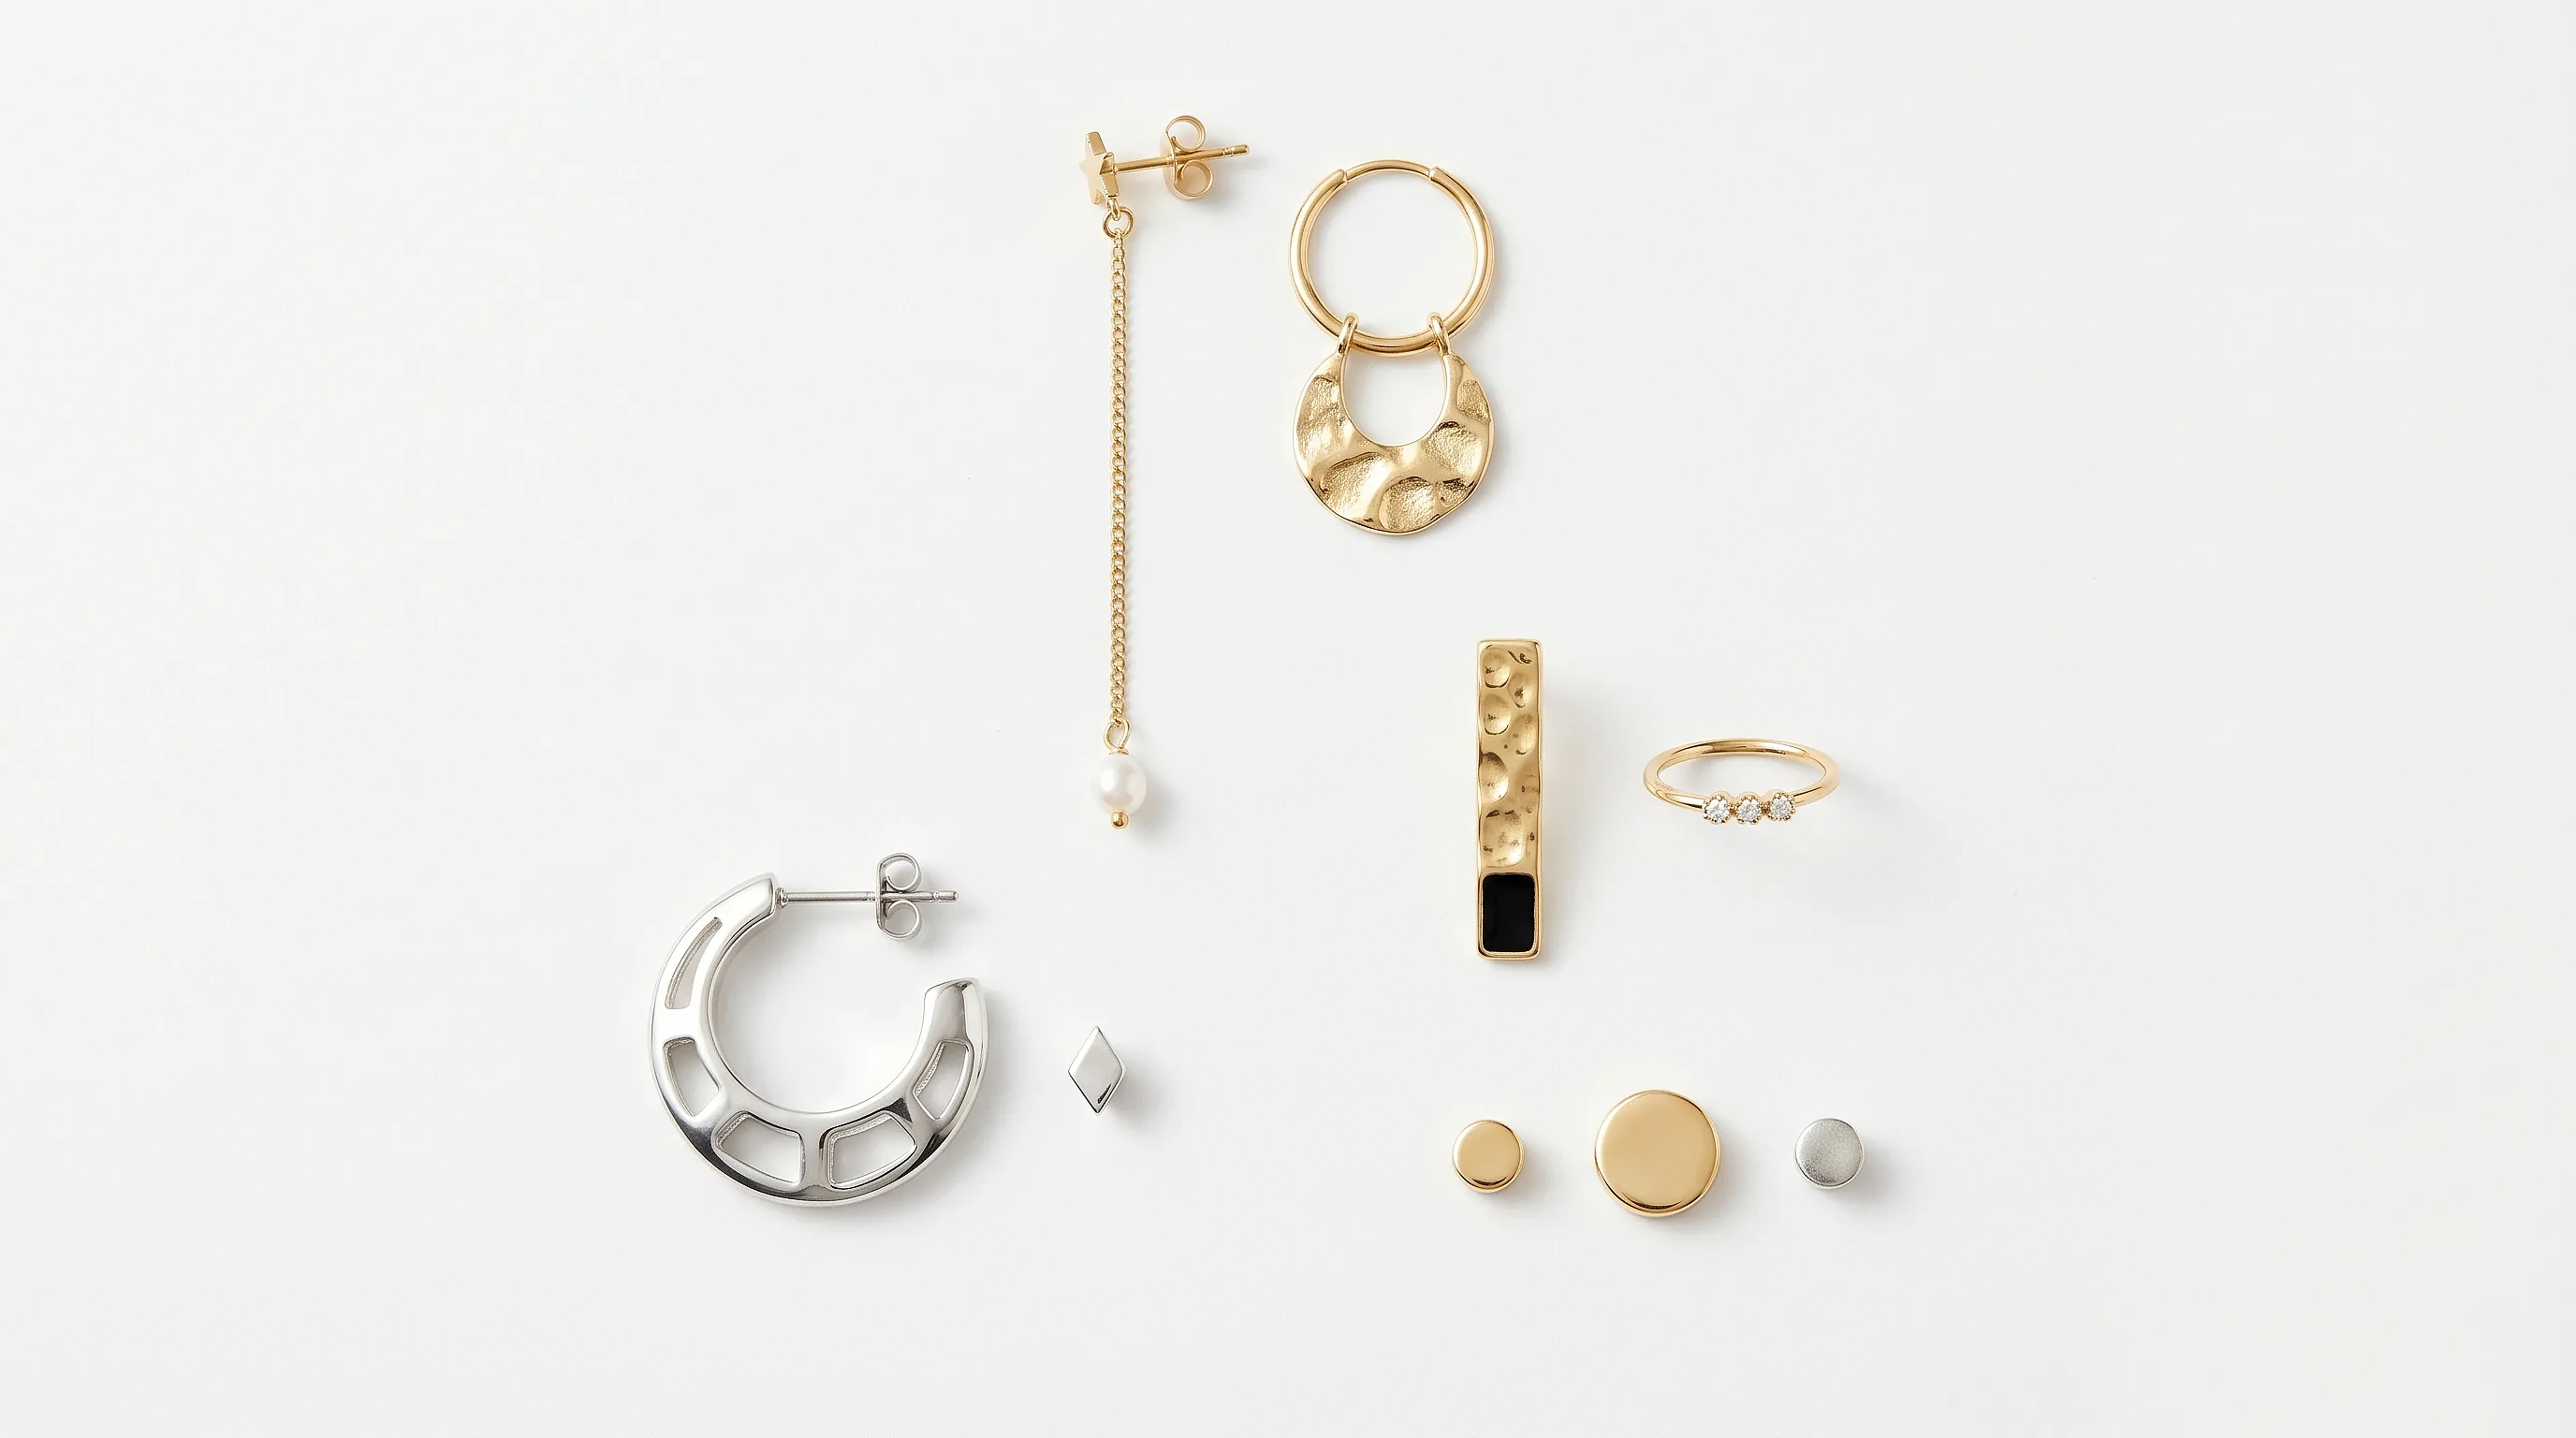
Layering is exactly what it sounds like: wearing multiple pieces of jewellery together in a way that creates visual depth and interest. Instead of one necklace, you wear two or three at different lengths. Instead of a single bracelet, you stack several on the same wrist. Instead of one ring, you spread them across multiple fingers.
But here's the thing that separates good layering from a random pile of accessories: intention. When someone layers well, each piece has a reason to be there. The lengths are deliberately different. The textures contrast. The weights balance. There's usually one standout piece that anchors the whole arrangement, with supporting pieces that complement without competing.
The trend has been building steadily for the past decade, and it's not slowing down. Social media accelerated it. Instagram and TikTok made it easy to see how other people combine their pieces, and suddenly everyone realised that one necklace at a time was a self-imposed rule that nobody actually needed to follow. Stylists started calling it "jewellery cocktailing," and the term stuck.
Why does layering work so well? A few reasons. First, it creates visual texture on what might otherwise be a plain outfit. A simple white shirt becomes something entirely different with three well-chosen chains. Second, it lets you tell a story. Each pendant or charm can represent something meaningful: a celestial symbol, an ocean motif, a tarot reference. Wearing them together creates a personal narrative that a single piece can't match. Third, it's forgiving. Unlike choosing one "perfect" necklace for every outfit, layering lets you mix and match from what you already own. Different combinations for different days. No single piece has to carry all the weight.
And honestly, it's just fun. There's a real creative satisfaction in pulling three or four pieces out of a jewellery box and discovering that they look great together in a way you hadn't planned.
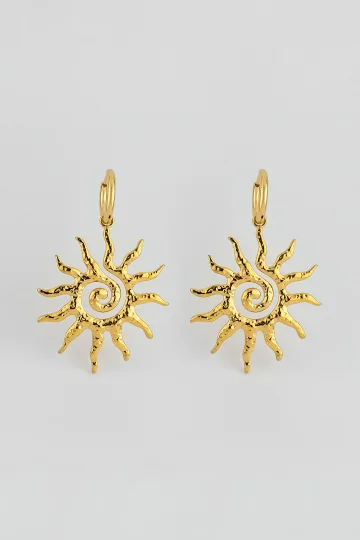
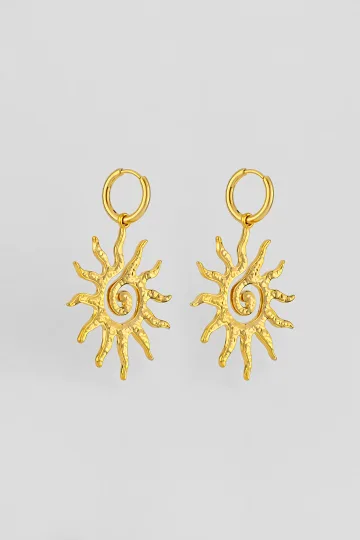
Wear the symbol, don't just read about it. These are in stock:


The rules of layering
Rules is a strong word. Think of these as guidelines that make the difference between "that looks really put together" and "did you grab everything out of the drawer this morning?"
The odd number principle
This one comes from interior design, but it applies perfectly to jewellery. Odd numbers (three, five, seven) create more visually interesting arrangements than even numbers. Two necklaces can look like you couldn't decide between them. Three necklaces look like a deliberate choice.
The sweet spot for most people is three. Three necklaces, three bracelets, three rings across both hands. It's enough to create the layered effect without overwhelming. Five works for bracelets (wrists can handle more volume) and rings (spread across fingers). Seven is festival territory. Go for it, but know what you're doing.
Why do odd numbers work? It comes down to symmetry and the human brain. Even numbers create a sense of balance that reads as static. Odd numbers create a subtle visual tension that the eye finds more interesting. Three elements give you a beginning, middle, and end, a visual story. Two elements just sit there.
That said, this isn't gospel. Two rings on one hand looks great. Four bracelets can work perfectly. But when in doubt, go odd. It's a reliable starting point.
Vary your lengths
This is probably the single most important rule, especially for necklaces. If all your chains are the same length, the pendants cluster together in one spot, tangle constantly, and create a visual blob instead of a cascading effect.
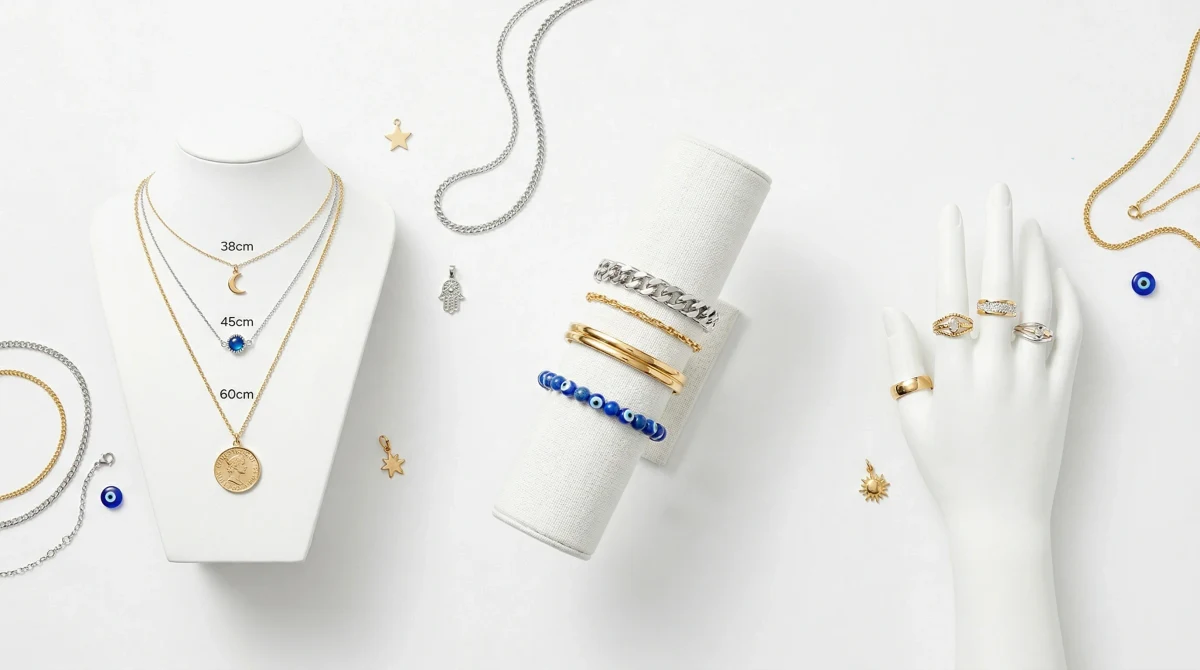
The classic three-necklace setup uses these approximate lengths: 35-40 cm (choker/collarbone), 45-50 cm (mid-chest), and 55-65 cm (below the neckline). This creates clear separation between each piece, lets each pendant breathe, and produces that cascading waterfall effect that makes layering look so good.
For bracelets, varying lengths means mixing widths and fits instead. A tight-fitting chain bracelet, a slightly looser cuff, and a beaded bracelet that sits loosely on the wrist. The different circumferences create natural spacing.
For rings, the "length" equivalent is placement. Spread them across different fingers rather than stacking three on one finger (which can look bulky and uncomfortable). An index finger ring, a middle finger ring, and a pinky ring create a more balanced visual spread.
Mix textures and weights
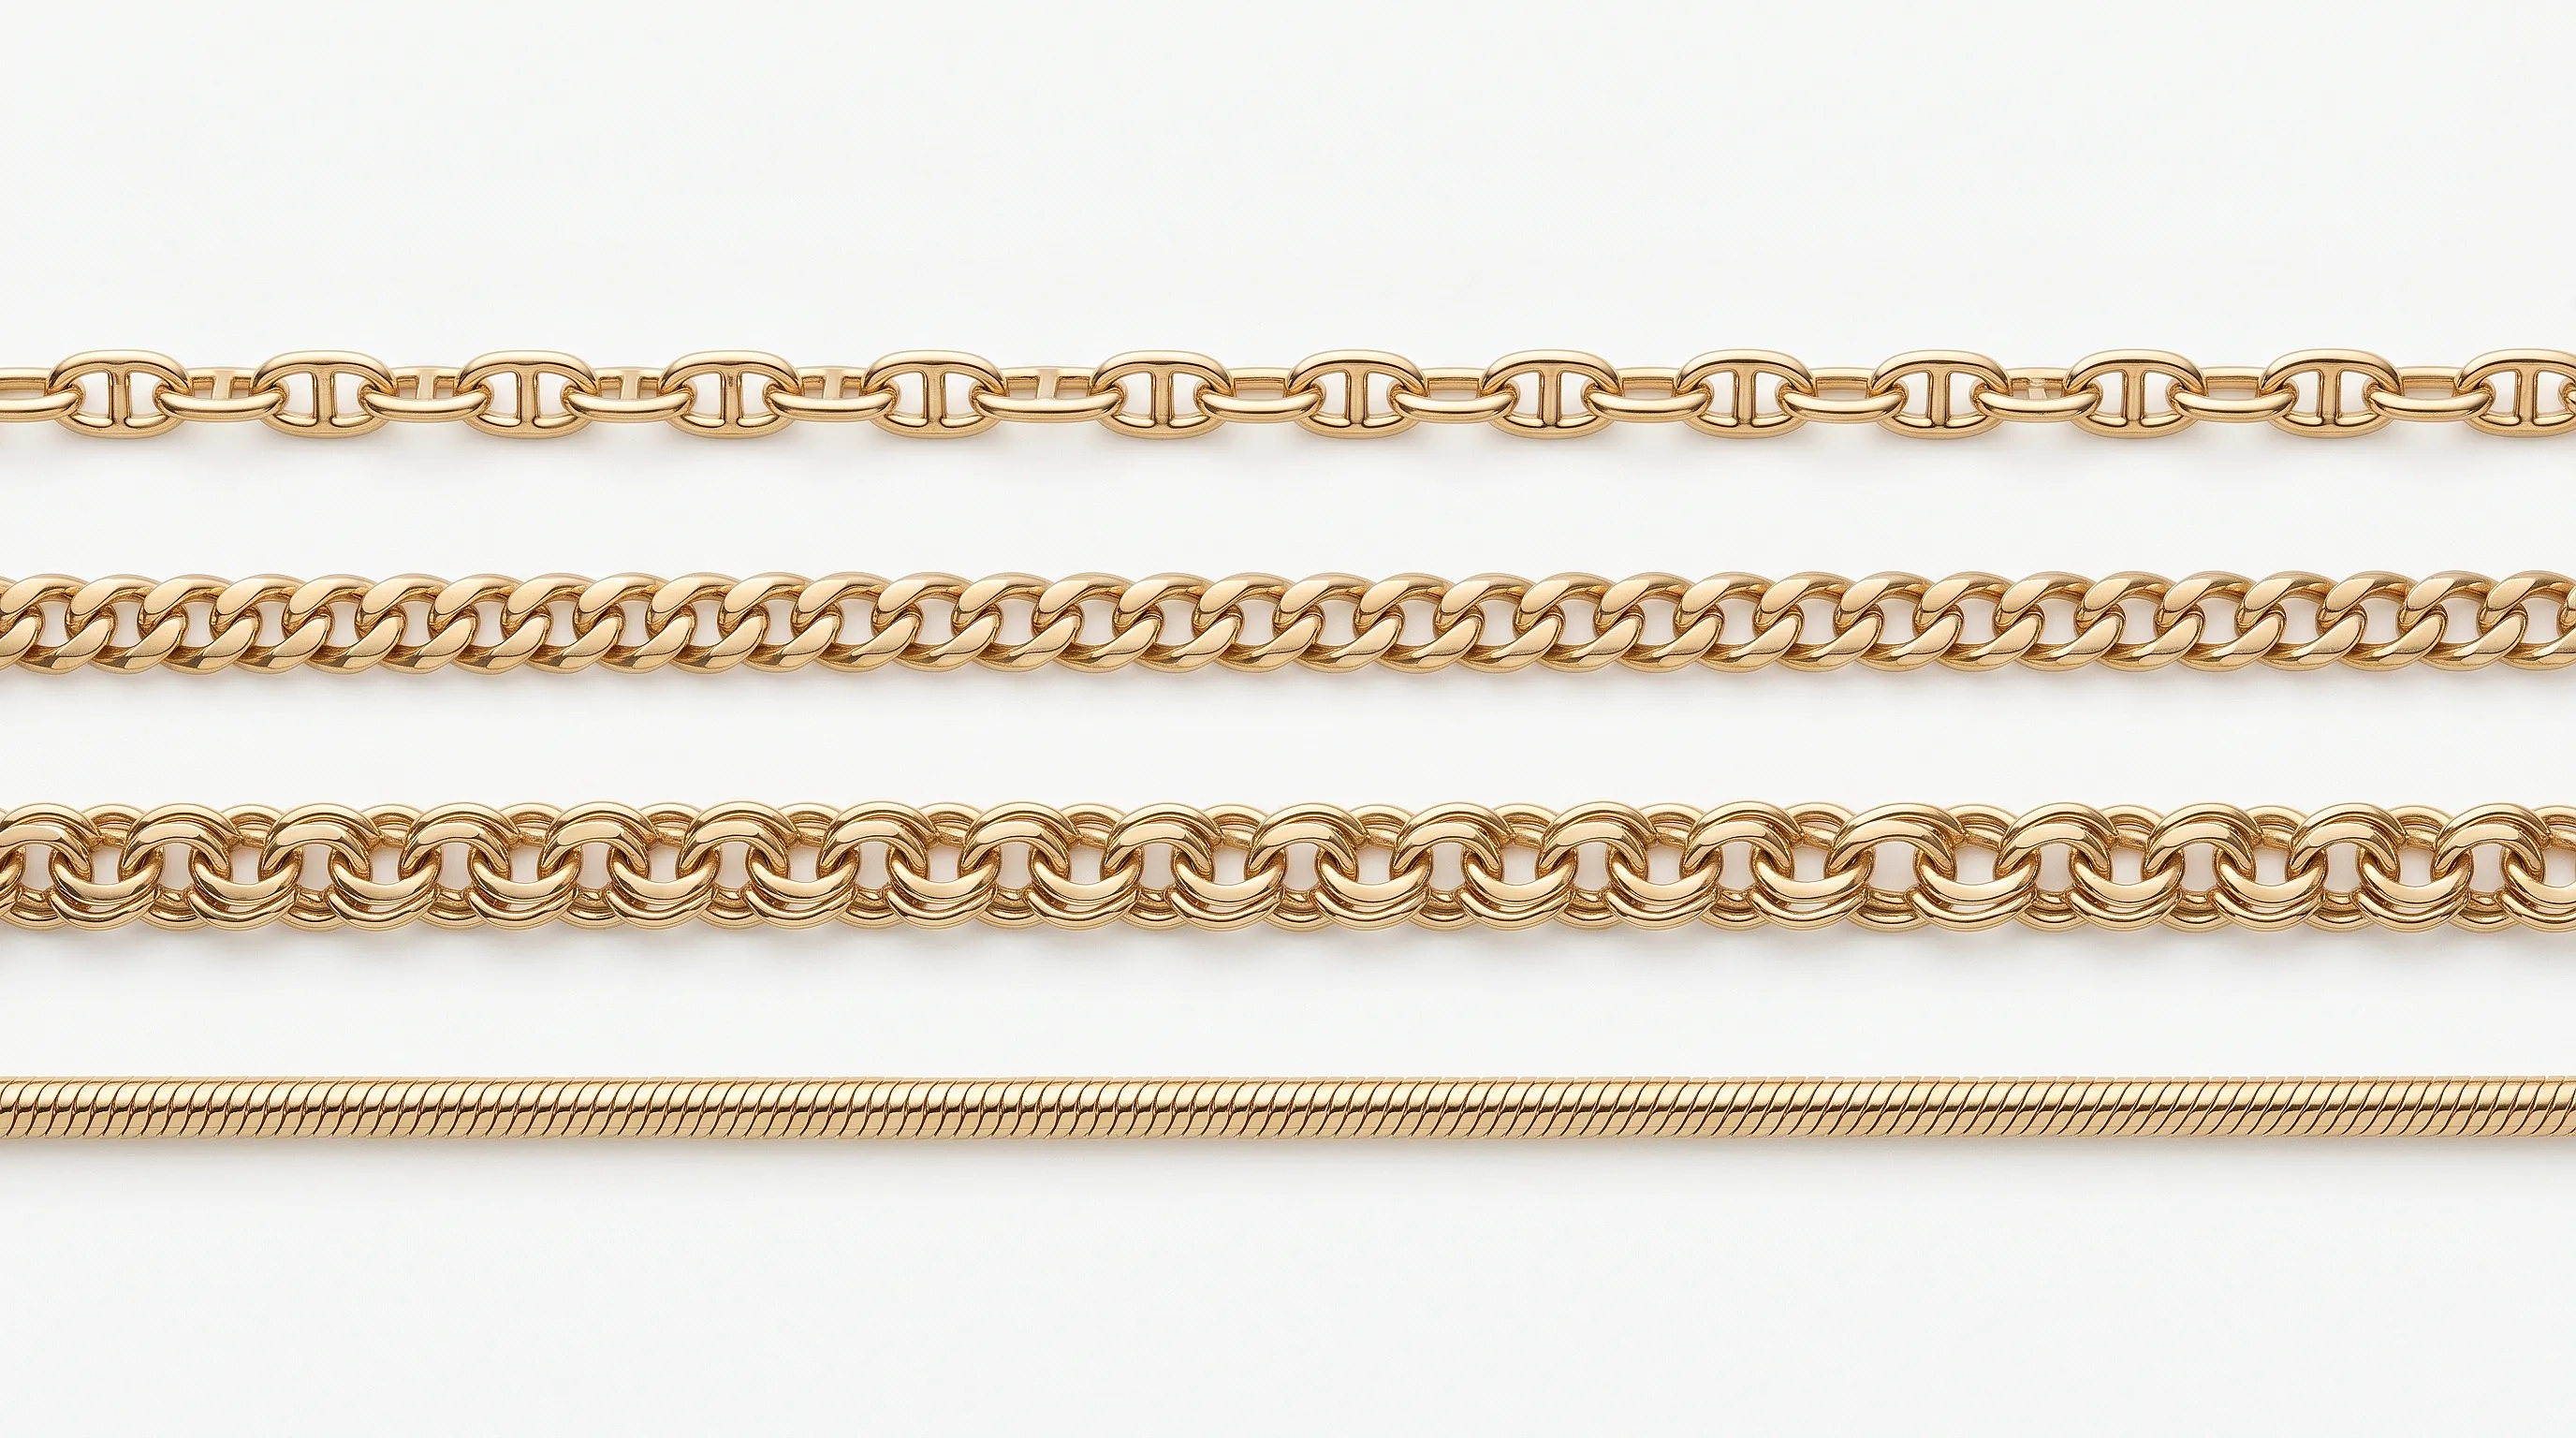
A common mistake is layering three identical chains. Same weight, same link style, same metal. It reads as monotonous. The pieces blur together instead of each one standing out.
Better: combine different chain styles. A delicate cable chain with a bolder curb chain. A smooth snake chain with a textured rope chain. A thin herringbone with a beaded strand. The contrast in texture is what creates visual interest and makes each piece distinguishable.
The same applies to bracelets. A smooth metal cuff next to a chain bracelet next to a beaded or woven piece creates a rich, textured stack that's far more interesting than three identical bangles. Each piece brings something different, and together they create depth.
Weight matters too. If every piece is ultra-delicate, the overall effect can get lost against clothing. If everything is heavy and bold, it becomes overwhelming. The best layered looks mix weights: one or two delicate pieces with one slightly bolder piece that serves as the anchor.
Choose one focal piece
Every good layered arrangement has a hero. One piece that's slightly larger, more detailed, or more eye-catching than the others. The supporting pieces are there to frame it, not compete with it.
For necklaces, the focal piece is usually the pendant with the most visual weight: the largest stone, the most intricate design, or the boldest colour. Put this on the chain length where it will get the most attention (usually mid-length, around 45-50 cm, where it sits right in the centre of the chest).
The other pieces should be simpler. A plain chain, a small disc pendant, a tiny symbol. They create context for the focal piece without stealing its thunder.
This principle comes from art composition. Every painting has a focal point, and everything else in the frame supports it. Treat your layered jewellery the same way. One star, a supporting cast.
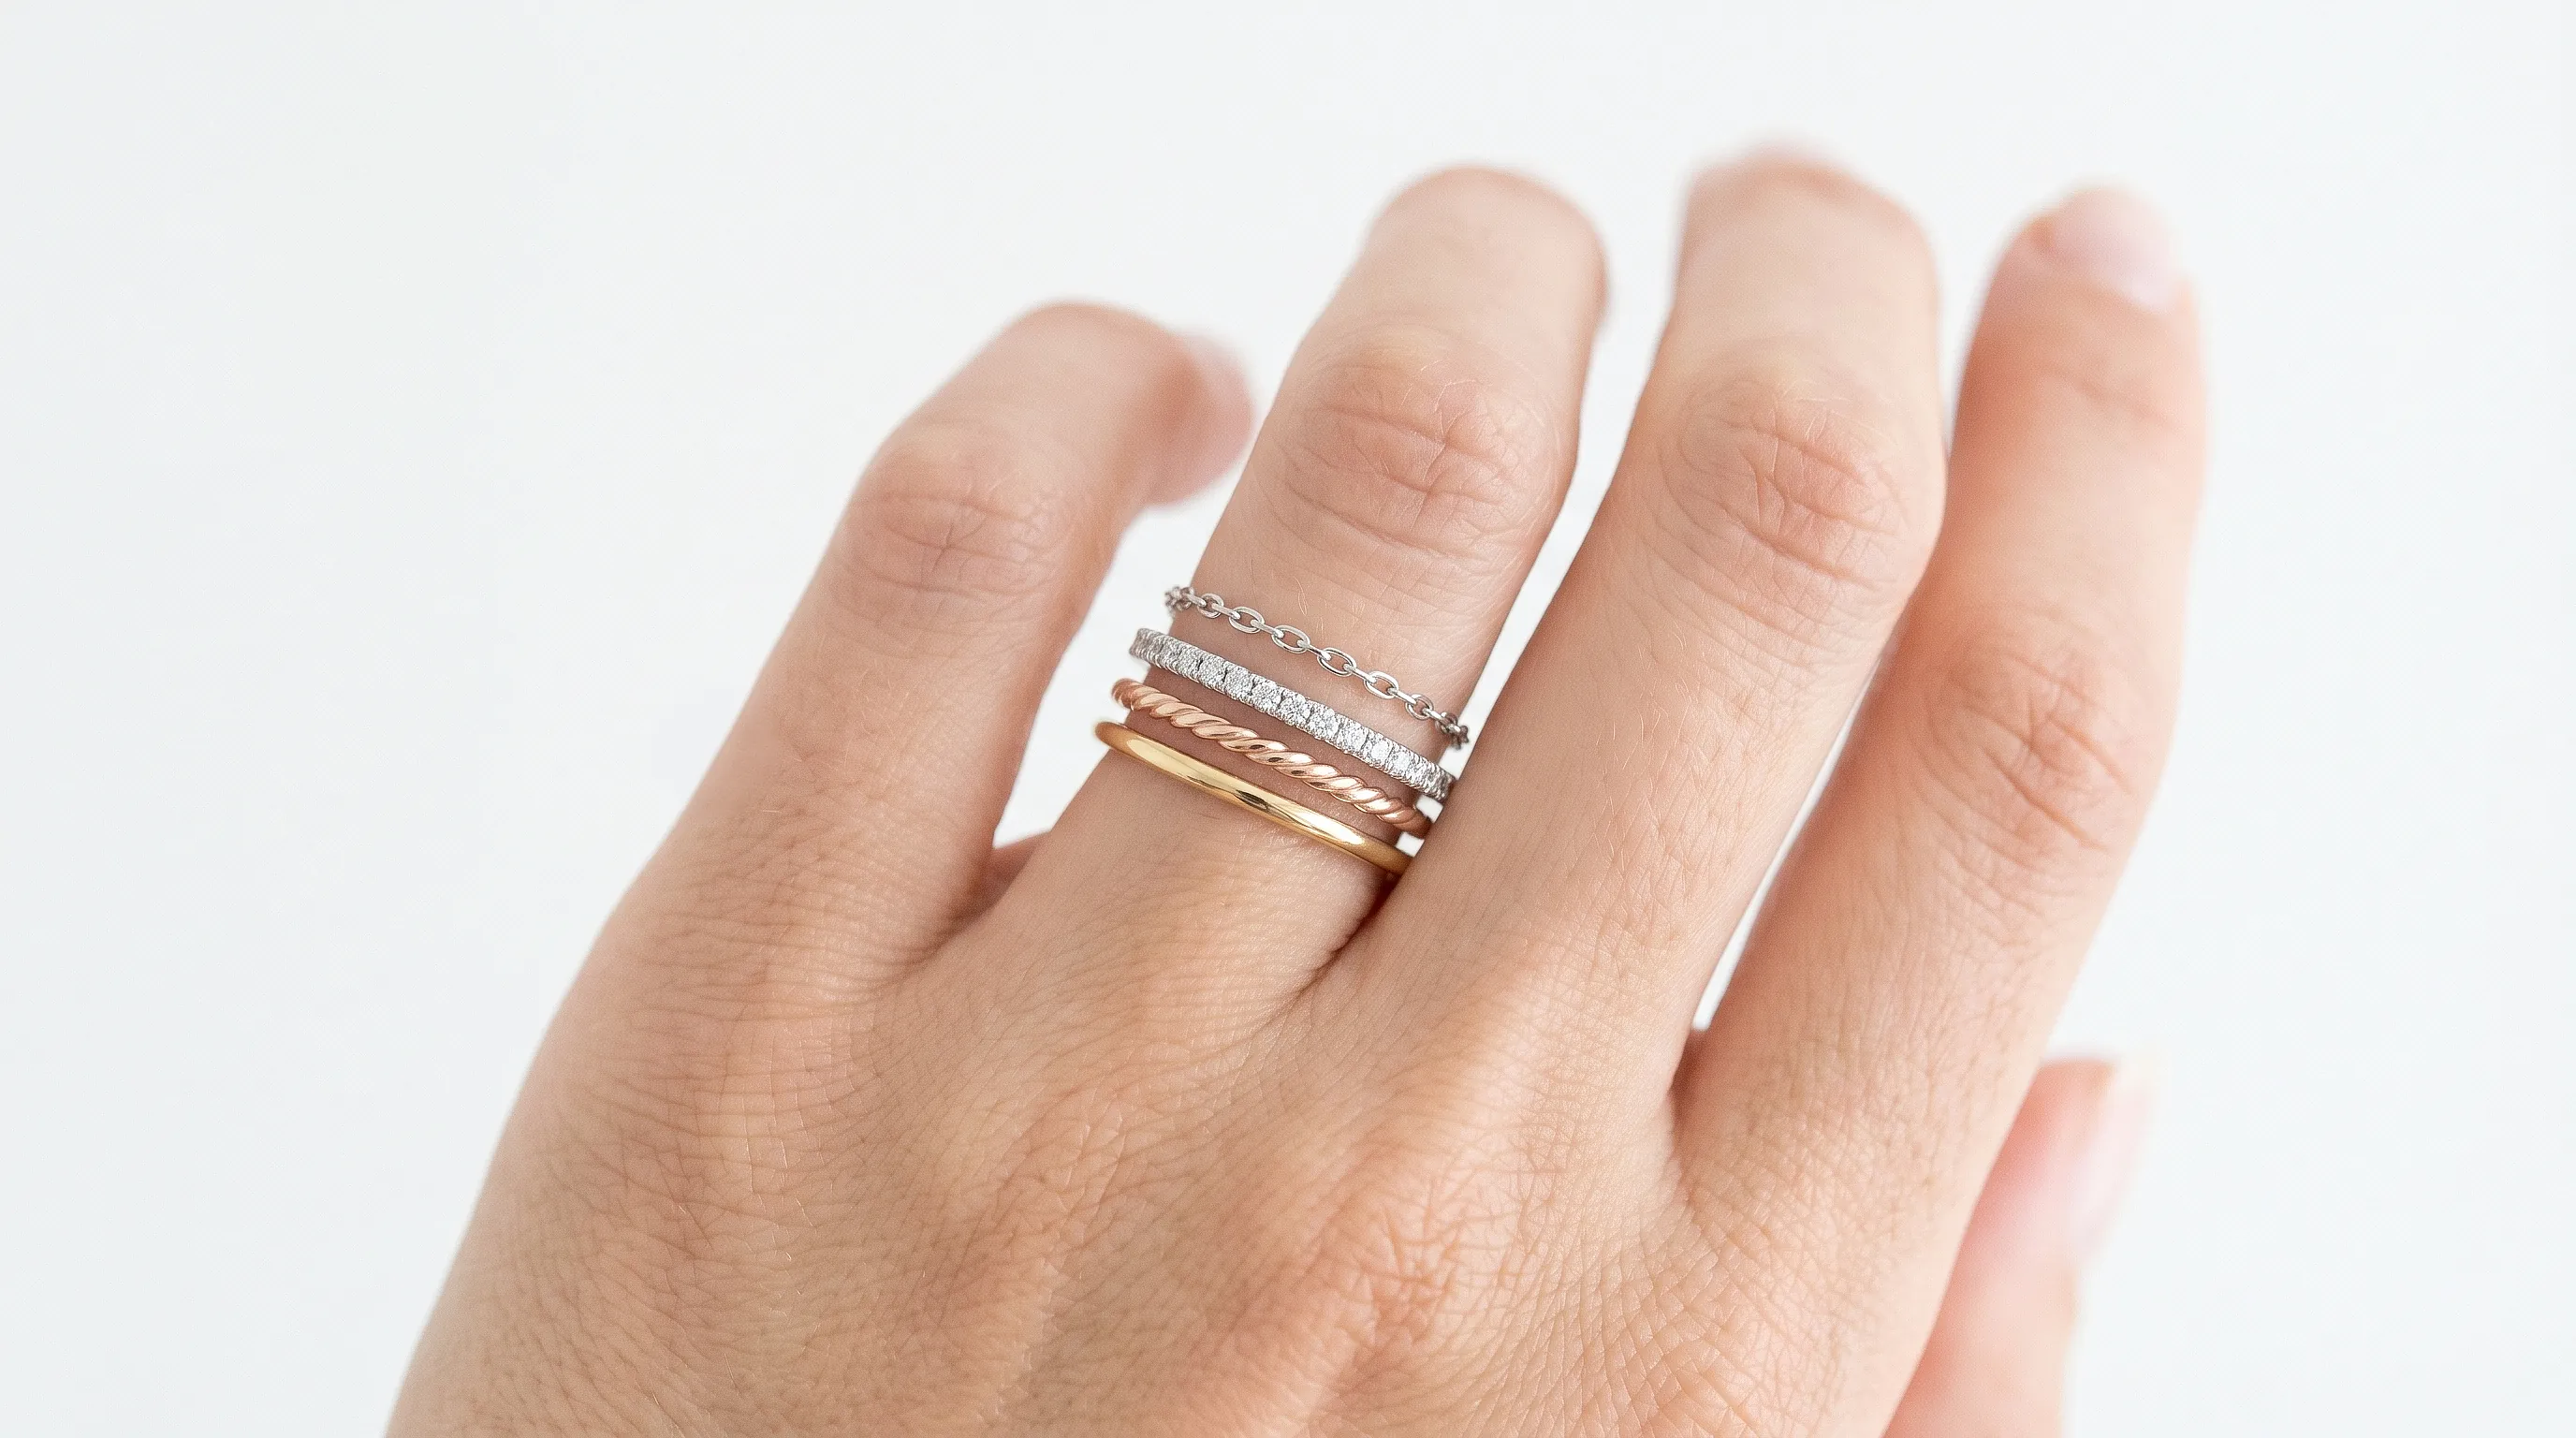
The rule of three
Interior designers talk about the rule of three constantly, and it translates perfectly. The idea: group items in threes for instant visual harmony. Three necklaces. Three bracelets. Three rings spread across your fingers.
Why three specifically? It's the smallest odd number that creates a pattern. One item is a choice. Two items look like a coincidence. Three items read as intentional. Your brain recognises three things as a deliberate grouping without needing to analyse further.
In practical terms, three also gives you a neat structure to work with. Think of it as a pyramid: one dominant piece, one medium piece, one subtle piece. Or a gradient: thin, medium, bold. Or a progression: short, medium, long. Three gives you enough elements to tell a visual story without overcrowding.
And here's the nice thing: once you've nailed the rule of three, scaling up to five or seven follows the same logic. You're just adding more chapters to the same story.
Creating visual rhythm
Good layering has a rhythm to it. Like music, it alternates between louder and quieter notes. A bold pendant followed by a simple chain followed by a textured choker: that's a visual rhythm. Bold, quiet, textured. Your eye travels from piece to piece with a sense of flow.
If everything is the same "volume," there's no rhythm. It's a flat line. If everything is loud, it's noise. The best layered looks alternate: something catches the eye, then something lets the eye rest, then something catches it again.
You can create rhythm through size (large pendant, small disc, medium chain), through texture (smooth, then bumpy, then smooth), through colour (bright stone, plain gold, coloured enamel), or through spacing (pieces close together, then a gap, then another piece). Play with it. Once you start seeing layering as rhythm rather than decoration, everything clicks.
The importance of negative space
This one gets overlooked. People focus on what they're wearing and forget about the space between. But the gaps between your layered pieces are just as important as the pieces themselves.
Negative space is what makes each piece visible. If your three necklaces sit 2 cm apart, they blur into one cluster. If they sit 8-10 cm apart, each one reads individually. The skin between the chains becomes part of the composition. It's a breathing room that lets the eye process each piece separately.
Same concept applies to rings. Three rings crammed onto adjacent fingers look cramped. Three rings with a bare finger between each one look deliberate and elegant. The empty fingers are doing visual work.
When you're putting a layered look together, step back and look at the gaps. Are there enough of them? Are they roughly balanced? The space is not empty. It's part of the design.
Customer reviews
Zevira is a real jewellery shop. Genuine payments, deliveries and customer thank-yous.
🥰🥰🥰 gracias
Ok, ¡gracias! 🙂
The chain length guide
Understanding chain lengths changes everything about necklace layering. Instead of guessing, you can build combinations that work every time.
The key lengths
35-38 cm, the choker. Sits right on the throat or just below it. This is your top layer, the one closest to the skin. Chokers work as standalone statements or as the anchor of a layered setup. They look particularly good with open necklines, off-shoulder tops, and V-necks. On most people, a choker draws attention to the collarbone and jawline.
40-42 cm, the collarbone. Falls just at or slightly below the collarbone. This is probably the most universally flattering single-necklace length, and it's a brilliant starting layer. A simple pendant at collarbone length gives you a clean foundation to build on.
45-48 cm, the standard. Rests on the upper chest, a few centimetres below the collarbone. This is where most ready-made necklaces sit, which is why it's called "standard." It's the most common length in most jewellery collections, and your best bet for the middle layer of a three-chain setup.
50-55 cm, mid-chest. Falls roughly to the middle of the chest, between the collarbone and the sternum. This length adds drama without going too long. It's excellent for statement pendants because the eye naturally settles in this area. If you're wearing a deep neckline, this length fills the visual space beautifully.
60-65 cm, the long layer. Sits at or below the sternum. Long chains create a strong vertical line that elongates the torso. They work over turtlenecks, high necklines, and layered clothing where shorter chains would get hidden. Long pendants at this length often become the focal point of a layered arrangement by sheer visual gravity.
70 cm and beyond, the statement. Opera length and beyond. These are dramatic pieces that hang well below the bust line. Less common in everyday layering, but powerful as the longest chain in a multi-layer setup. They work beautifully over jackets and coats in cooler weather.
Combinations that always work
The classic duo: 40 cm + 50 cm. Ten centimetres of separation, enough to see both clearly, close enough to read as connected.
The triple cascade: 38 cm + 45 cm + 55 cm. This is the combination that looks effortless on basically everyone. The roughly 8-10 cm gaps between each layer create a clean waterfall.
The dramatic spread: 35 cm + 50 cm + 65 cm. Wider spacing, more visual impact. Each chain occupies its own territory. This works especially well with necklines that expose a lot of skin.
The tight stack: 40 cm + 43 cm + 46 cm. Chains clustered close together for a denser, richer look. This works when you want the chains to read as a single decorative unit rather than three distinct pieces.
Adjusting lengths to your body
These centimetre ranges are guidelines, not laws. Your actual best lengths depend on your neck length, your torso length, and what neckline you're wearing. The quickest way to find your sweet spots: stand in front of a mirror, hold a chain at different lengths, and see where it falls on your body. Everyone's anatomy is different, and what hits the collarbone on one person might sit on the throat on another.
A practical tip: if you find two of your favourite necklaces sitting at the same length, use the extender chain on one of them. Most necklaces with an extender give you 3-5 cm of adjustment, which is often enough to create the separation you need.
Turn on your camera, pick earrings, a pendant or a ring, and see the piece on yourself in real time.
Switch items in one tap.
Everything runs in your browser: no photo or video is ever uploaded.
Layering pendants and necklaces
Necklaces are where most people start with layering, and where the biggest visual impact happens. A well-layered neckline transforms an outfit more dramatically than any other accessory combination.
The two-chain starter. If you've never layered before, start simple. Pick one chain that sits at your collarbone (35-40 cm) and one that falls 8-10 cm lower. Make one of them a simple chain and the other a pendant. This is almost impossible to get wrong, and it immediately looks more considered than a single piece.
The three-chain classic. This is the arrangement that gets the most compliments. Short chain at the collarbone (often a choker-length piece or a tight-fitting pendant), a medium chain with your main pendant at mid-chest, and a long chain that disappears into your neckline or sits just above it. The three levels create that cascading depth that defines the layered look.
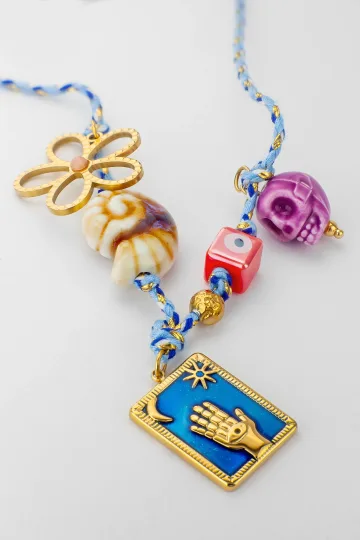
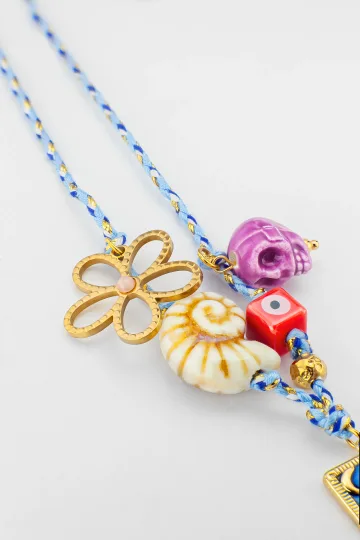
Mixing symbols. This is where layering gets personal. A crescent moon with a star pendant. An ocean-themed piece with a nature symbol. A tarot card pendant with a protective amulet. Combining symbols from different traditions creates a jewellery collection that's uniquely yours: nobody else will have the exact same combination with the exact same meanings.
The key to mixing symbols is that they don't need to "match" thematically. A celestial moon and an ocean shell work together not because they share a theme, but because they share an aesthetic weight and a sense of personal meaning. Your jewellery isn't a museum collection with a label. It's a reflection of everything that matters to you, all at once.
Chain length adjustments. If two of your favourite necklaces happen to be the same length, you don't need to give up on combining them. Many chains have extender links that give you 3-5 cm of adjustability. You can also add a small jump ring and a bit of extra chain to create the length difference you need. Some people use layering clasps: a single clasp that holds multiple chains at different lengths so they don't tangle.
The tangle problem. Let's be honest: tangling is the number one frustration with layered necklaces. The chains wrap around each other, the pendants get stuck, and you spend five minutes in the bathroom trying to separate everything. A few practical solutions: use chains of different link sizes (they tangle less than identical chains), put the heaviest pendant on the longest chain (gravity helps keep things separated), and consider investing in a layering clasp or necklace separator. Also, clasp placement matters: make sure all your clasps sit at the back of your neck, not twisted to the side, before you leave the house.
Stacking bracelets
Bracelets are arguably the most forgiving category for layering. The wrist is a small canvas, which means even a random combination of bracelets tends to look intentional. But a few guidelines take it from good to great.
The three-texture rule. A great bracelet stack combines three different textures. Think: one chain link bracelet, one solid cuff or bangle, and one beaded or corded piece. The contrast creates visual interest without any single piece dominating. If all three are metal chains, they blend into one visual mass. If they're different textures, each one stands out.
Which wrist? Most people instinctively stack on their non-dominant hand, and that's generally good advice. Your dominant hand moves more, which means more noise, more snagging, and more interference with daily tasks. But there's no real rule here. Some people stack both wrists differently: bolder on one, simpler on the other. Asymmetry can look fantastic.
Mixing cuffs and chains. Cuffs (rigid, open-ended bracelets) and chain bracelets (flexible, clasped) work brilliantly together because they move differently. A cuff stays in place while chains shift and catch light. This creates dynamic visual interest: your stack looks slightly different every time you move your hand.
The watch question. Can you layer bracelets with a watch? Absolutely, and it's one of the most popular stacking approaches. The watch becomes your focal piece (it's usually the largest, most structured item on your wrist), and the bracelets support it. Keep bracelets on the same wrist as the watch relatively thin and delicate so they complement rather than compete. Or go bolder on the opposite wrist to create balance.
Beaded bracelets. These bring colour and organic texture to a stack. A natural stone bead bracelet alongside metal chains creates a beautiful contrast between the organic and the manufactured. They also add visual weight without adding much actual weight, which keeps your stack comfortable.
Charm bracelets. A revived classic that fits naturally into a stack: each hanging charm reads as its own miniature focal point. The full story of the charm bracelet revival covers how to build one charm by charm, but as a stacking element, a charm bracelet brings rhythm and personal narrative that no plain chain can match.
How many is too many? There's no universal answer, but a good rule of thumb: if your bracelets extend more than about 5 cm up your forearm from your wrist bone, you're probably in festival territory. For everyday wear, three to five is the sweet spot. For a night out, five to seven can work beautifully. For a music festival, go wild.
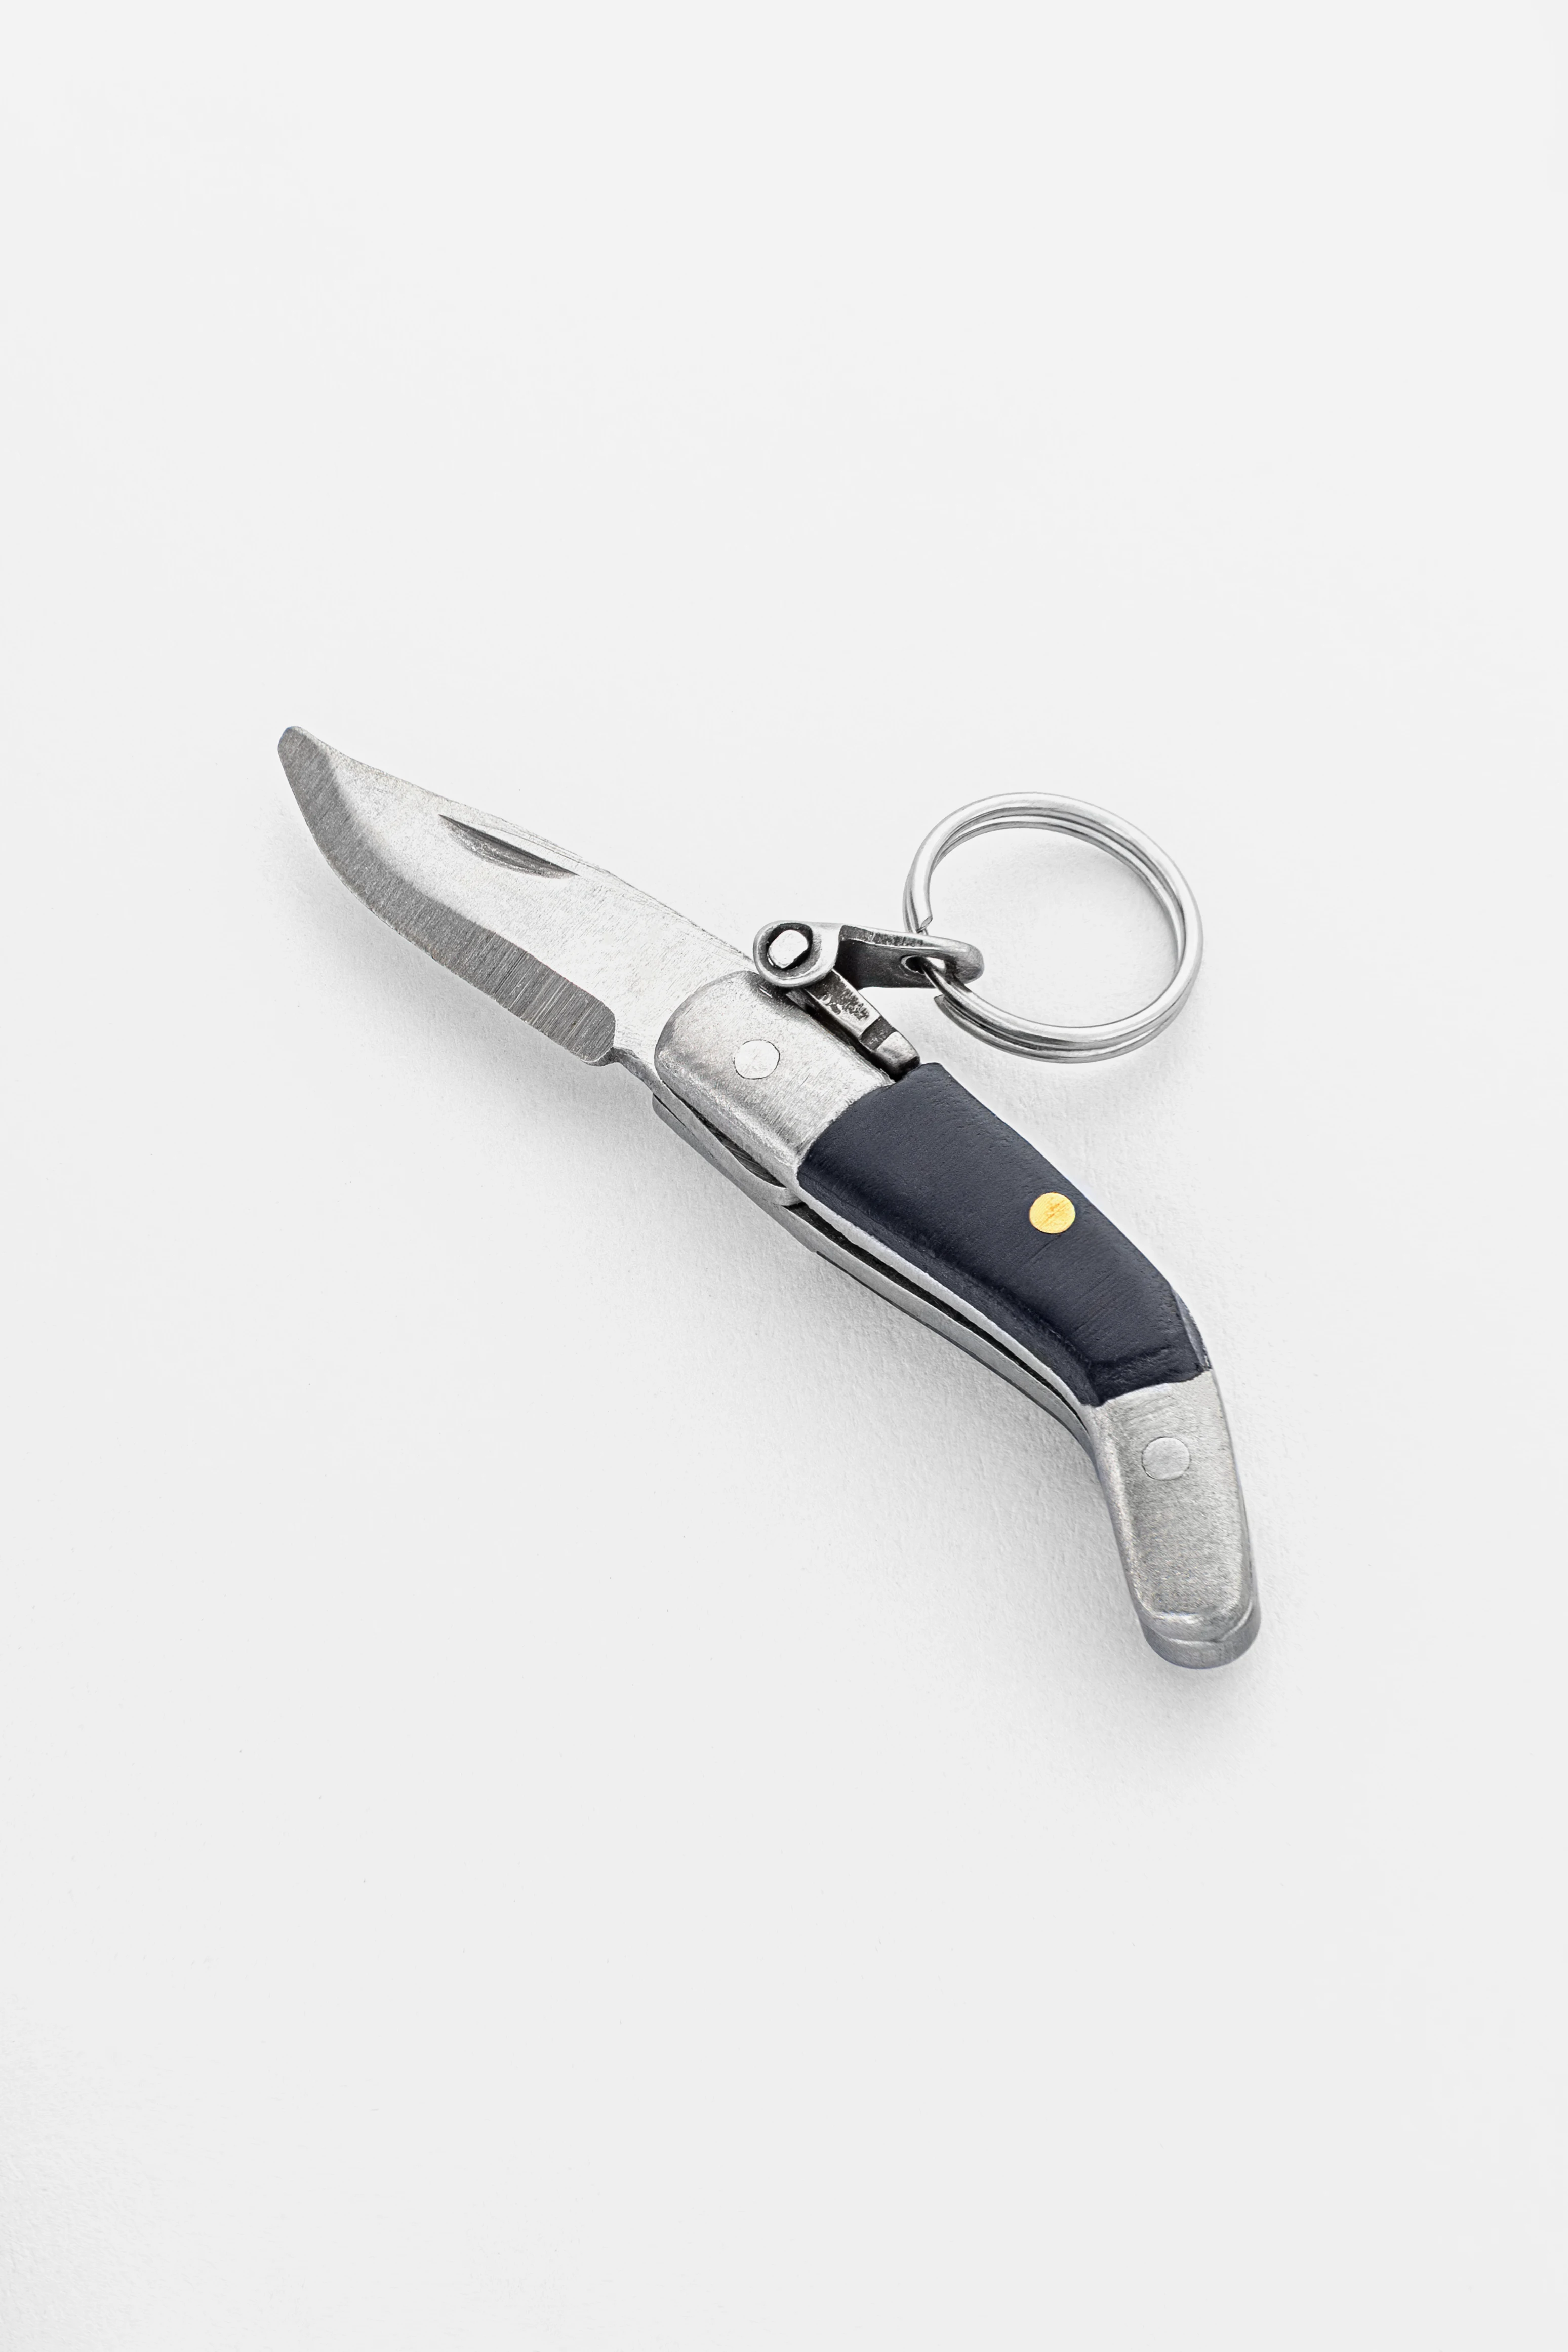
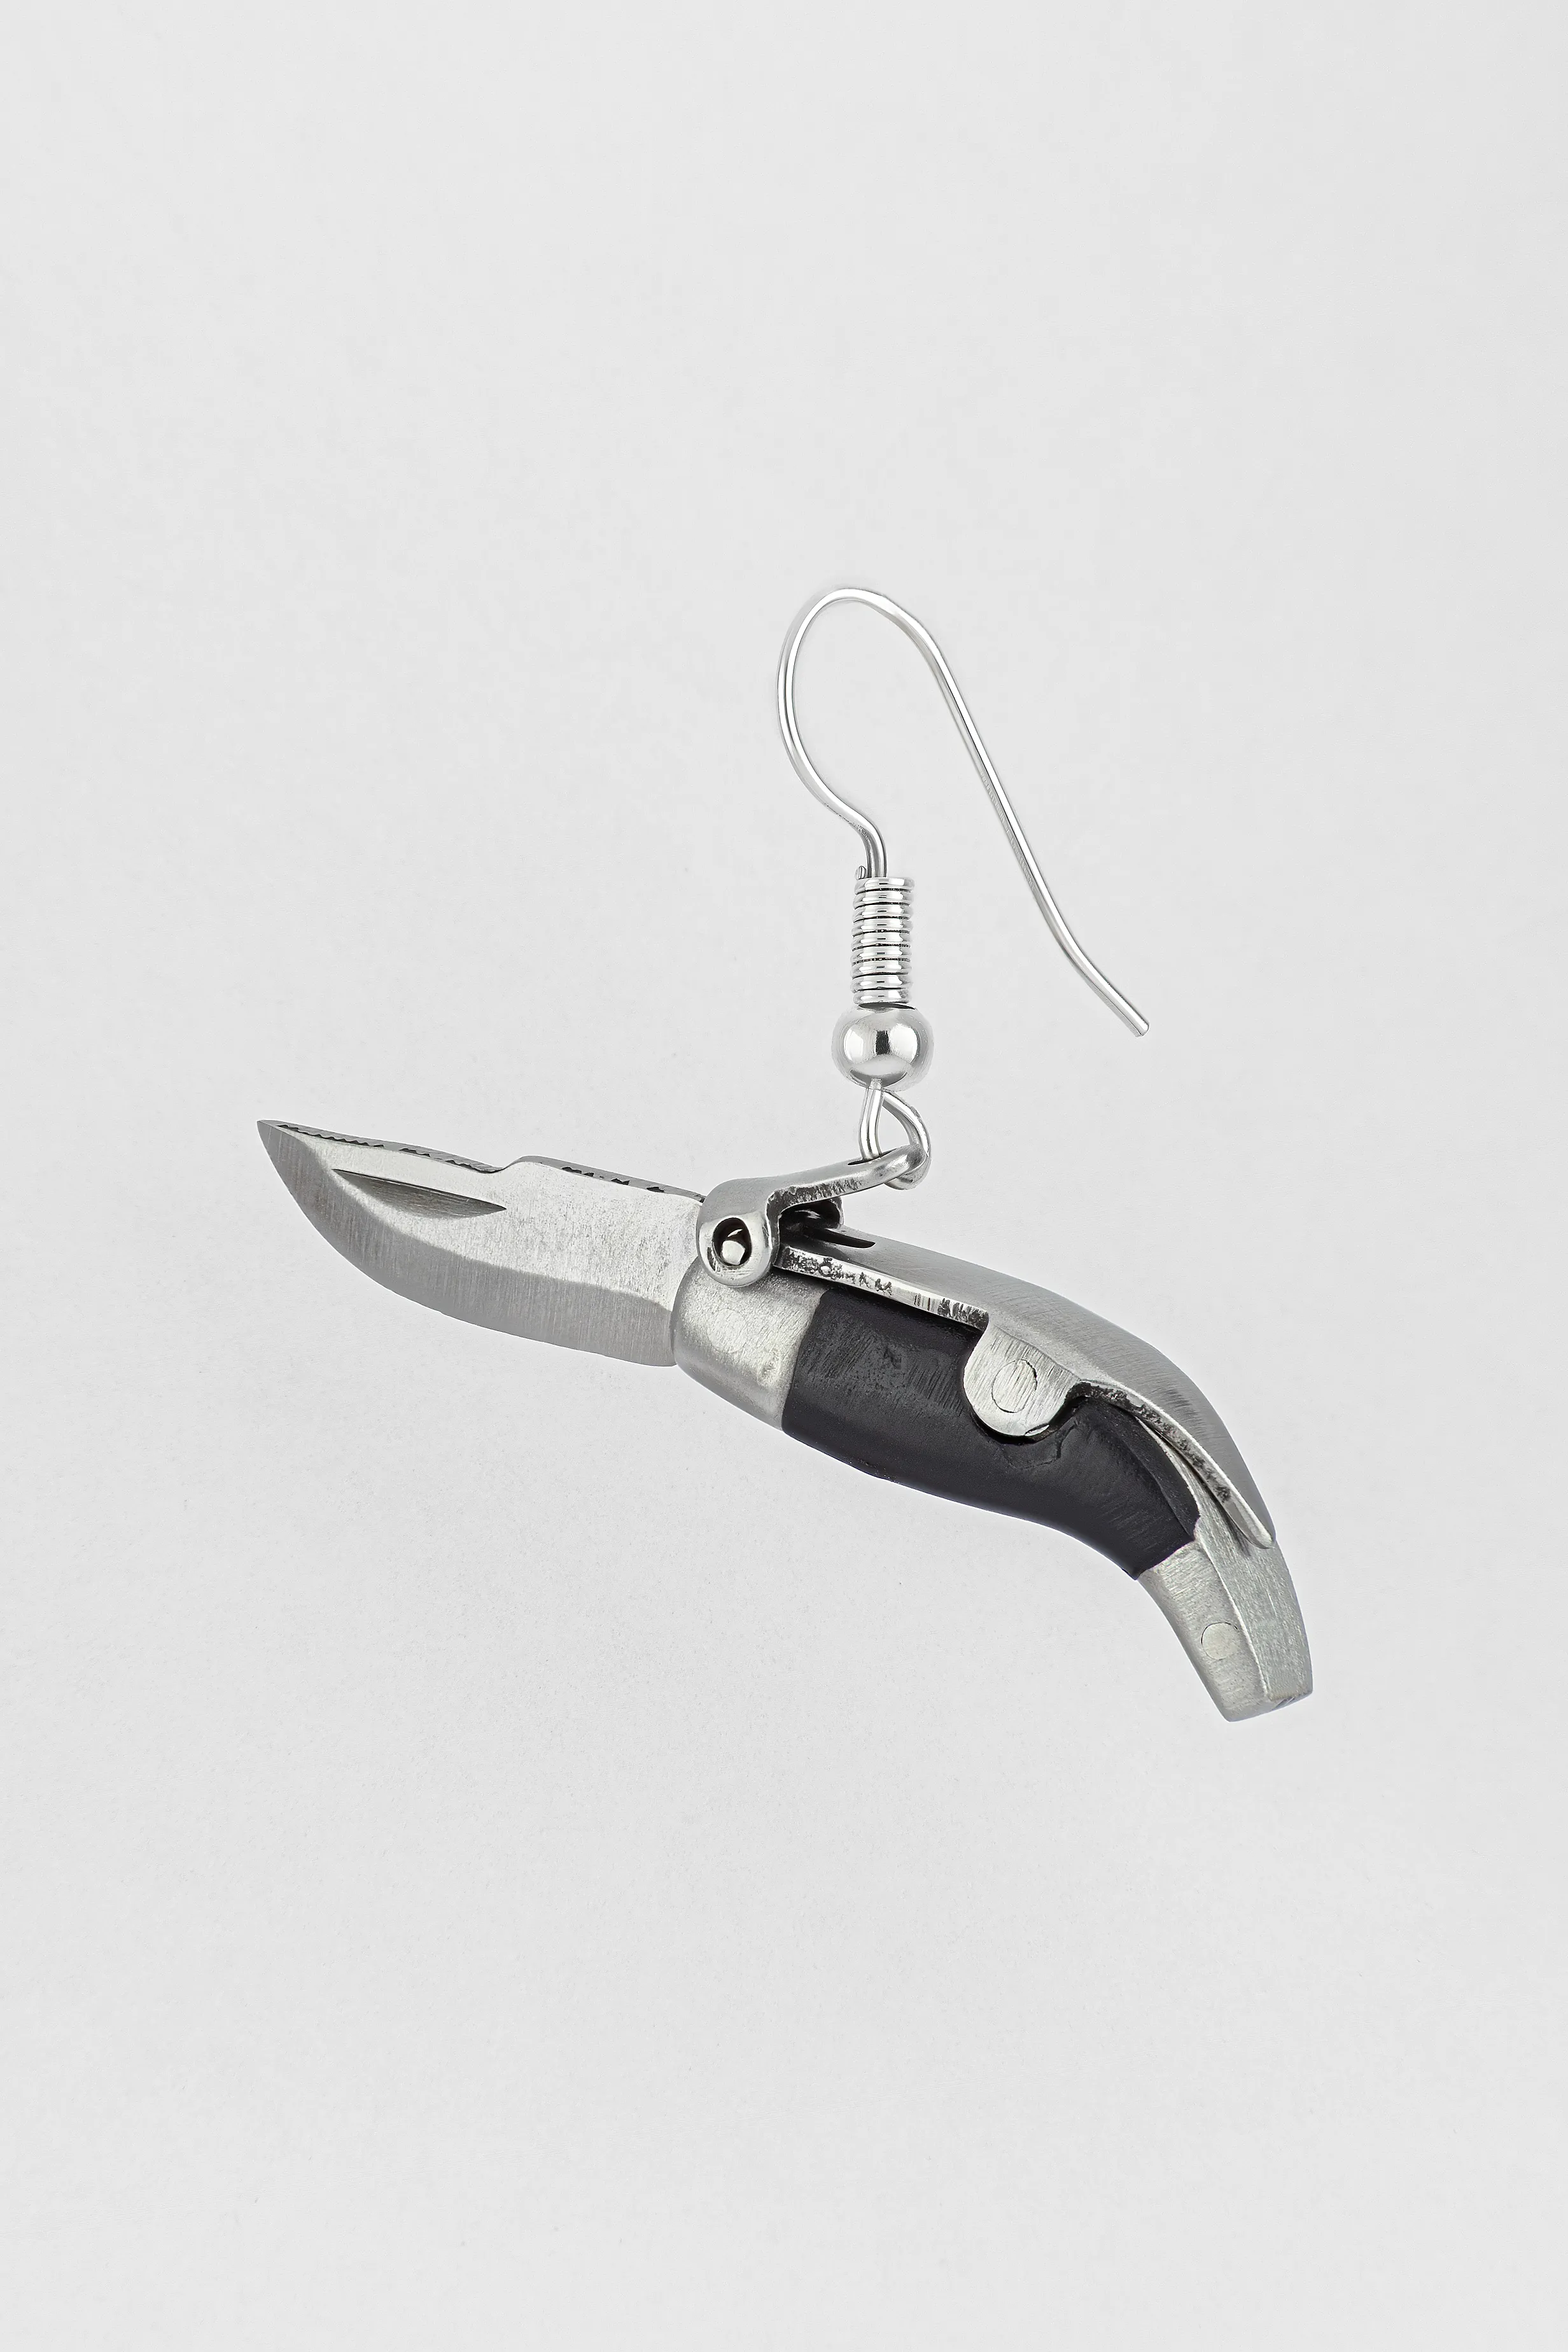
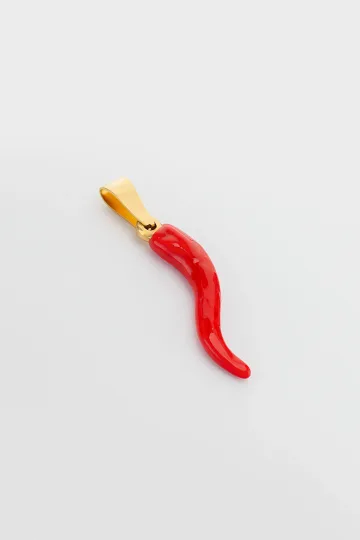
Artisan-crafted CAPAORA navaja pendant
A 40 mm stainless-steel navaja with a real folding mechanism and Palanquilla lock. An affordable gift to remember.
A code for blog readers:
10% off your first order
Authentic · Maker's guarantee · Ships from Spain
Mixing metals
This section might be the most important one in this guide, because the "rule" that you can't mix gold and silver has stopped more people from experimenting with layering than any other single myth.
Here's the truth: mixing metals looks fantastic. Gold-toned and silver-toned pieces together create a richness and depth that single-metal arrangements can't achieve. The contrast between warm gold and cool silver catches light differently across the day, adding dimension to your look.
Why the "don't mix" rule existed. The prohibition on mixing metals came from a very specific era of fashion: roughly the 1980s and 1990s, when "matching" was considered essential. Your belt buckle matched your shoe hardware matched your watch matched your earrings. Everything had to be one consistent metal tone. This was a cultural moment, not a timeless truth. Before that era, and after it, mixing metals was and is completely normal.
How to mix well. The key is distribution. If you wear one silver piece and four gold pieces, the silver can look like a mistake: like you grabbed the wrong bracelet. But if you spread both metals across your arrangement, it reads as intentional. For example: a gold chain and a silver chain layered as necklaces, plus a gold bracelet and silver rings. The metals appear in multiple places, so the eye reads it as a pattern rather than an accident.
The bridge piece. One of the most effective techniques is including a piece that contains both metals. A necklace with both gold and silver elements, a two-tone ring, or a bracelet with mixed metal links. This "bridge piece" ties the whole arrangement together by showing that the combination is deliberate. It gives your eye permission to see gold and silver as partners rather than competitors.
Rose gold as a bridge. Rose gold sits between yellow gold and silver on the colour spectrum. Including a rose gold piece in a mix of gold and silver creates a smooth gradient effect: warm gold, mid-tone rose gold, cool silver. It's one of the easiest ways to make a mixed-metal look feel cohesive.
When single metal works better. For very formal occasions, sticking to one metal tone can create a cleaner, more polished look. If you're wearing a dress with specific hardware (gold zippers, silver buckles), matching your jewellery to the clothing hardware creates a unified effect. But these are style choices, not rules. Some of the best evening looks mix metals deliberately for that unexpected edge.
Leave your email, we'll send your discount code. No spam, unsubscribe anytime.
The code arrives by email, valid on your first order.
Layering by occasion
The same person might layer differently on a Saturday morning, a Monday at the office, a Friday evening, and a weekend festival. Context matters, not because there are strict rules, but because the setting affects what feels right.
Casual and weekend
This is where you can be the most relaxed and experimental. Casual layering is about personal expression without worrying about "appropriateness." Stack five bracelets. Wear mismatched earrings. Layer four necklaces with your favourite band t-shirt.
The casual look tends to work best with a mix of textures and tones. This is the time to break out the beaded bracelets, the cord necklaces, the vintage pieces you found at a market. Mixing metals is practically expected in casual settings. The overall vibe should be "I put this together because I love these pieces," not "I coordinated this for an hour."
Denim and layered jewellery is one of those combinations that just works. Something about the simplicity of jeans and a shirt provides the perfect canvas for multiple accessories. The jewellery becomes the focal point of the outfit, which is exactly what layering is designed to do.
Office and professional
Layering at work requires a lighter touch, but it absolutely works. The goal is visual interest without distraction. You want your colleagues to think "she always looks put together" rather than hear your bracelet stack jangling through a meeting.
For necklaces in professional settings, two chains are usually better than three. Keep them delicate. Small pendants or plain chains. The layered effect is subtle, a hint of depth rather than a statement. Avoid anything that clinks or catches on clothing.
Bracelets at the office: one or two maximum. A thin chain bracelet with a small cuff, or a watch with a single supporting bracelet. Keep the movement quiet and the profile slim.
Rings are actually the safest layering category for work. Two or three rings spread across your fingers look polished and intentional in any professional environment. They don't make noise, don't interfere with typing, and add personality without drawing too much attention.
Evening and date night
Evening is when layering gets to shine. Lower lighting catches metallic surfaces beautifully, and dressier necklines often expose more skin, which gives your necklace layers room to breathe.
The evening approach: dial up the drama slightly. Choose one statement pendant as your focal piece and build around it with simpler supporting chains. If your outfit has a deep V-neck, a three-chain layered arrangement fills that space gorgeously, framing the neckline like a built-in accessory.
Earrings can also be layered for evening. If you have multiple piercings, use them: a small stud in the upper piercing, a hoop or drop in the lobe. If you have a single piercing per ear, choose a slightly bolder earring to balance your necklace layers.
Evening bracelet stacks can be bolder than daytime versions. More metals, more texture, more movement. The sound of bracelets shifting on your wrist actually adds to the atmosphere of a dinner or event. It's part of the sensory experience.
Festival and holiday
Festivals are the no-rules zone of jewellery layering. More is more. Stack everything. Layer every necklace you own. Pile on the bracelets. Wear rings on every finger. Festival fashion is performative and joyful, and the layered-to-the-maximum look is part of that energy.
The practical festival consideration: security. In crowds, long necklaces can get caught or pulled. Secure your clasps. Avoid pieces that are extremely valuable. And remember that sun, sweat, and sunscreen will affect your jewellery, so save the investment pieces for dinner and bring the fun pieces to the festival.
Holiday layering (beach trips, city breaks, resort dinners) falls somewhere between casual and evening. During the day, keep it light: two necklaces with swimwear, a bracelet stack with a sundress. In the evening, build up: add more layers as the sun goes down and the occasion gets dressier.
Layering by body type
This isn't about what you're "allowed" to wear. You can wear anything. But being aware of how proportions interact with your frame helps you make choices that feel balanced rather than accidental.
Petite frames
If you're on the shorter or slighter side, scale becomes your best friend. Ultra-chunky chains and oversized pendants can visually overwhelm a smaller frame, making the jewellery wear you instead of the other way around.
What works brilliantly: delicate to medium-weight pieces. Shorter chain lengths (chokers and collarbone-length) that don't add excessive vertical length to your torso. Layered necklaces with relatively close spacing (5-7 cm between each) rather than wide dramatic cascades. Small to medium pendants that complement your scale.
For bracelets, thinner chains and narrower cuffs tend to look proportional. You can still stack several, just keep the individual pieces refined rather than bulky.
A useful trick for petite layering: keep your longest chain above the bust line. Anything hanging much lower can visually shorten the torso, which works against you if you're already on the shorter side.
Taller or broader frames
Larger frames can handle bolder jewellery without being overwhelmed. In fact, very delicate, tiny pieces sometimes get lost on a broader frame. They can look like afterthoughts rather than intentional choices.
What works well: medium to bold pieces. Longer chain lengths that use the vertical space available. Wider spacing between necklace layers (8-12 cm) that fills the proportionally larger canvas. Bolder pendants and chunkier chains that hold their own against a bigger frame.
Bracelet stacks can be wider and more substantial. Thicker cuffs, larger bangles, and heavier chain links look proportional and intentional.
The key insight: it's not about "big person = big jewellery." It's about finding the scale where each piece reads as a deliberate choice rather than getting lost or overwhelming.
Neckline and necklace interplay
Your clothing neckline is part of your layering canvas, and getting this right makes a huge difference.
V-necks and plunging necklines: The easiest canvas for necklace layering. The V shape naturally guides the eye downward, and cascading chains follow that same line. Position your layers so the longest chain sits within the V, not below it.
Crew and round necks: The fabric edge sits high, so your shortest chain needs to fall below it. Collarbone-length pieces that peek just below the neckline work well. Skip the choker: it'll sit too close to the fabric edge and look crowded.
Scoop necks: Similar to V-necks but with a softer, wider opening. Shorter layers fill the exposed area nicely. This is one of the most flattering necklines for showcasing a two or three-chain layered setup.
Turtlenecks and high necks: These are tricky. Shorter chains disappear under the fabric. The solution: go long. Wear one or two chains at 55 cm and beyond, sitting on top of the fabric rather than against skin. A single bold pendant on a long chain over a turtleneck is a classic look for a reason.
Off-shoulder and strapless: These expose the collarbone area beautifully, making shorter layers shine. Chokers and collarbone-length pieces frame the exposed skin. Avoid chains that are too long: they can compete with the neckline for attention.
Seasonal layering
What works in July doesn't always work in December. The weight of your clothing, the temperature, and even the amount of skin you're showing change with the seasons, and your layering approach should shift with them.
Summer layering
Less is more in hot weather, and that's actually a good thing for layering. When you're wearing tank tops, sundresses, and open necklines, you have more exposed skin for your jewellery to sit against, which means fewer pieces can make a bigger visual impact.
Summer layering tips: keep it light. Two chains instead of three. Thin, delicate pieces that don't trap heat or stick to sweaty skin. Shorter chains that sit above the clothing rather than getting buried under layers. Bright colours and coloured enamel work beautifully in summer; they complement the lighter, more vibrant palette of warm-weather wardrobes.
Materials matter in heat. Metal against hot skin can get uncomfortable, so lighter chains and smaller pendants are more practical. And if you're near water (beach, pool, holiday), keep in mind that chlorine, salt water, and sunscreen aren't kind to most jewellery finishes.
Winter layering
Cold weather is when layering really gets fun, because you've got layers of clothing to work with. Sweaters, scarves, coats, turtlenecks: each one creates a different backdrop for your jewellery.
Winter layering tips: go longer and bolder. When you're wrapped in a chunky knit, delicate short chains vanish. You need pieces with enough presence to be visible over or against heavier fabrics. Long chains that sit on top of sweaters. Bold pendants that don't get lost in the folds. Chunky bracelets that peek from coat sleeves.
This is the season for dramatic layering. Three long chains over a turtleneck. A stack of bracelets visible between your gloves and sleeve. Statement earrings that stand out against scarves and collars. The extra clothing gives you more visual contrast to play with.
Transitional seasons
Spring and autumn are the sweet spot for layering, because the weather is unpredictable and your outfits tend to be more layered themselves. A light jacket over a t-shirt in the morning, just the t-shirt by afternoon. Your jewellery can adapt to this.
The transitional approach: build in flexibility. Start with a two-chain setup in the morning. Add a third when you take off your jacket and expose more skin. Layer bracelets that work with both long sleeves and rolled-up cuffs.
Transitional seasons also call for versatile pieces, the kind that work equally well dressed up or dressed down, over knitwear and against bare skin. This is where your most-worn, most-versatile chains earn their keep.
Send a friend a discount code, they save on their first order.
Layering for beginners
If you've read this far and feel slightly overwhelmed, this section is for you. Forget everything else for a moment. Here's how to start layering from zero.
Step one: start with two pieces
Don't jump to three or five. Start with two. Pick one necklace you already wear regularly and add one more at a different length. That's it. Wear those two together for a week and get used to how they feel, how they move, how they look with your usual outfits.
The easiest starter pairing: one simple chain at your collarbone, one pendant necklace about 8-10 cm longer. This combination is almost fail-proof. The plain chain provides structure, the pendant provides interest.
Step two: build your foundation pieces
Once you're comfortable with two, think about what's missing. Do both your necklaces sit at similar lengths? Add one that's noticeably longer or shorter. Are both the same texture? Add one with a different chain style. Are both the same metal tone? Try mixing in a contrasting metal.
Good foundation pieces for a layering collection: one choker-length chain (35-40 cm), one standard-length pendant (45-48 cm), one longer statement piece (55-60 cm). With just these three, you can create the classic cascading layered look.
Step three: experiment on low-stakes days
Your first layering experiments shouldn't happen on a day when you need to feel confident and polished. Try new combinations on weekends, casual days, or evenings at home. Stand in front of a mirror, swap things around, see what works. Some combinations will surprise you in a good way. Others won't feel right. Both outcomes are useful information.
Step four: add one piece at a time
Resist the urge to buy five new chains at once. Add one piece at a time and explore all the combinations it creates with what you already own. A single new necklace paired with your existing two gives you three new combinations. That's much more value than buying three necklaces you don't yet know how to combine.
Starter combinations from the Zevira collection
If you're looking for specific pieces that layer well together, here are some combinations from the Zevira collection that work straight out of the box:
For a celestial-themed layer: combine a small star pendant at choker length with a moon or crescent piece at mid-length. The shared celestial theme creates instant coherence, while the different lengths give you the cascade effect.
For a mixed-symbol layer: pair a protection pendant with a nature or ocean motif. Different themes, unified by similar aesthetic weight. This is the kind of combination that tells a personal story.
For a minimalist start: one plain chain at 40 cm with one small pendant at 50 cm. Clean, simple, immediately effective. You can build on this foundation for months before feeling the need to add anything else.
Common mistakes
Learning what not to do is sometimes more useful than learning what to do.
Everything the same size. When all your pieces are the same scale (same chain width, same pendant size, same bracelet thickness), the individual pieces disappear into a homogeneous mass. Vary your scales. One delicate, one medium, one slightly bold.
Ignoring your neckline. The shape of your clothing neckline dramatically affects how layered necklaces look. V-necks are the easiest: they naturally frame cascading chains. Crew necks work well with chains that fall below the neckline. Turtlenecks are tough for necklace layering (try longer chains that sit on top of the fabric). Off-shoulder tops call for shorter, choker-style layers. Before you get dressed, think about what shape your neckline creates and choose your layers accordingly.
Too much visual noise. Layering is about depth, not chaos. If every single piece is bold, detailed, colourful, and large, the overall effect isn't "maximalist chic": it's overwhelming. The best layered looks have a clear visual hierarchy: one or two statement pieces surrounded by quieter supporting pieces.
Forgetting about comfort. If your bracelet stack catches on your keyboard, if your necklaces constantly tangle during the day, if your rings make it hard to grip things, you'll stop wearing them. Layering should enhance your day, not create constant small annoyances. Test your combinations at home before wearing them out. Move around. Sit down. Type on your phone. If anything bothers you, adjust.
Matchy-matchy everything. A common beginner instinct is to make everything "go together" in the most literal sense: all the same metal, all from the same collection, all the same style. This creates a look that's coordinated but boring. The magic of layering comes from contrast and unexpected combinations. A celestial pendant with an ocean-themed piece. A modern geometric cuff with a vintage-style chain. Give yourself permission to mix things that "shouldn't" go together. They usually do.
Neglecting proportion to your body. Delicate, tiny pieces on a broad frame can get lost. Chunky, heavy pieces on a small frame can overwhelm. This doesn't mean you can't wear whatever you want, but being aware of scale helps you make choices that feel balanced. If you're petite, try a mix of delicate and medium pieces. If you have a larger build, medium and bold pieces tend to look proportional.
Layering over the wrong fabric. Textured fabrics like chunky knits, tweed, and lace can compete visually with your jewellery. Delicate chains against a heavily textured sweater simply disappear. If you're wearing a busy fabric, go bolder with your layers or skip necklace layering and focus on bracelets or rings instead.
Ignoring the back of your neck. This is purely practical. When three or four necklaces all have clasps sitting at the nape of your neck, the clasps can bunch together, catch on hair, and create an uncomfortable cluster. Stagger them slightly. Some people rotate clasps to slightly different positions so they don't all pile up in one spot.
Wearing the same combination every day. The whole point of building a layering collection is variety. If you find yourself wearing the exact same three necklaces in the exact same arrangement day after day, you're missing the creative half of the equation. Mix it up. Try two pieces one day, four the next. Swap the focal piece. Change the order. Your pieces are building blocks, not a uniform.
Skipping the mirror check. Five minutes in front of a mirror before leaving saves you from layering combinations that looked good in theory but don't work with your actual outfit and body that day. Check from the front, check from the side. Move around a bit. What looks balanced when you're standing still might shift when you sit down or lean forward.
Frequently asked questions
How many necklaces can I layer at once? There's no hard maximum, but for everyday wear, two to four tends to look best. Beyond four, you need very deliberate length separation (at least 5-7 cm between each chain) to prevent a tangled mess. Festival and editorial fashion regularly goes to five or more, but that's a specific context. Start with three and add from there once you're comfortable.
Will layering damage my jewellery? Friction between pieces can cause surface scratching over time, particularly on softer metals and plated finishes. To minimise this, avoid layering very delicate pieces directly against heavier ones. When you take your jewellery off at night, separate the pieces. Don't store them tangled together. And give each piece an occasional individual clean to keep it looking its best.
Can men layer jewellery? Absolutely, and more men are doing it every year. Men's layering tends to lean toward fewer, bolder pieces: two chains of different weights, a watch with one or two bracelets, a couple of rings. But there are no gender rules in layering. The principles of varying length, mixing texture, and choosing a focal piece apply to everyone regardless.
What if I only own pieces from different brands or styles? That's actually ideal for layering. Pieces from different sources naturally have different designs, weights, and textures, which creates the contrast that makes layering interesting. A carefully coordinated set from one brand can look like a matching set rather than a curated collection. Mix it up. The best layered looks feel collected over time, not bought as a package.
How do I keep layered necklaces from tangling? Use chains of different weights (heavier chains tangle less with lighter ones). Make sure there's at least 5 cm difference in length between each chain. Use a layering clasp or necklace separator. Keep the heaviest pendant on the longest chain. And put all your necklaces on before doing your hair, because catching chains in hair movement is the number one tangle cause.
Is it okay to mix expensive and inexpensive pieces? Yes. In fact, this is one of the smartest approaches to layering. A meaningful pendant on a quality chain, supported by simpler, more affordable pieces, creates a look that appears high-end without requiring every single piece to be an investment. Fashion stylists do this all the time. They'll pair designer pieces with high-street finds. What matters is how the pieces look together, not what each one cost individually.
Should I match my jewellery layers to my outfit colour? Not necessarily. Metal tones (gold, silver, rose gold) are neutral by nature. They work with virtually any colour. If your pendant has coloured stones or enamel, you can choose to echo those colours in your clothing or deliberately contrast them. Both approaches work. The outfit-matching instinct can lead to over-coordination, which is the enemy of interesting layering.
How do I start layering if I only have a few pieces? Start with what you have. Even two pieces layered with intention look different from each wearing alone. Buy one new piece specifically chosen to complement something you already own: different chain length, different texture, compatible style. Build your layering collection gradually. Each new piece multiplies the combinations available with everything else you own, so your options grow exponentially.
Can I layer jewellery with a scarf or turtleneck? Yes, but the approach changes. With turtlenecks, shorter chains get hidden, so go for longer pieces (55 cm and up) that sit on top of the fabric. With scarves, jewellery can get tangled or hidden, so layer your necklaces first, then add the scarf, and adjust so the pendants are visible. Some people skip necklace layering with scarves entirely and focus on bracelet stacks and rings instead.
What's the best metal tone for layering? There isn't one. Gold-toned pieces layer beautifully, silver-toned pieces layer beautifully, and mixed metals layer beautifully. If you're just starting out and want to keep things simple, pick whichever metal tone you already have more of and build from there. You can always introduce the second metal later.
How do I store layered necklaces so they don't tangle? Never store multiple chains loose in a drawer or pouch together. They will tangle overnight. Hang each necklace individually on a hook, jewellery tree, or peg board. If you travel, lay each chain in a separate small zip-lock bag or use a travel jewellery roll with individual compartments. The five seconds of separation when you take them off saves five minutes of detangling in the morning.
Does layering work with statement earrings? It can, but be mindful of the overall visual weight. If you're wearing bold, attention-grabbing earrings, you might want to dial back the necklace layers. The face is a natural focal point, and heavy earrings already draw the eye upward. Adding a busy necklace arrangement on top of that can feel like two focal points competing. When in doubt: bold earrings plus one or two simple chains, or bold necklace layering plus small studs.
Silver and gold jewellery, wedding bands, symbolic pendants, paired sets.
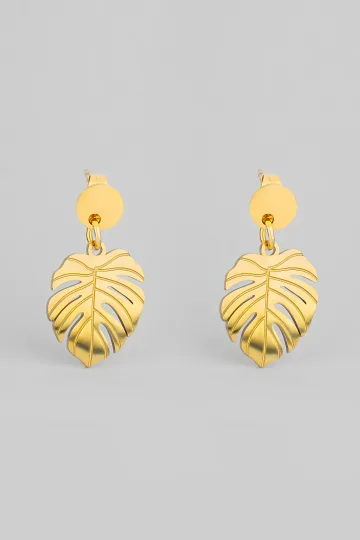
Wear the symbol, don't just read about it. These are in stock:


Conclusion
Layering is one of those rare fashion techniques that's genuinely democratic. It doesn't require a big budget, a perfect body type, or any particular style expertise. It requires curiosity and willingness to experiment.
The rules in this guide are starting points, not boundaries. Odd numbers, varied lengths, mixed textures, one focal piece: these principles work consistently and will save you from the most common mistakes. But the best layered looks you'll ever create are the ones where you break a rule because something about the combination just feels right.
Your jewellery box is a palette. Each piece is a colour. Layering is how you paint with them. Some days you'll want a minimalist sketch: two chains, one bracelet, done. Other days you'll want a full composition: necklaces cascading, bracelets stacked, rings glinting from multiple fingers. Both are valid. Both are you.
The only actual rule is this: if you look in the mirror and it makes you feel something good, you did it right.